Install-Module -Name PnP.PowerShell -Scope CurrentUser
Connect-PnPOnline -Url "https://quantr.sharepoint.com/gitlab" -Interactive
Remove-PnPList -Identity "Commit" -Recycle -Force -LargeList
Get-PnPLargeListOperationStatus -Identity "60f2e783-aba5-46e8-9621-070ede81482b" -OperationId "2a93bded-42f7-4879-977a-20d631216bc4"

!!! This is not the perfect guide, during the compilation it got errors, ask gemini. https://share.gemini.google/bFyDzMtkYZVk
Step 1: Install Tools
Step 1: Install Vitis (it has Vivado)
Step 2: Install petalinux https://www.amd.com/en/products/software/adaptive-socs-and-fpgas/embedded-software/petalinux-sdk.html
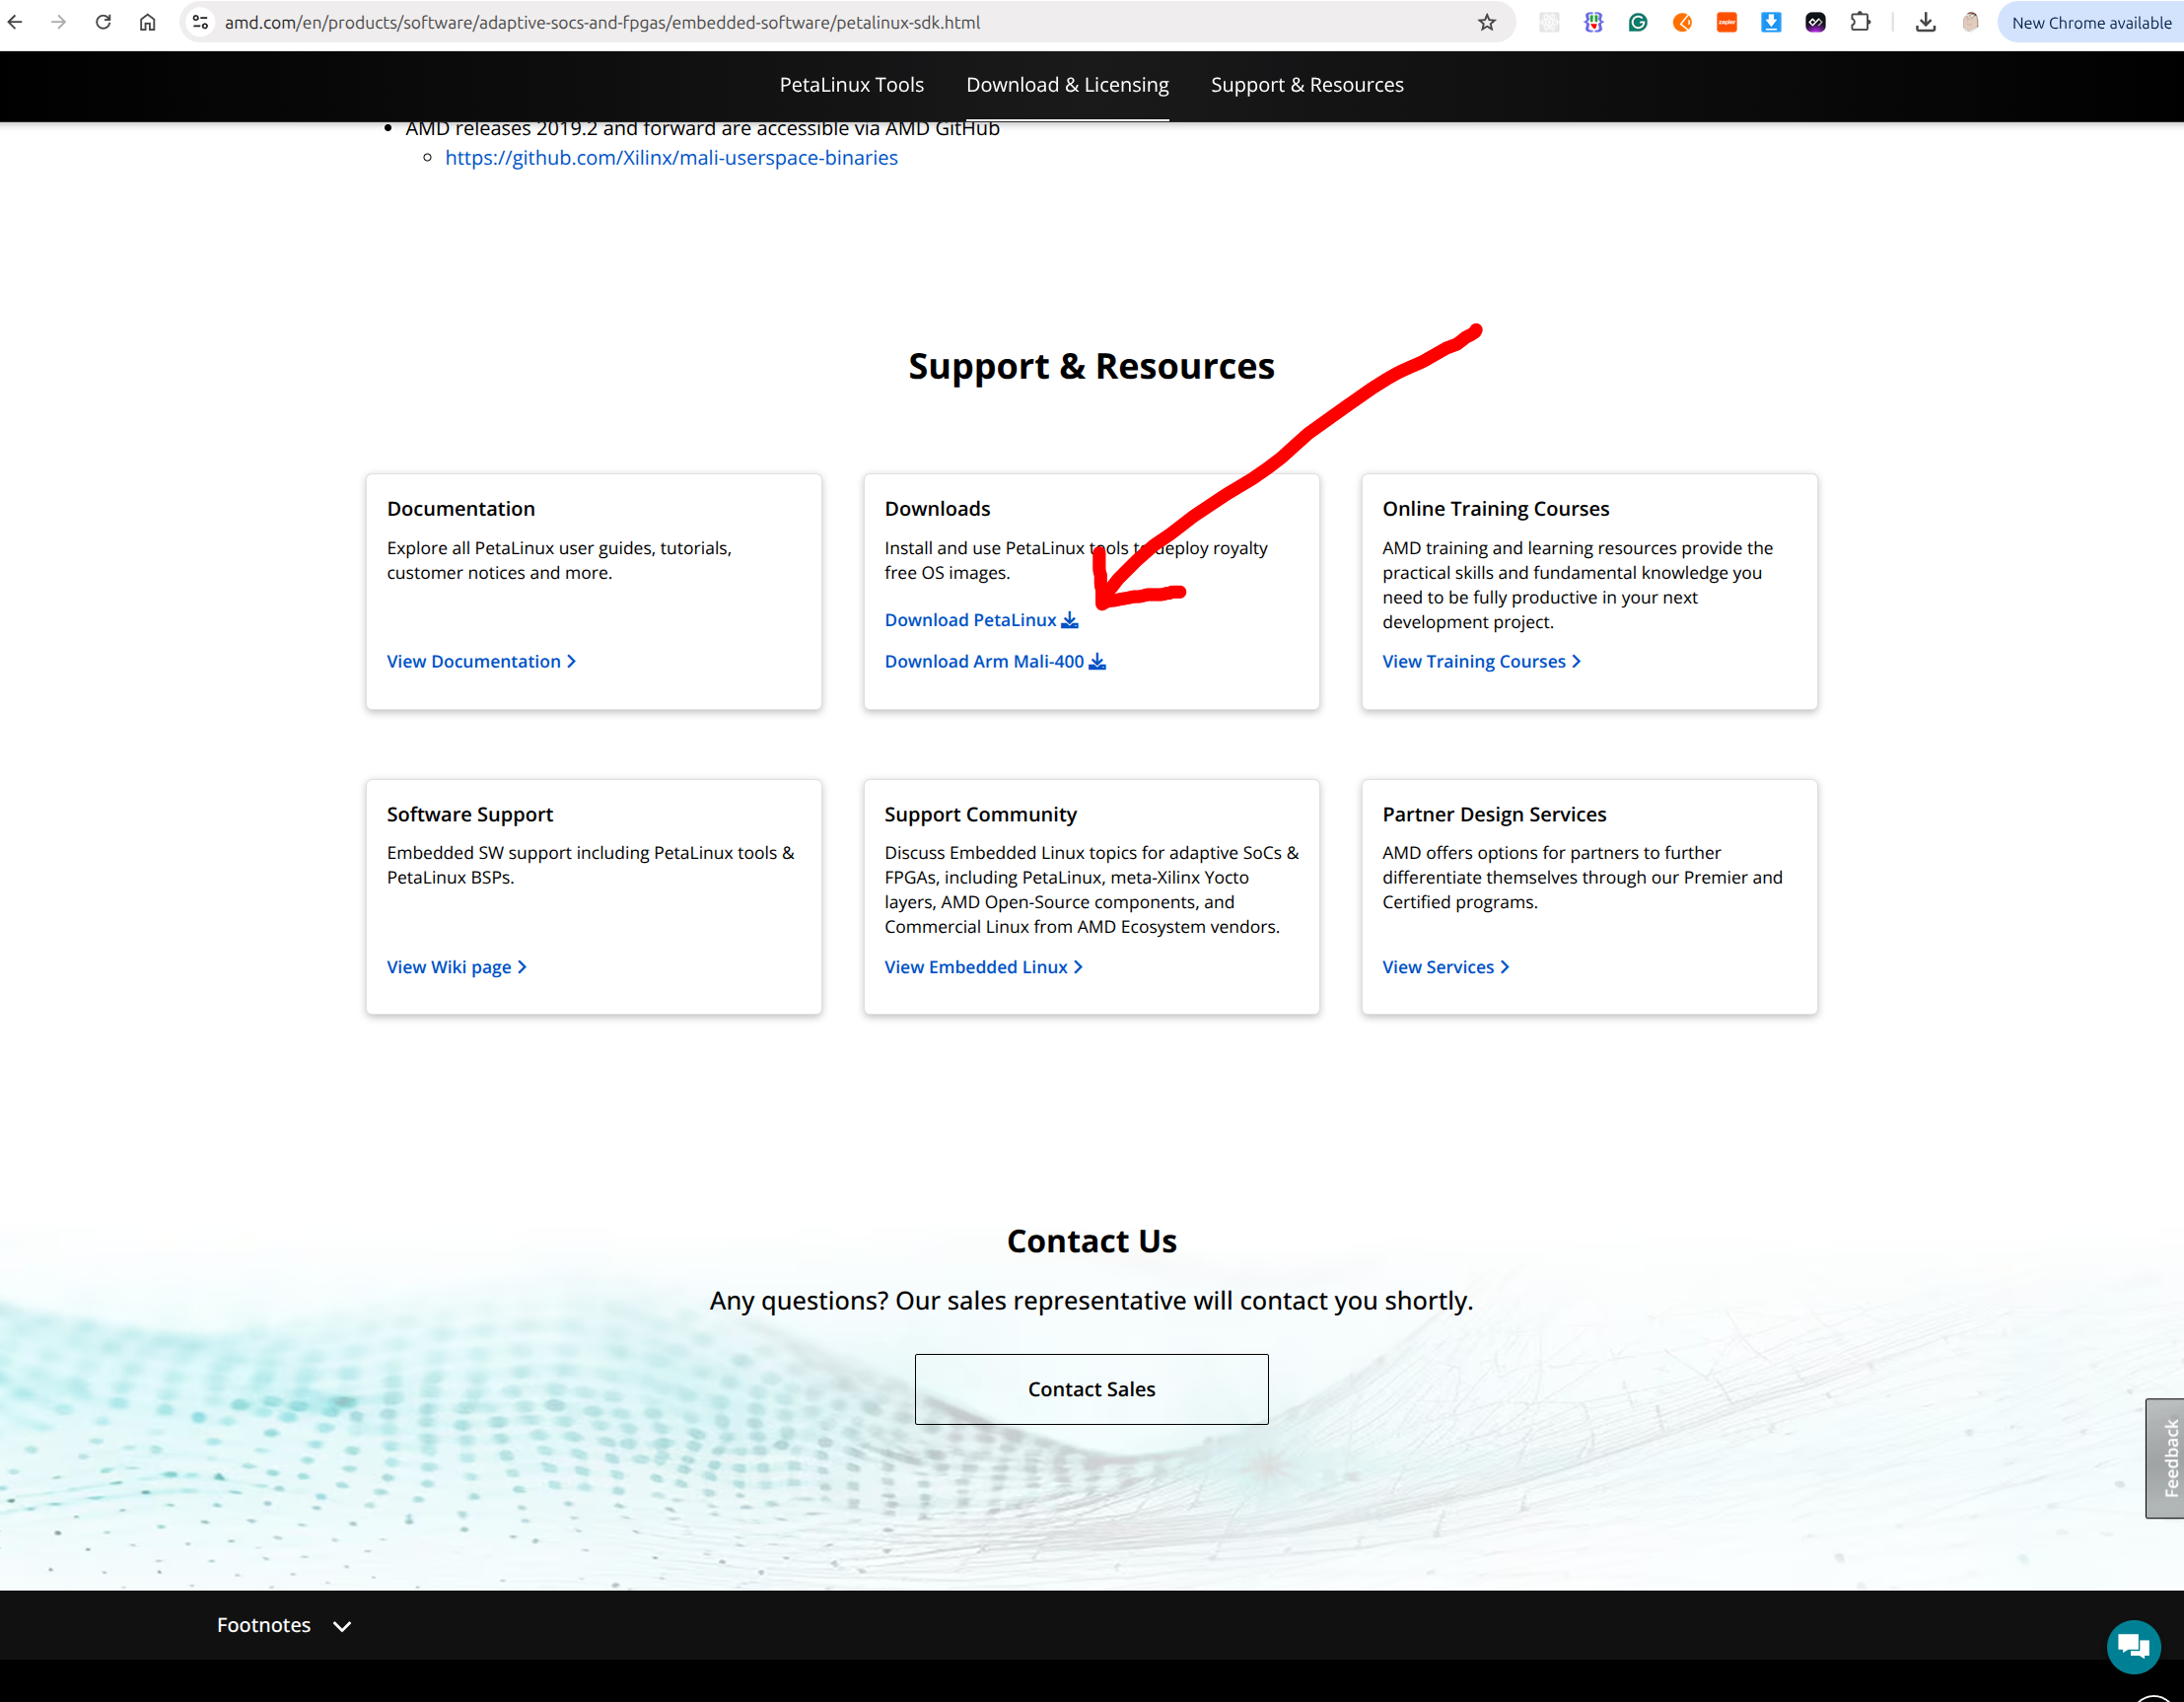
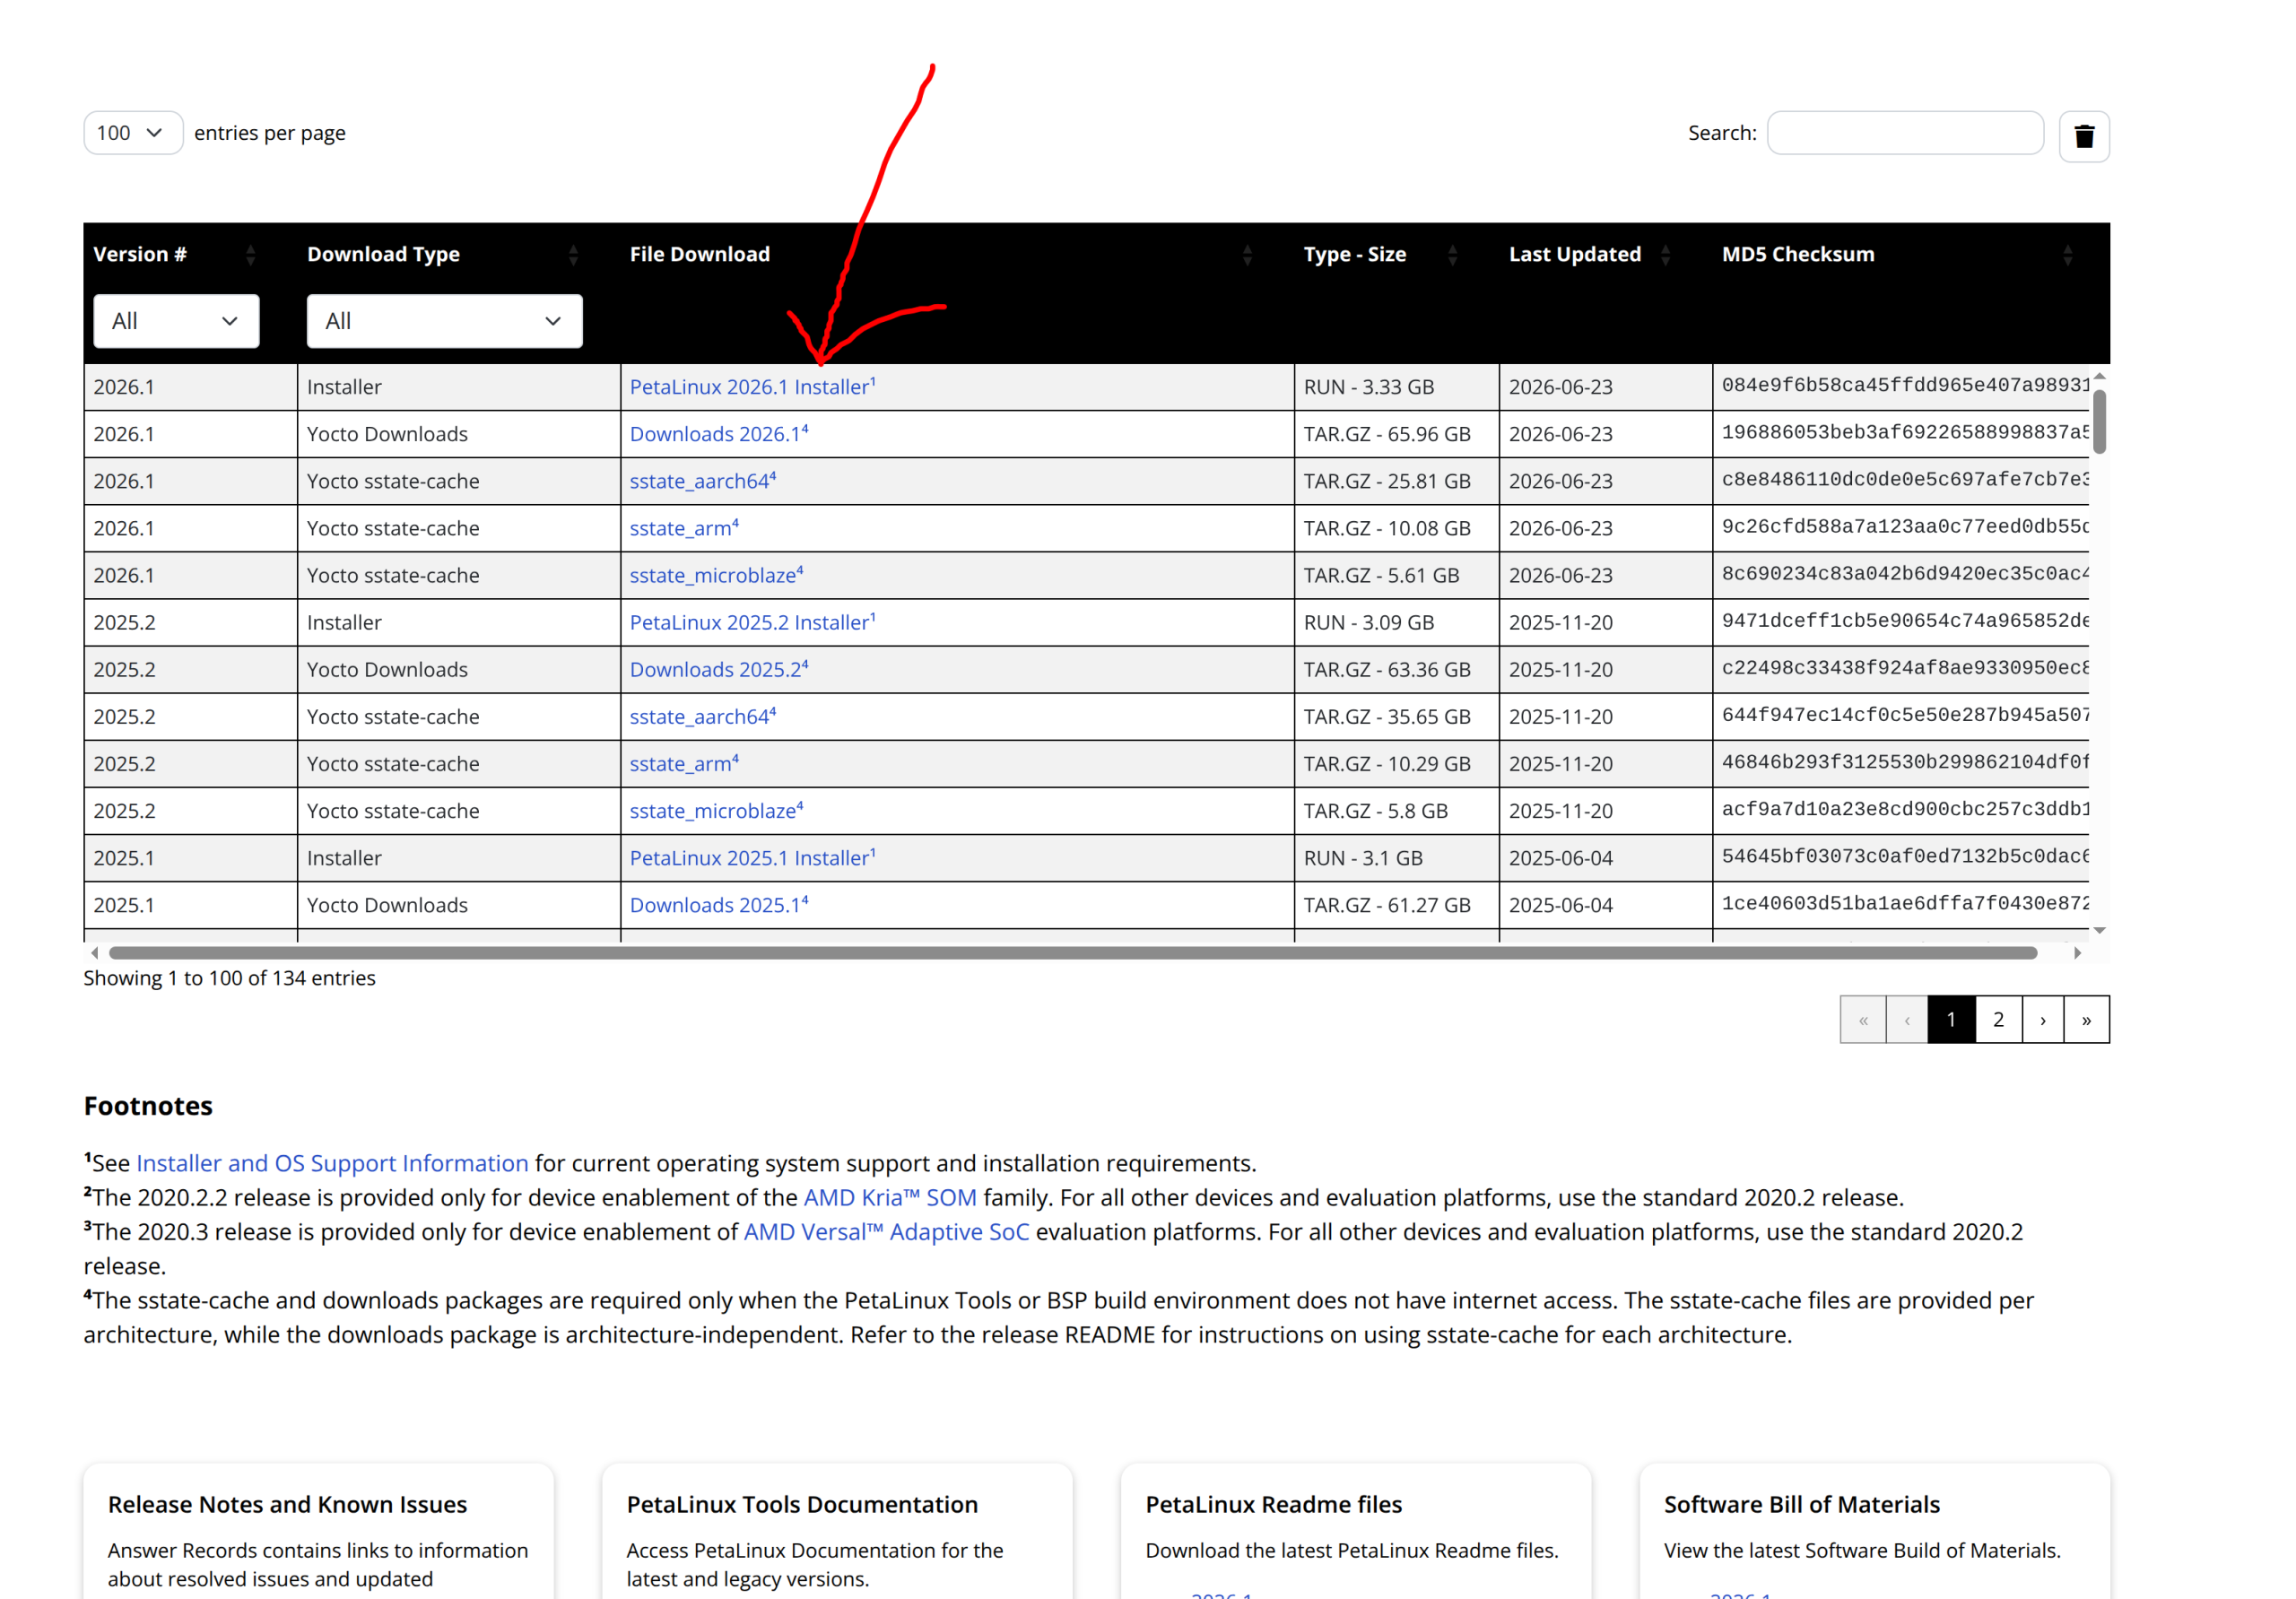
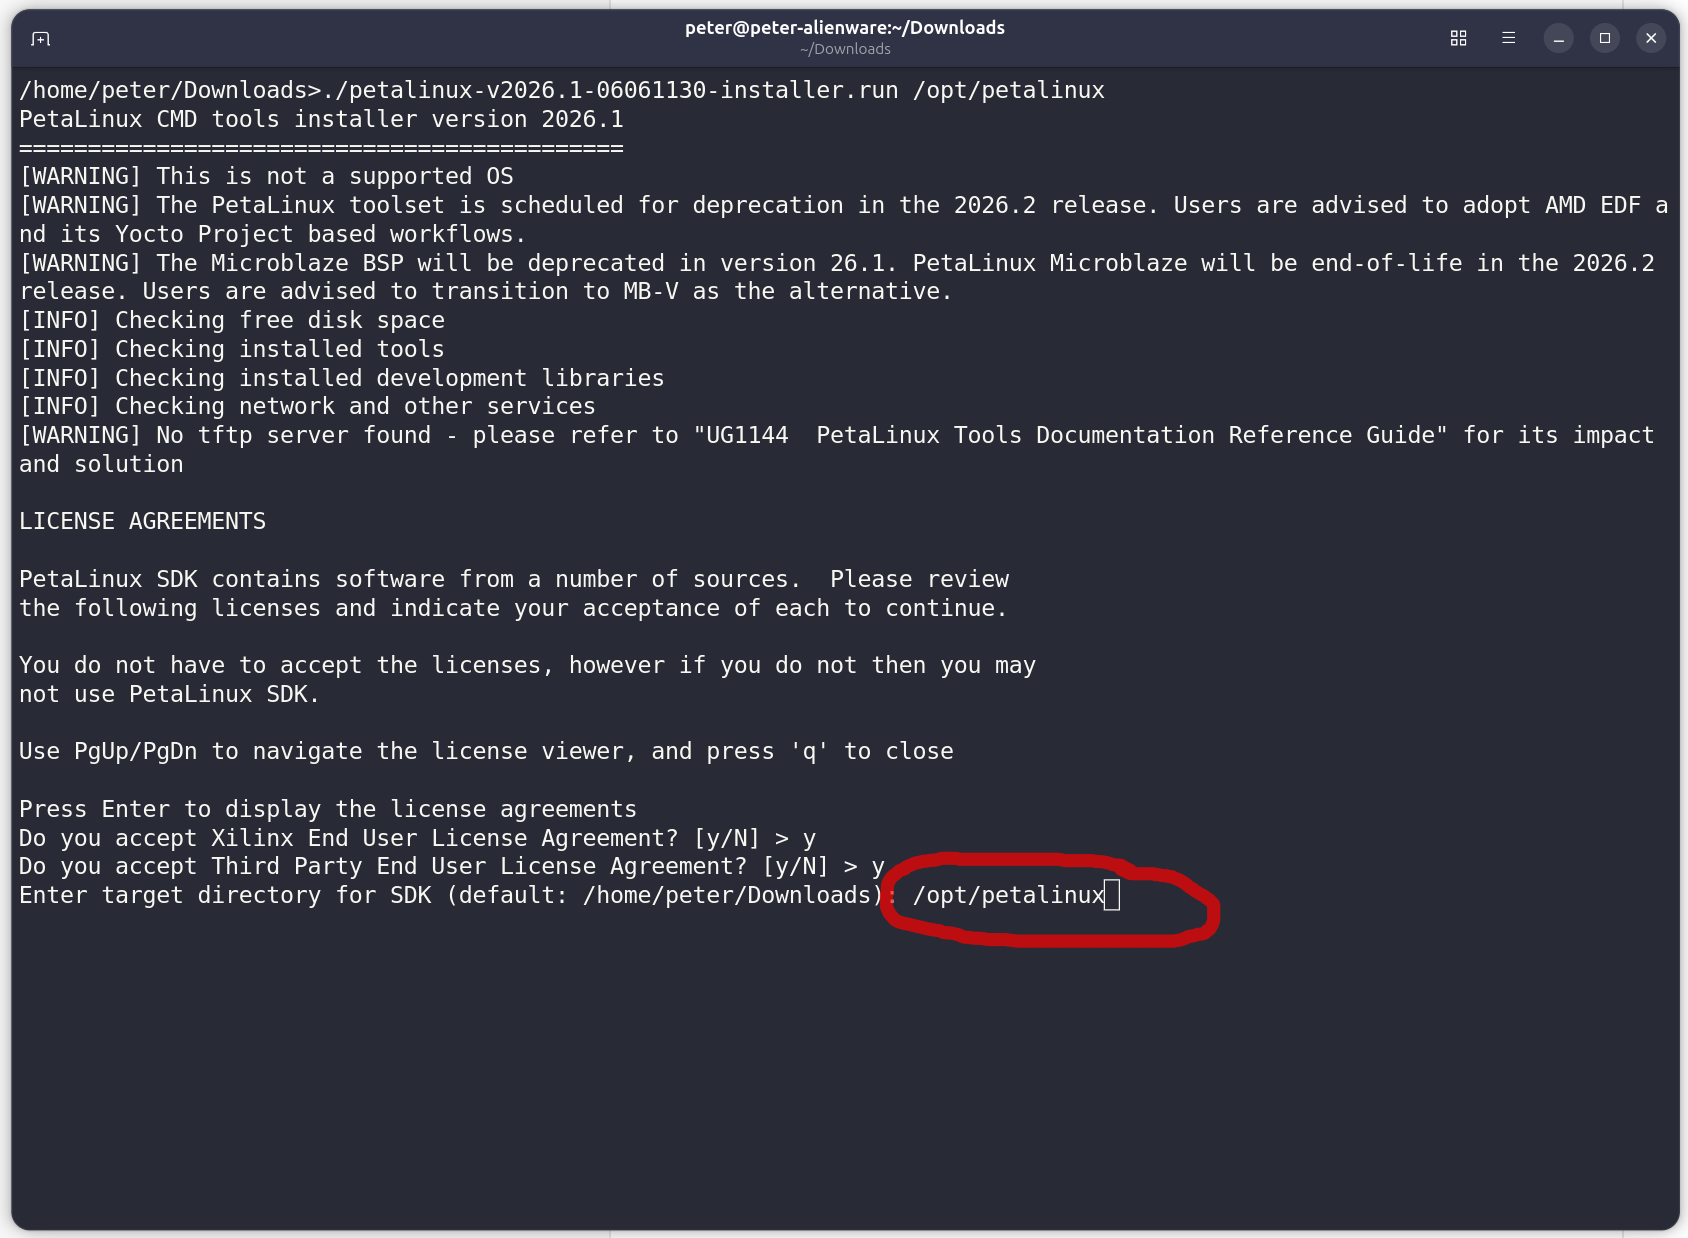
chmod+x petalinux-v20XX.X-final-installer.run
./petalinux-v20XX.X-final-installer.run
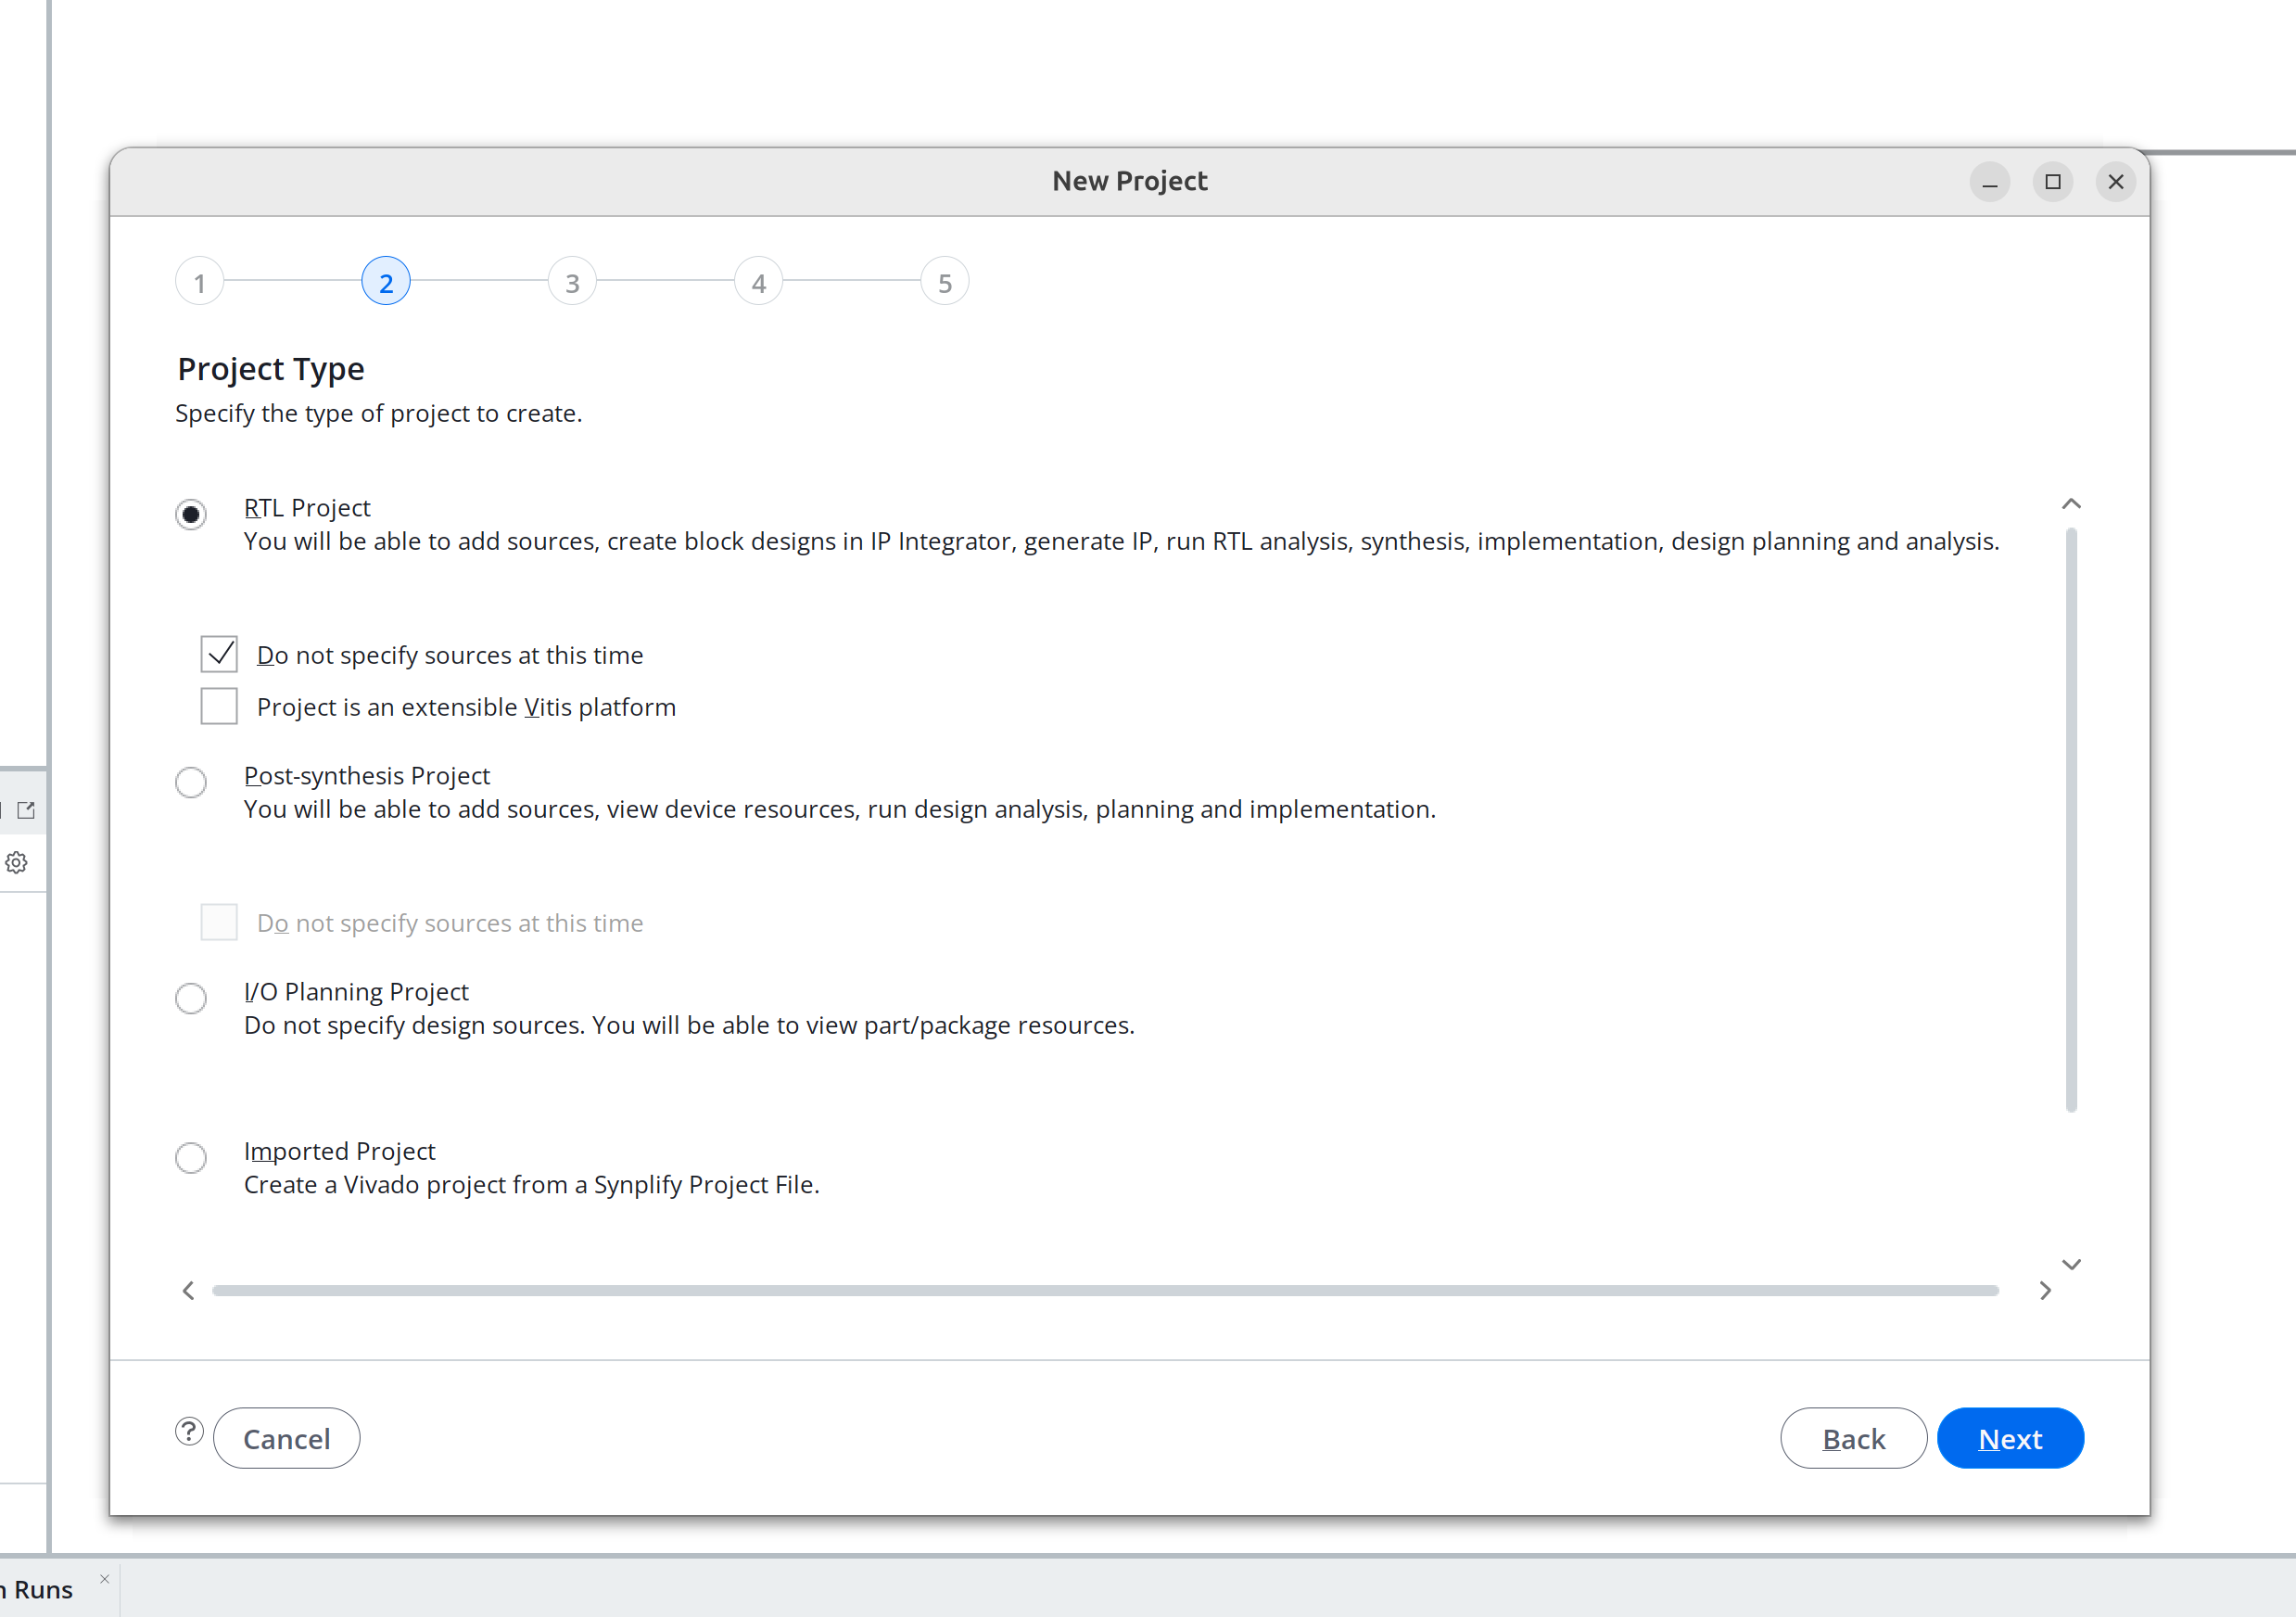
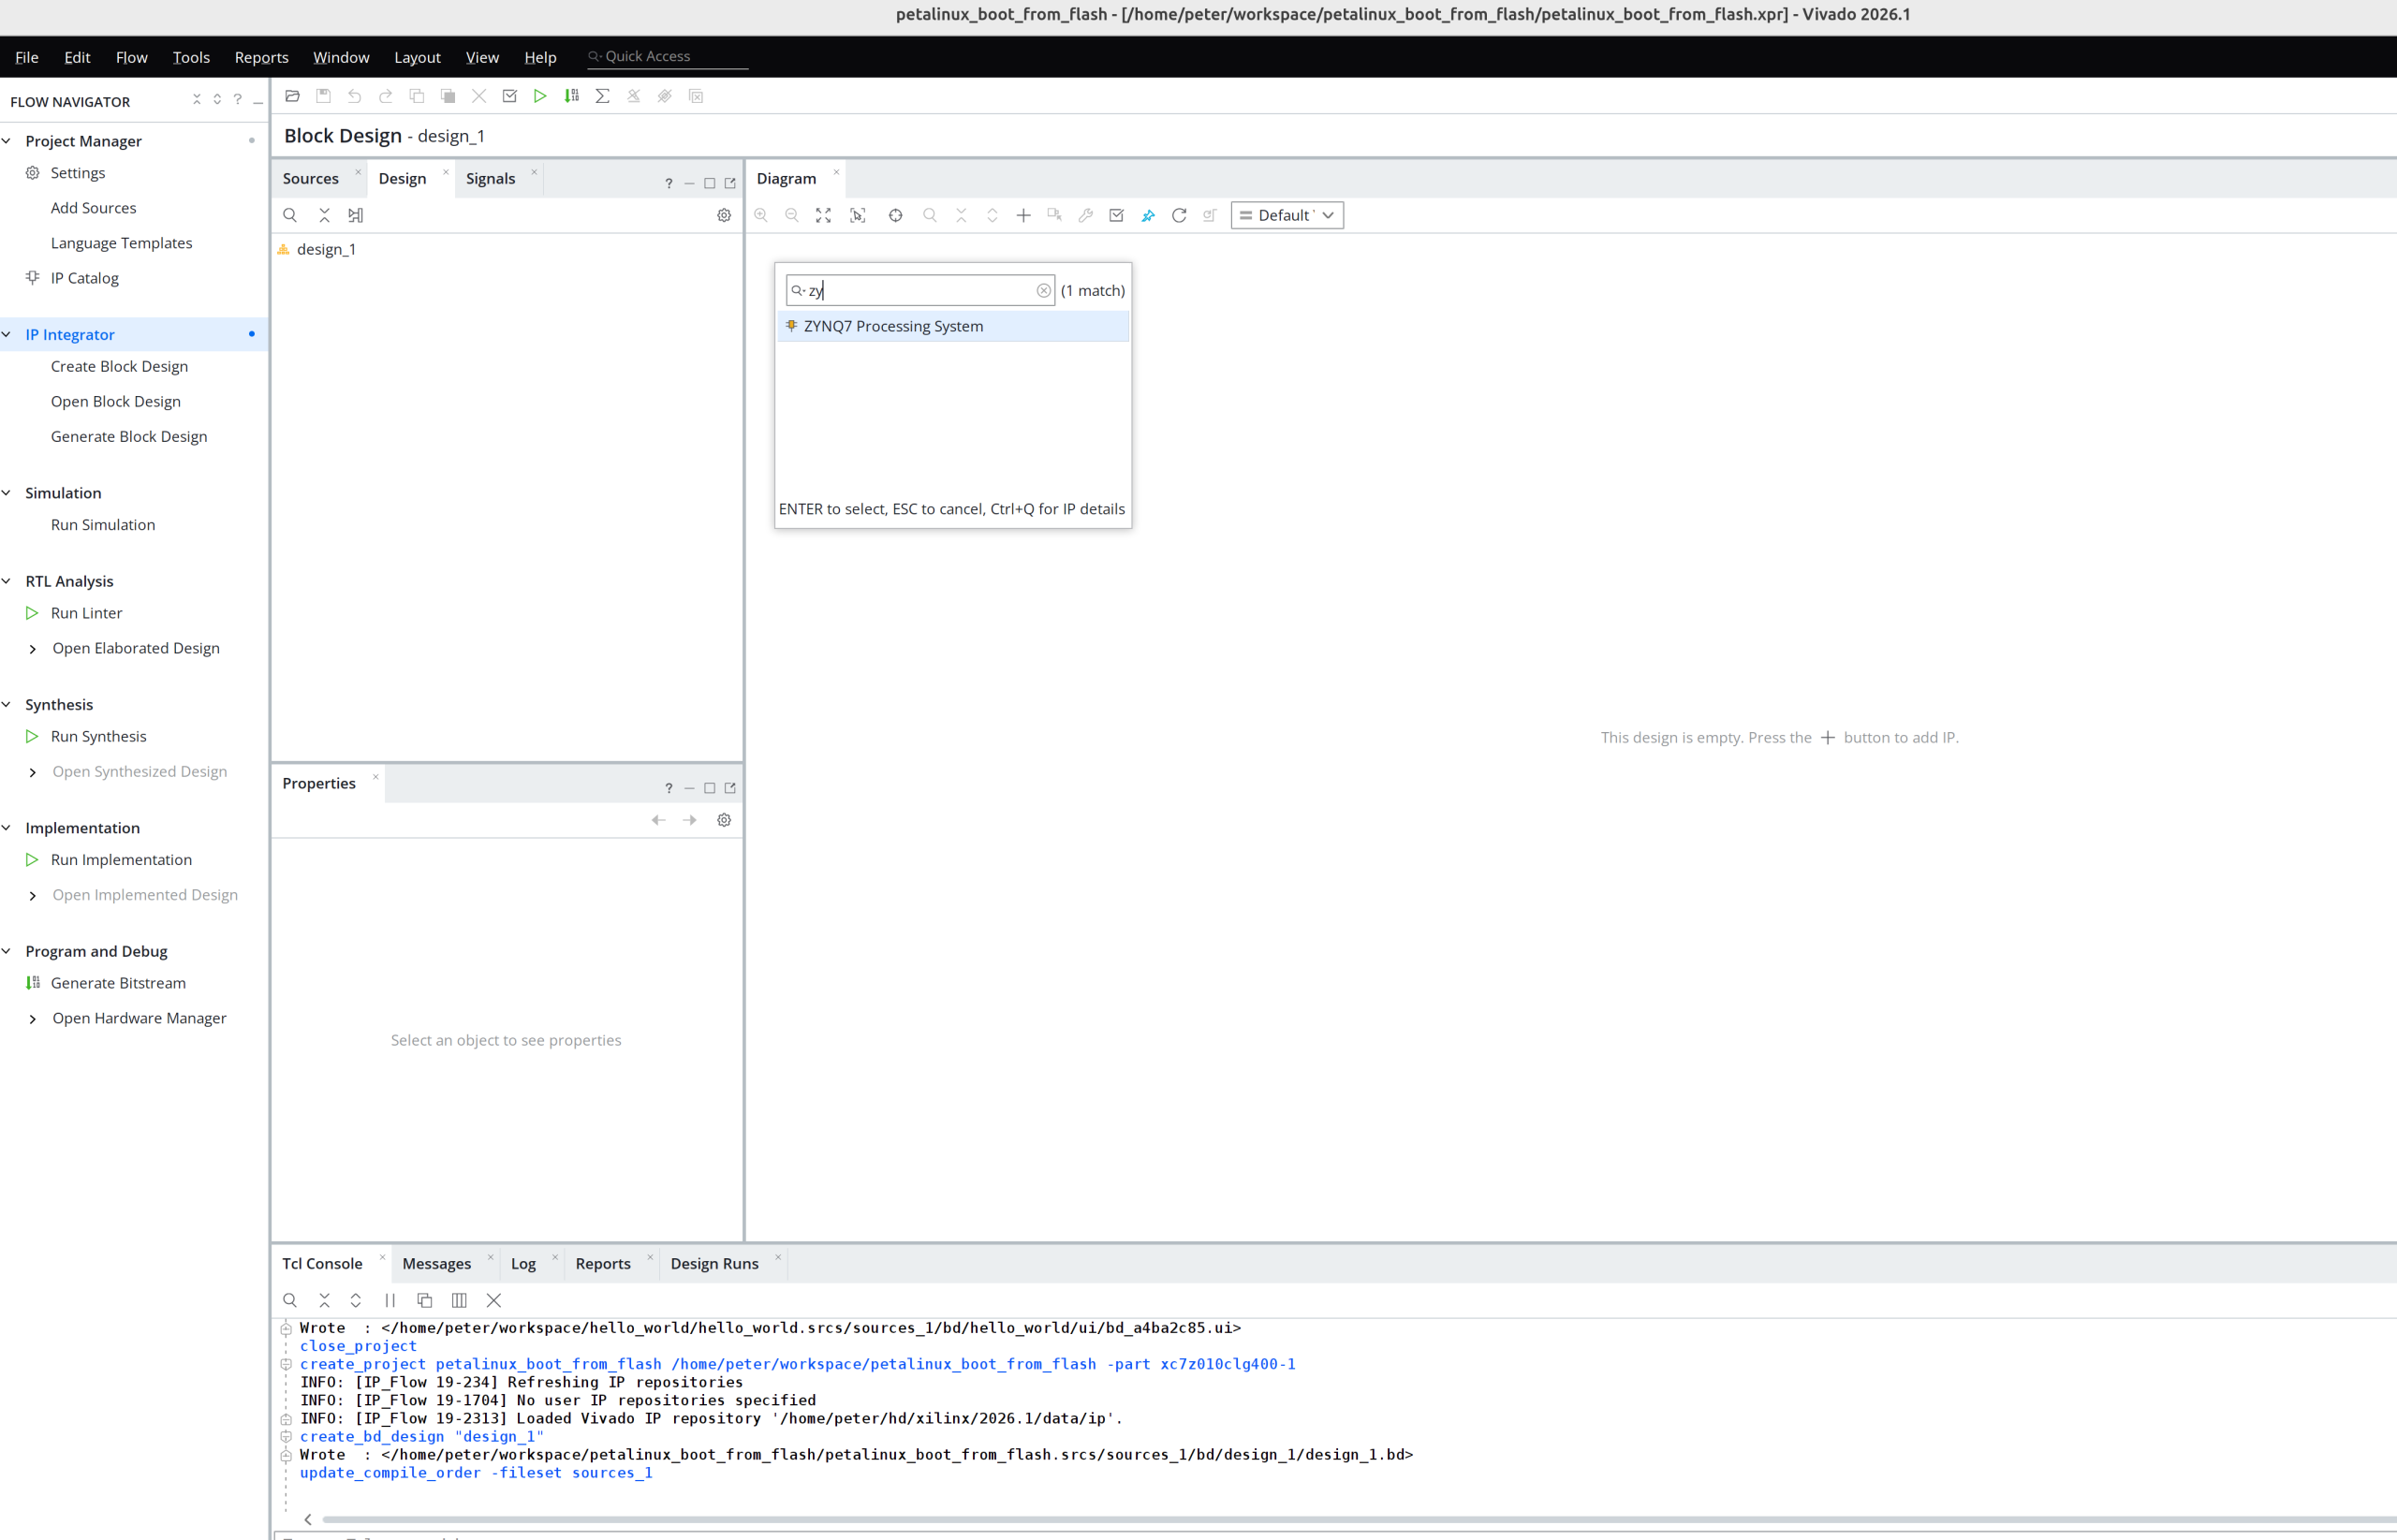
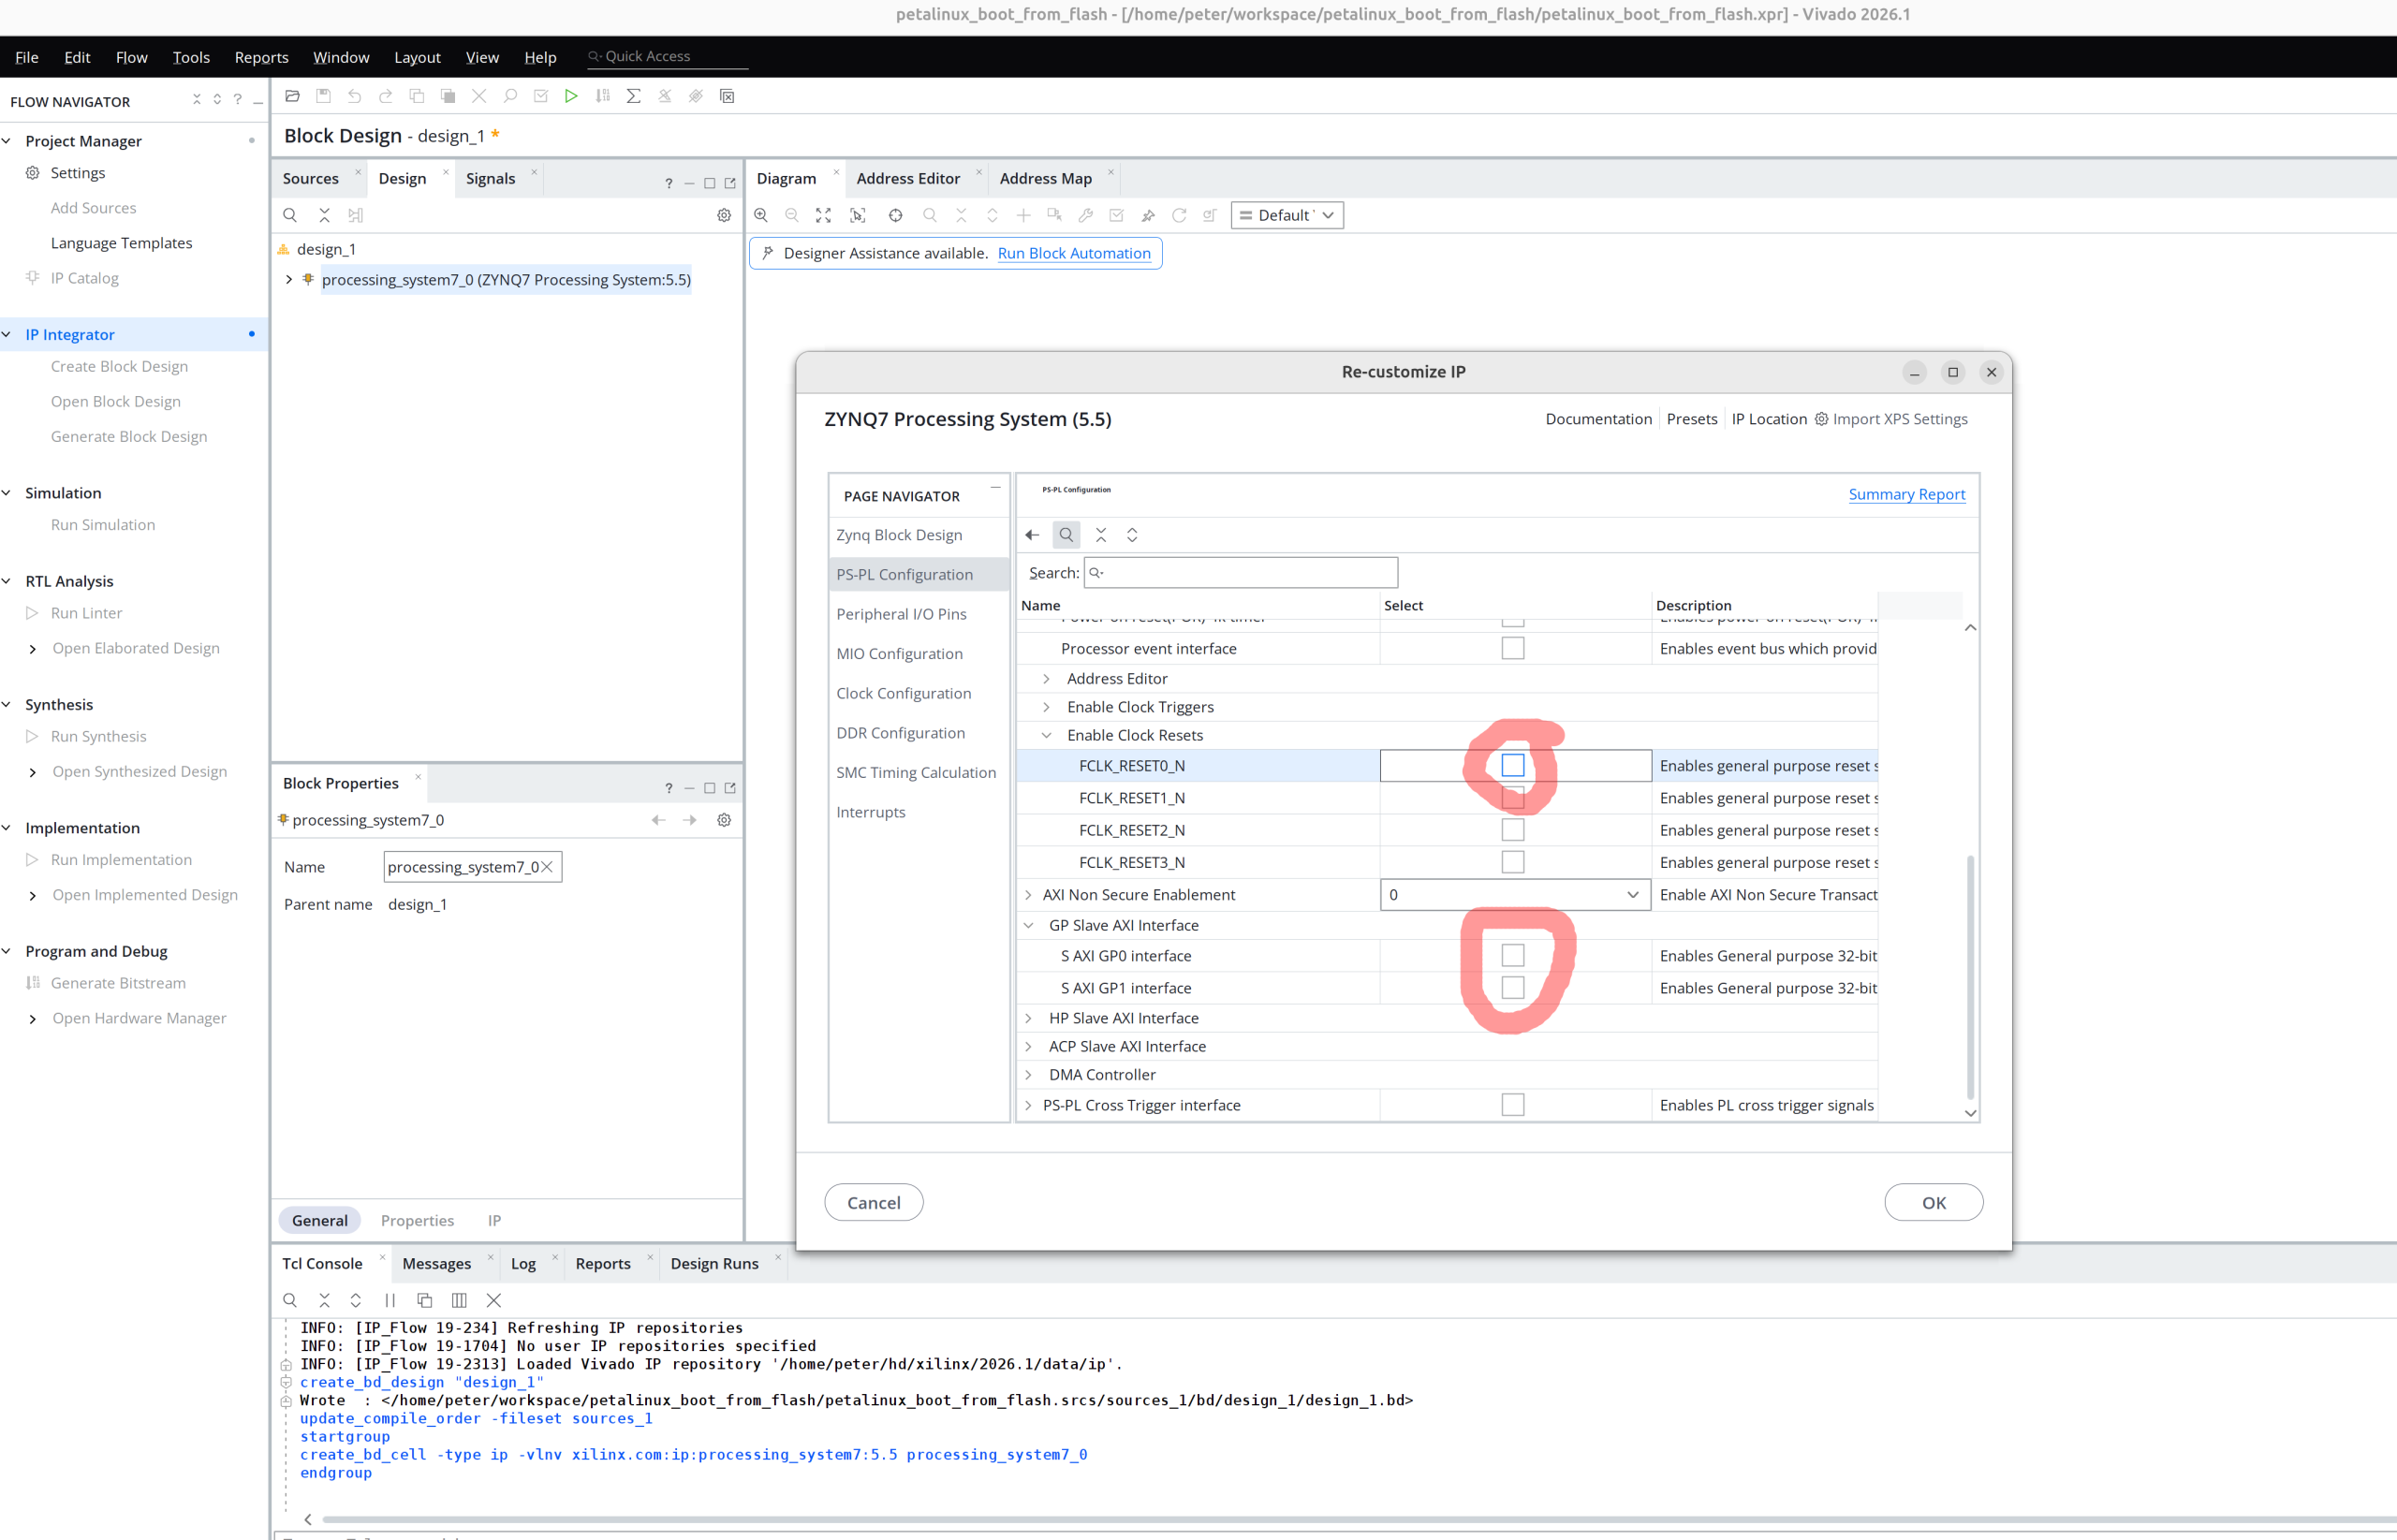
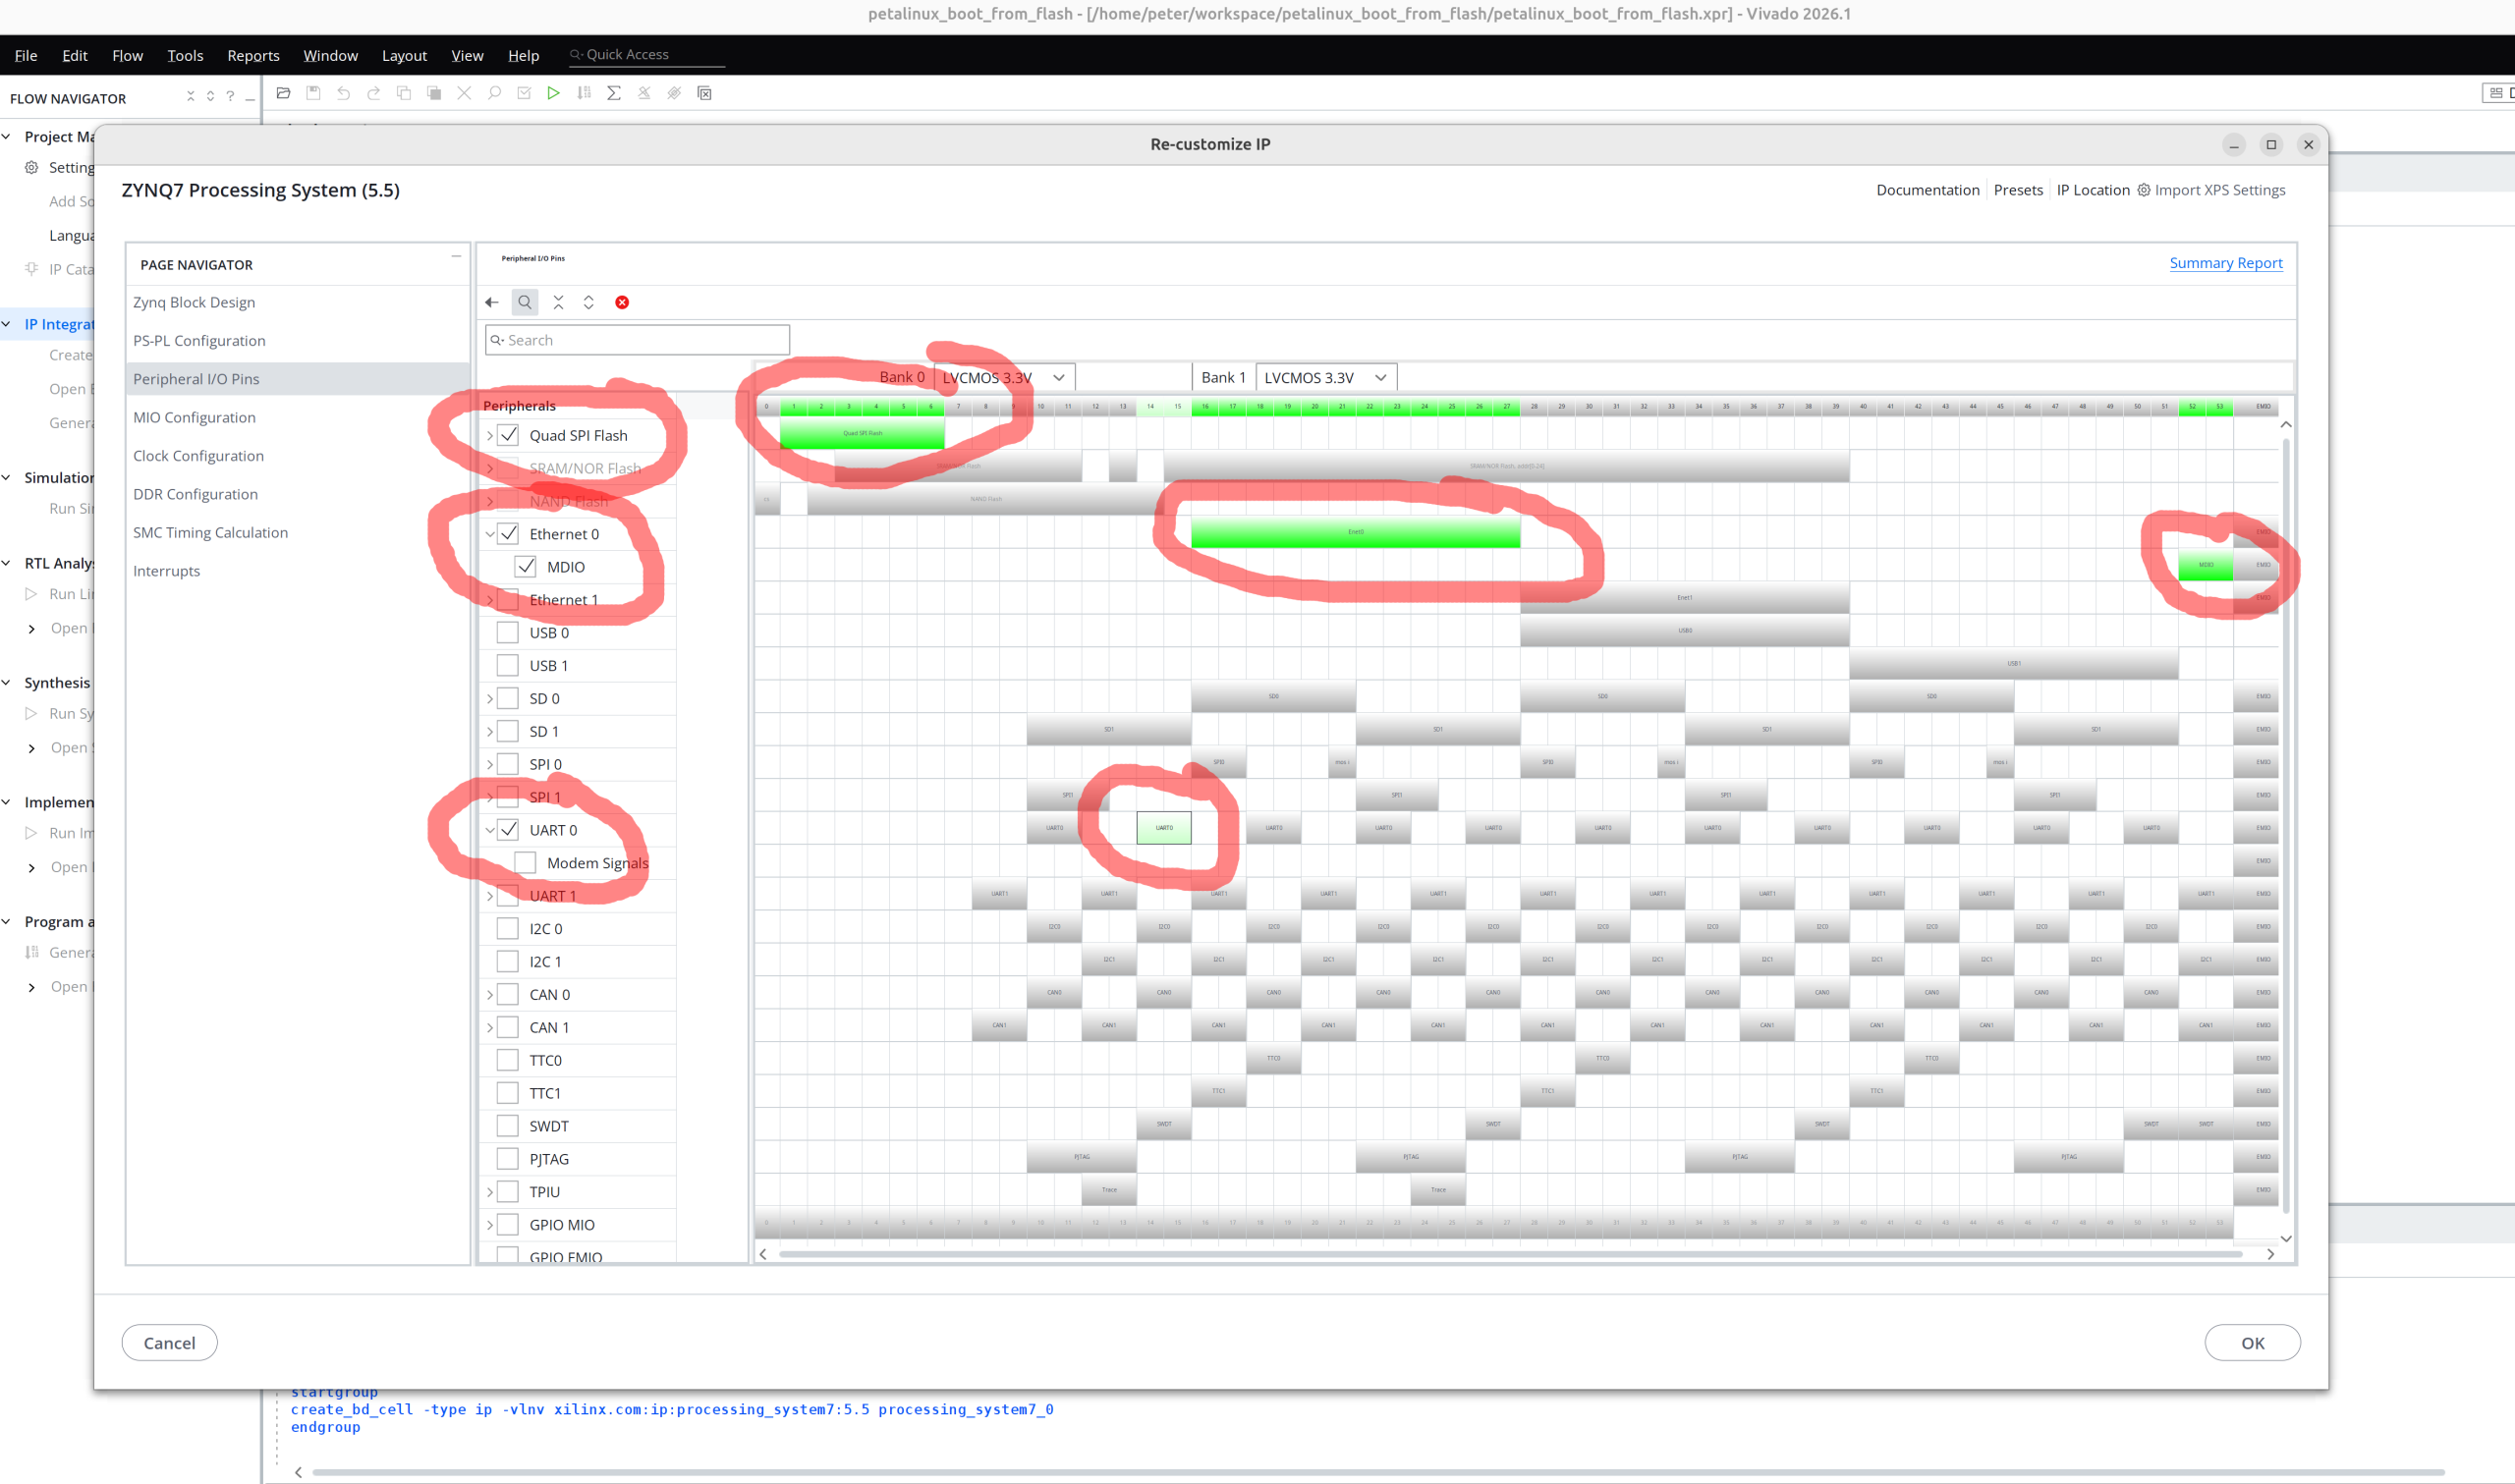
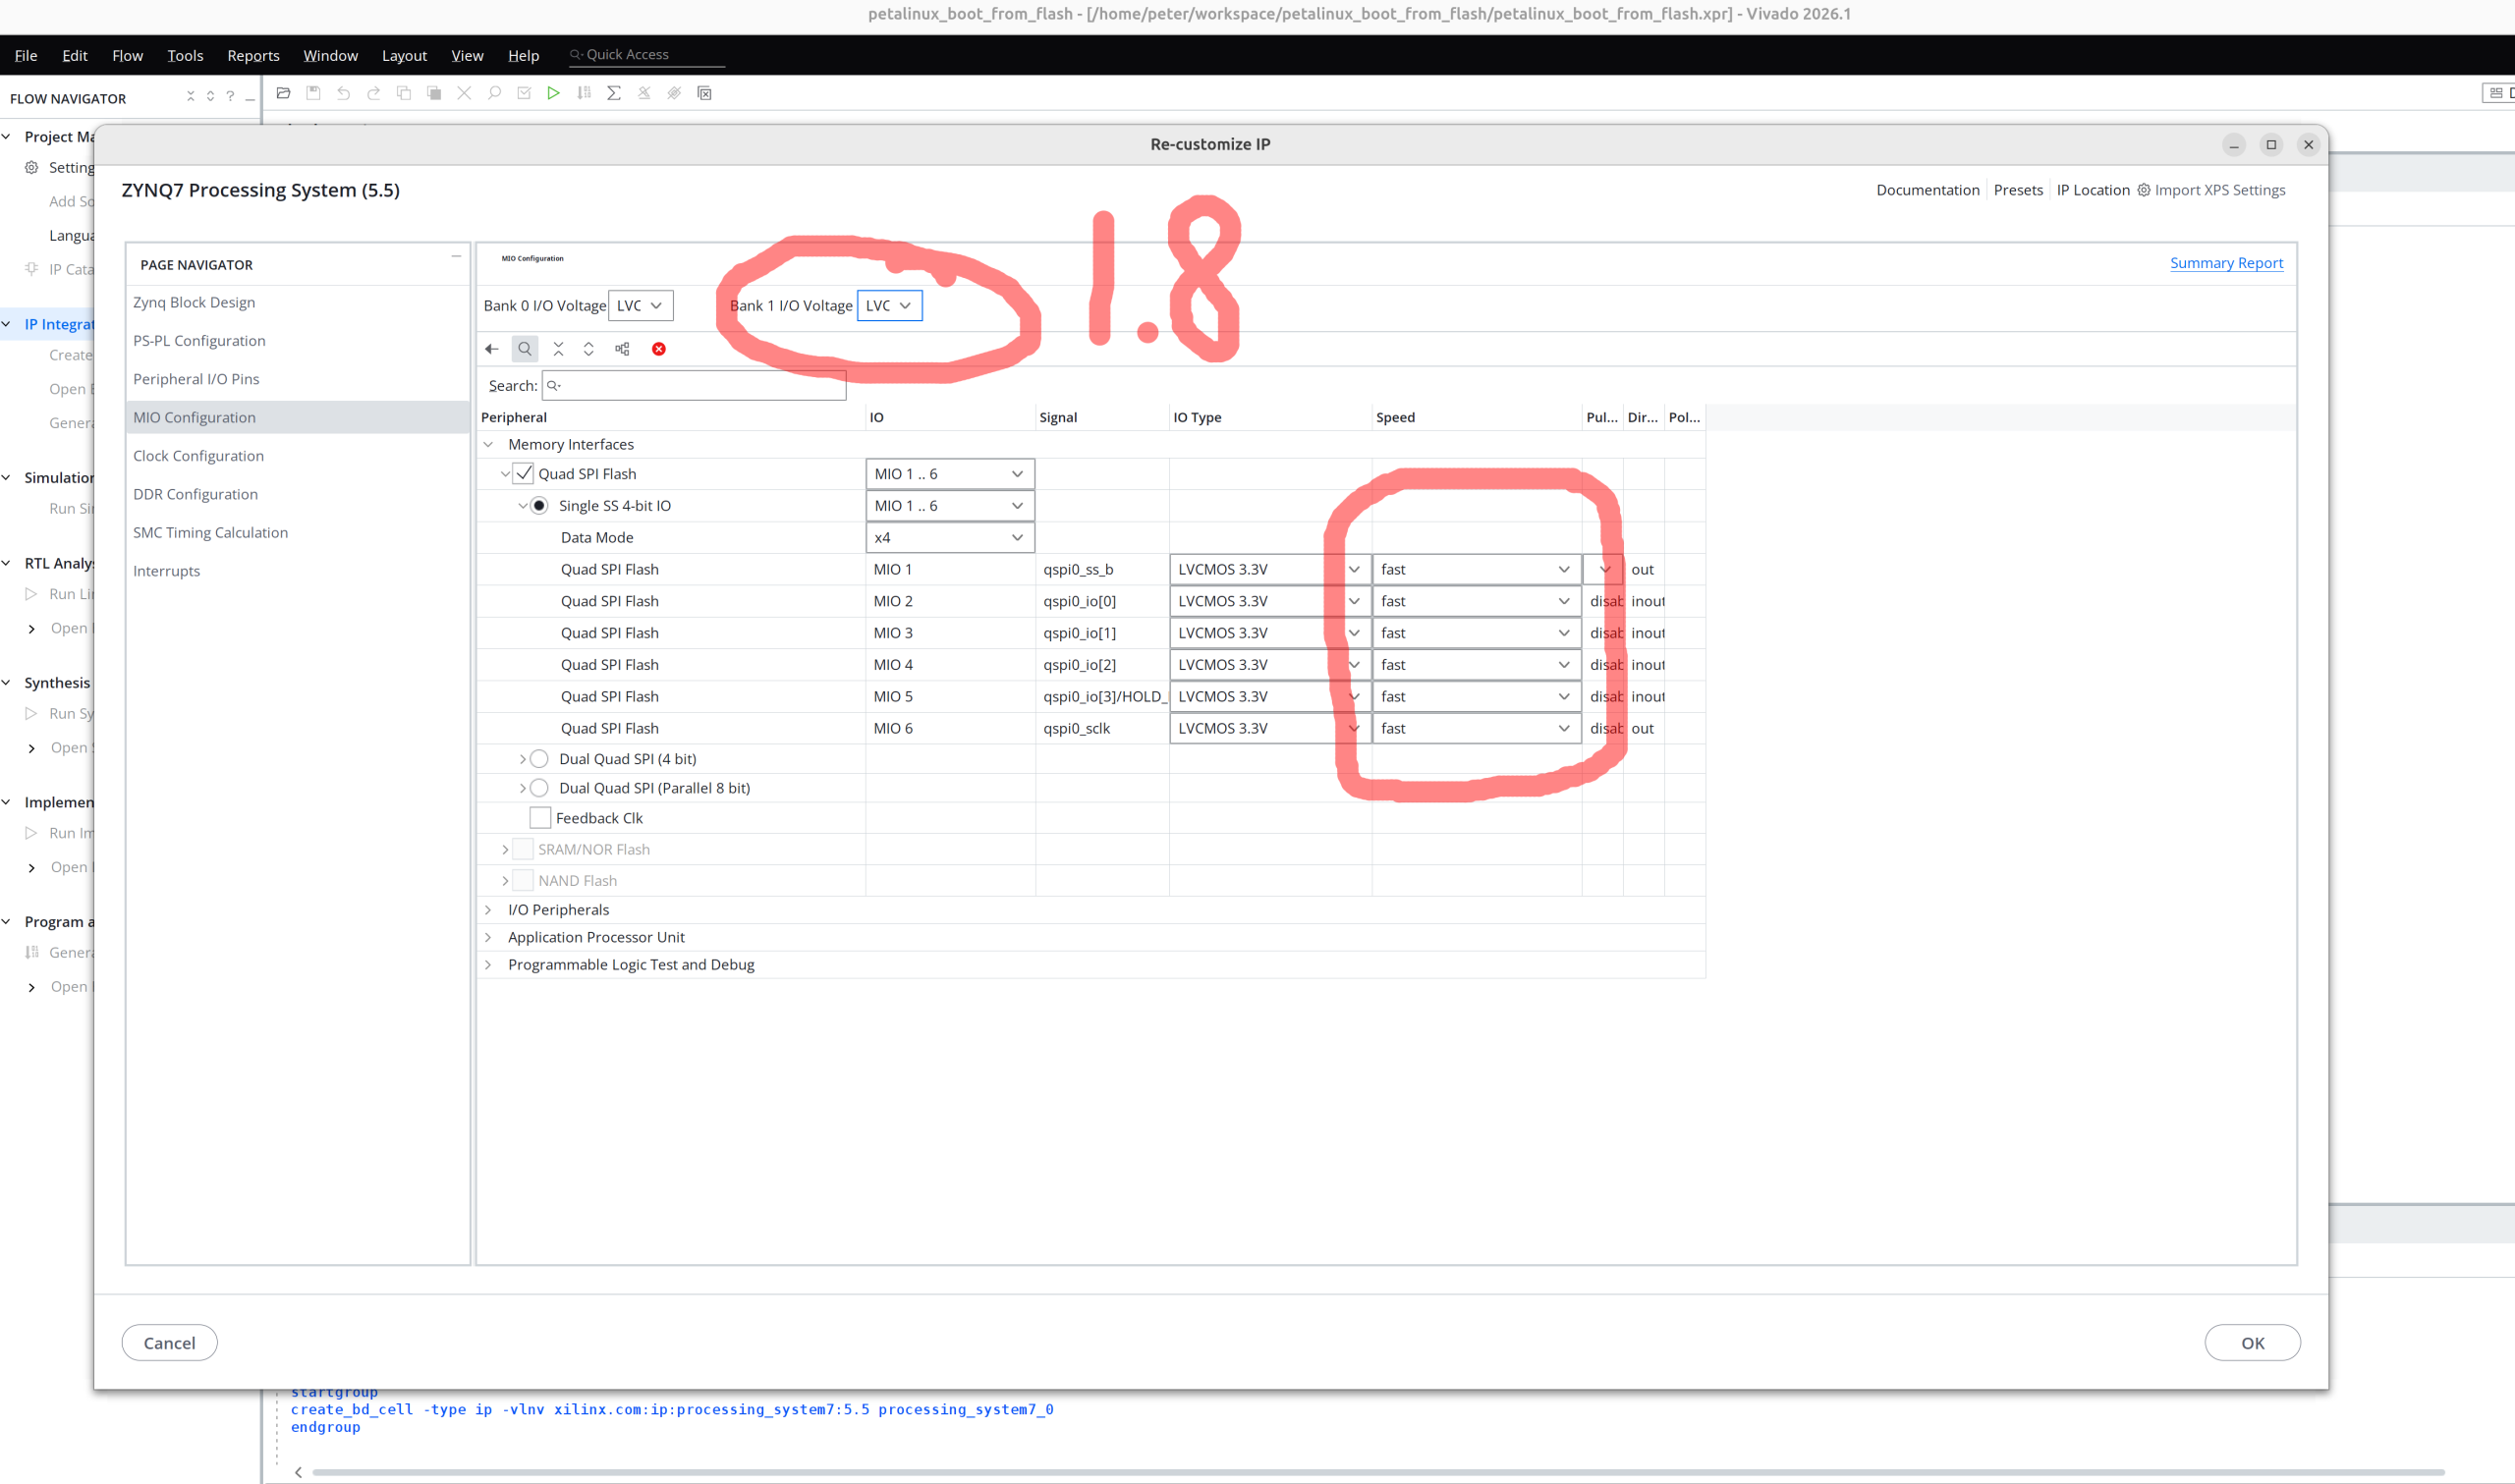
Open Vivado and create project
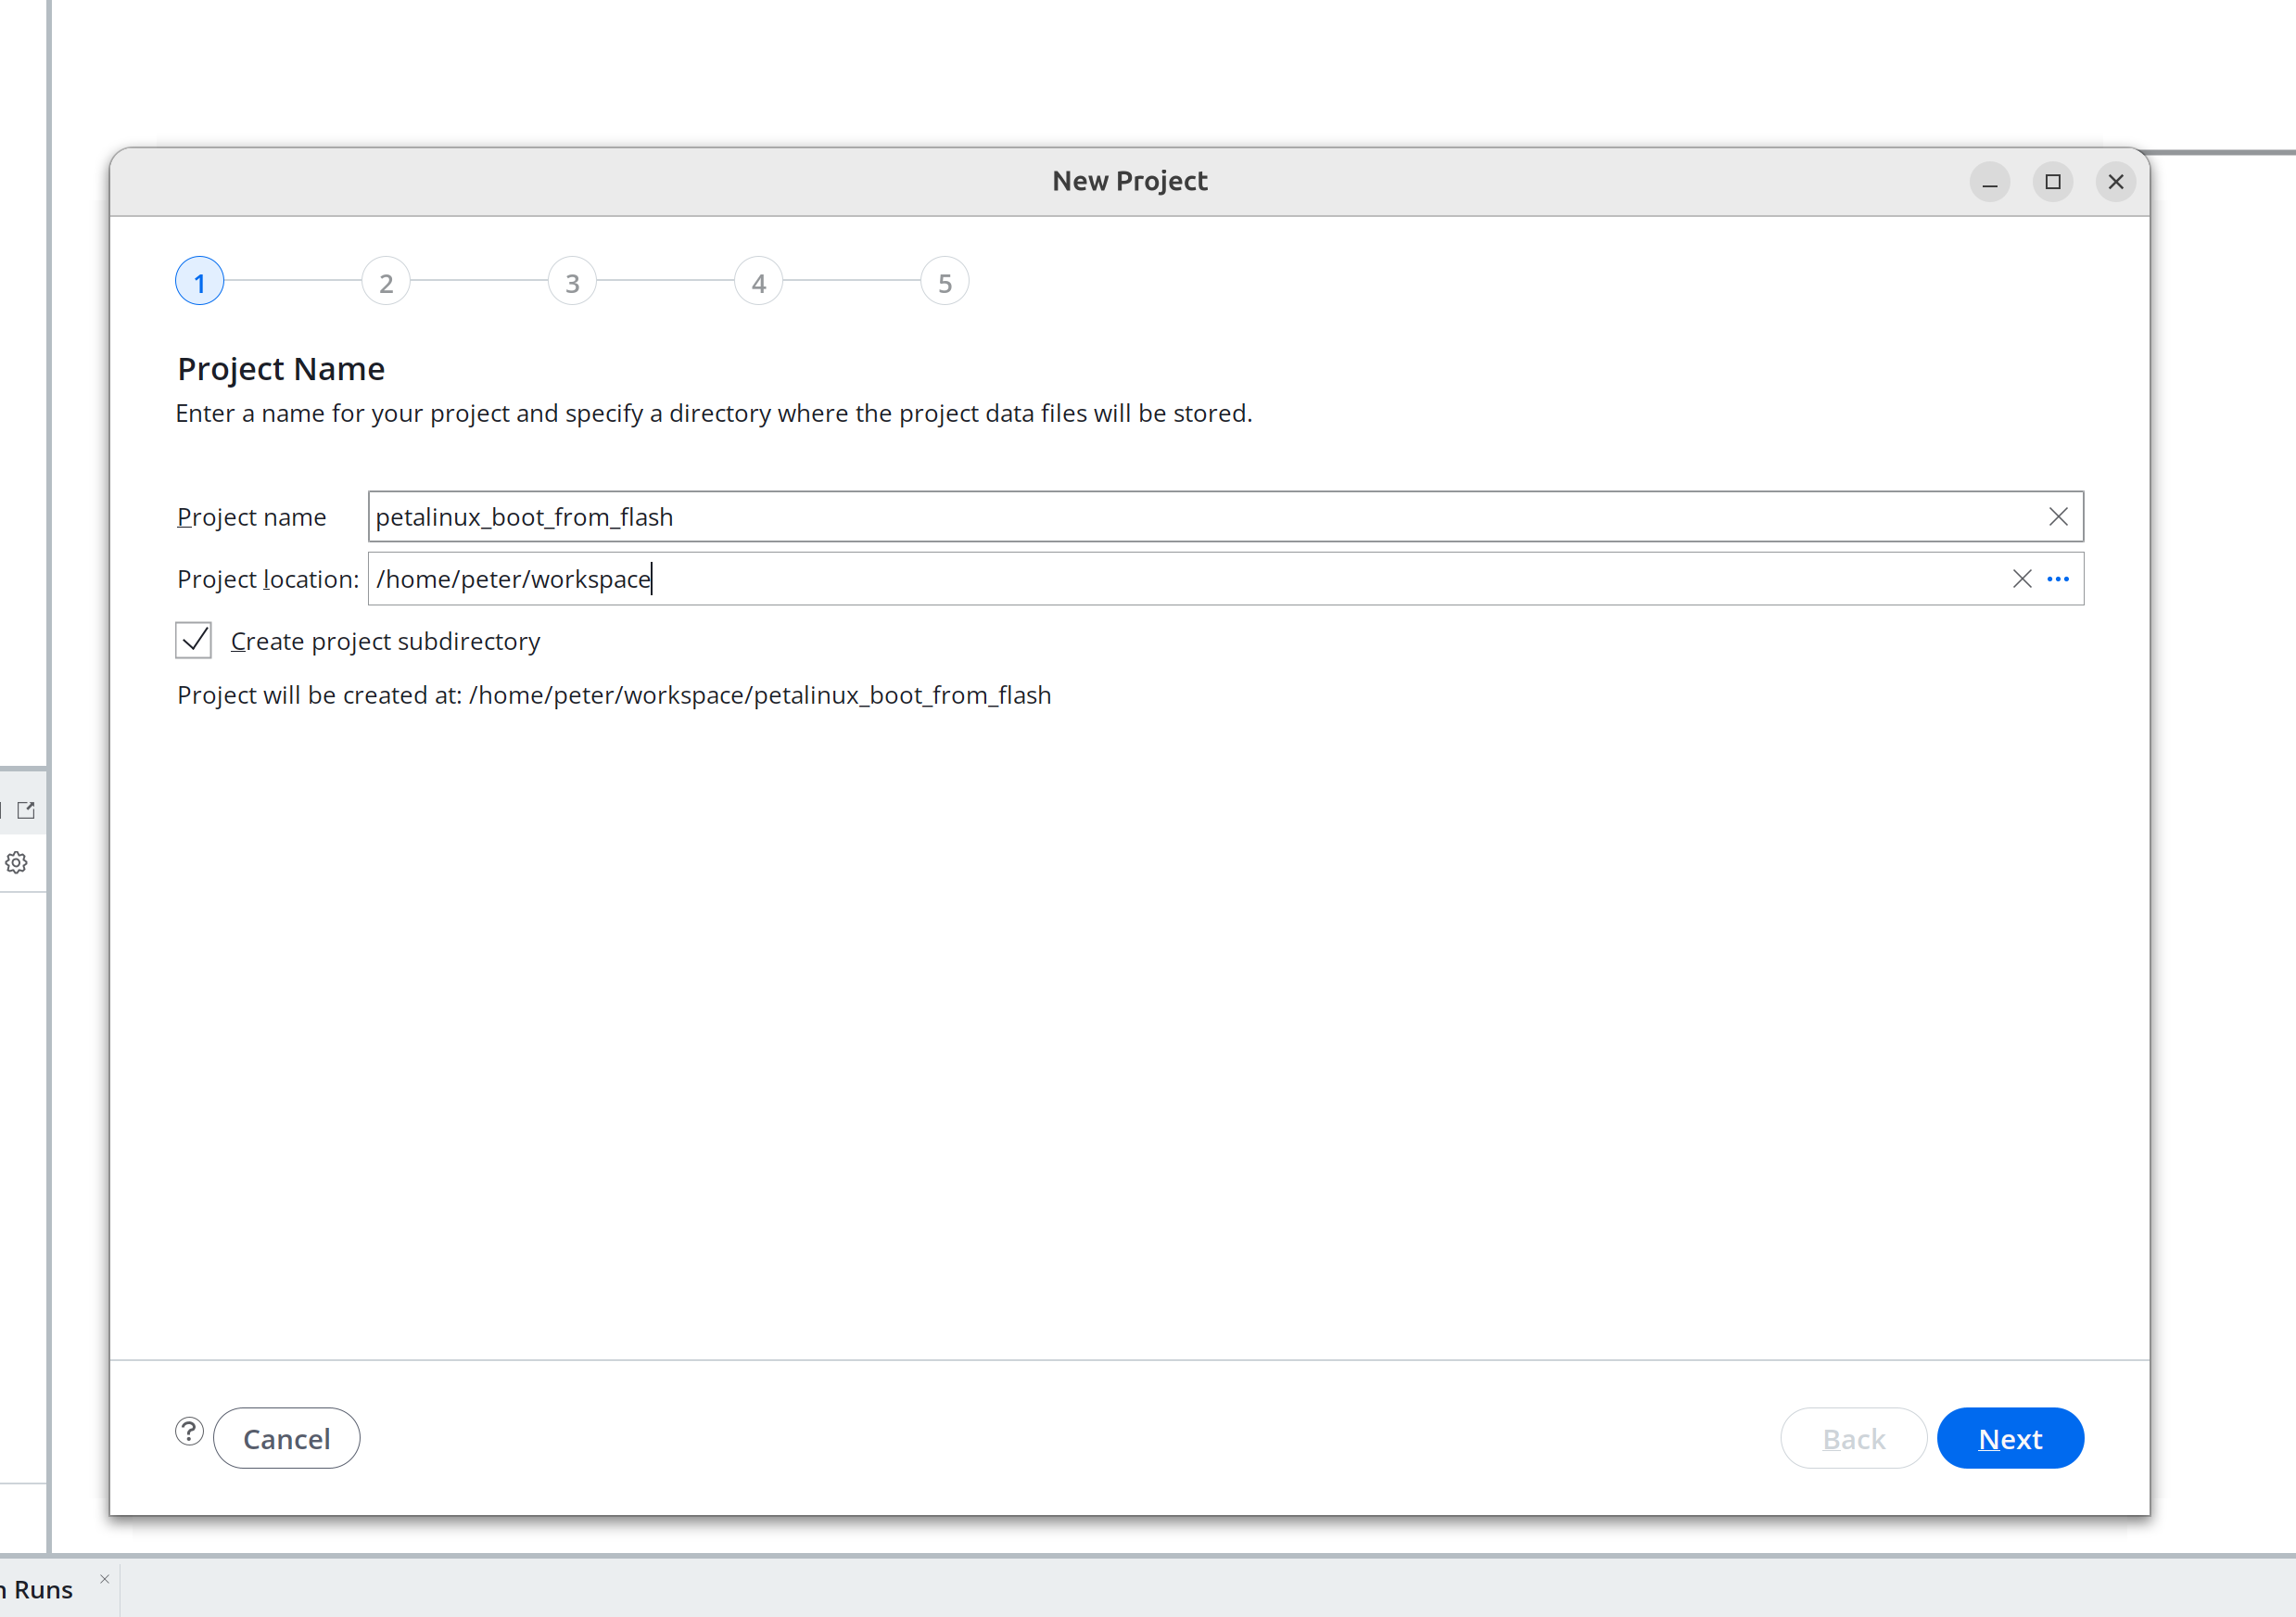
Project name : petalinux_boot_from_flash_vivado
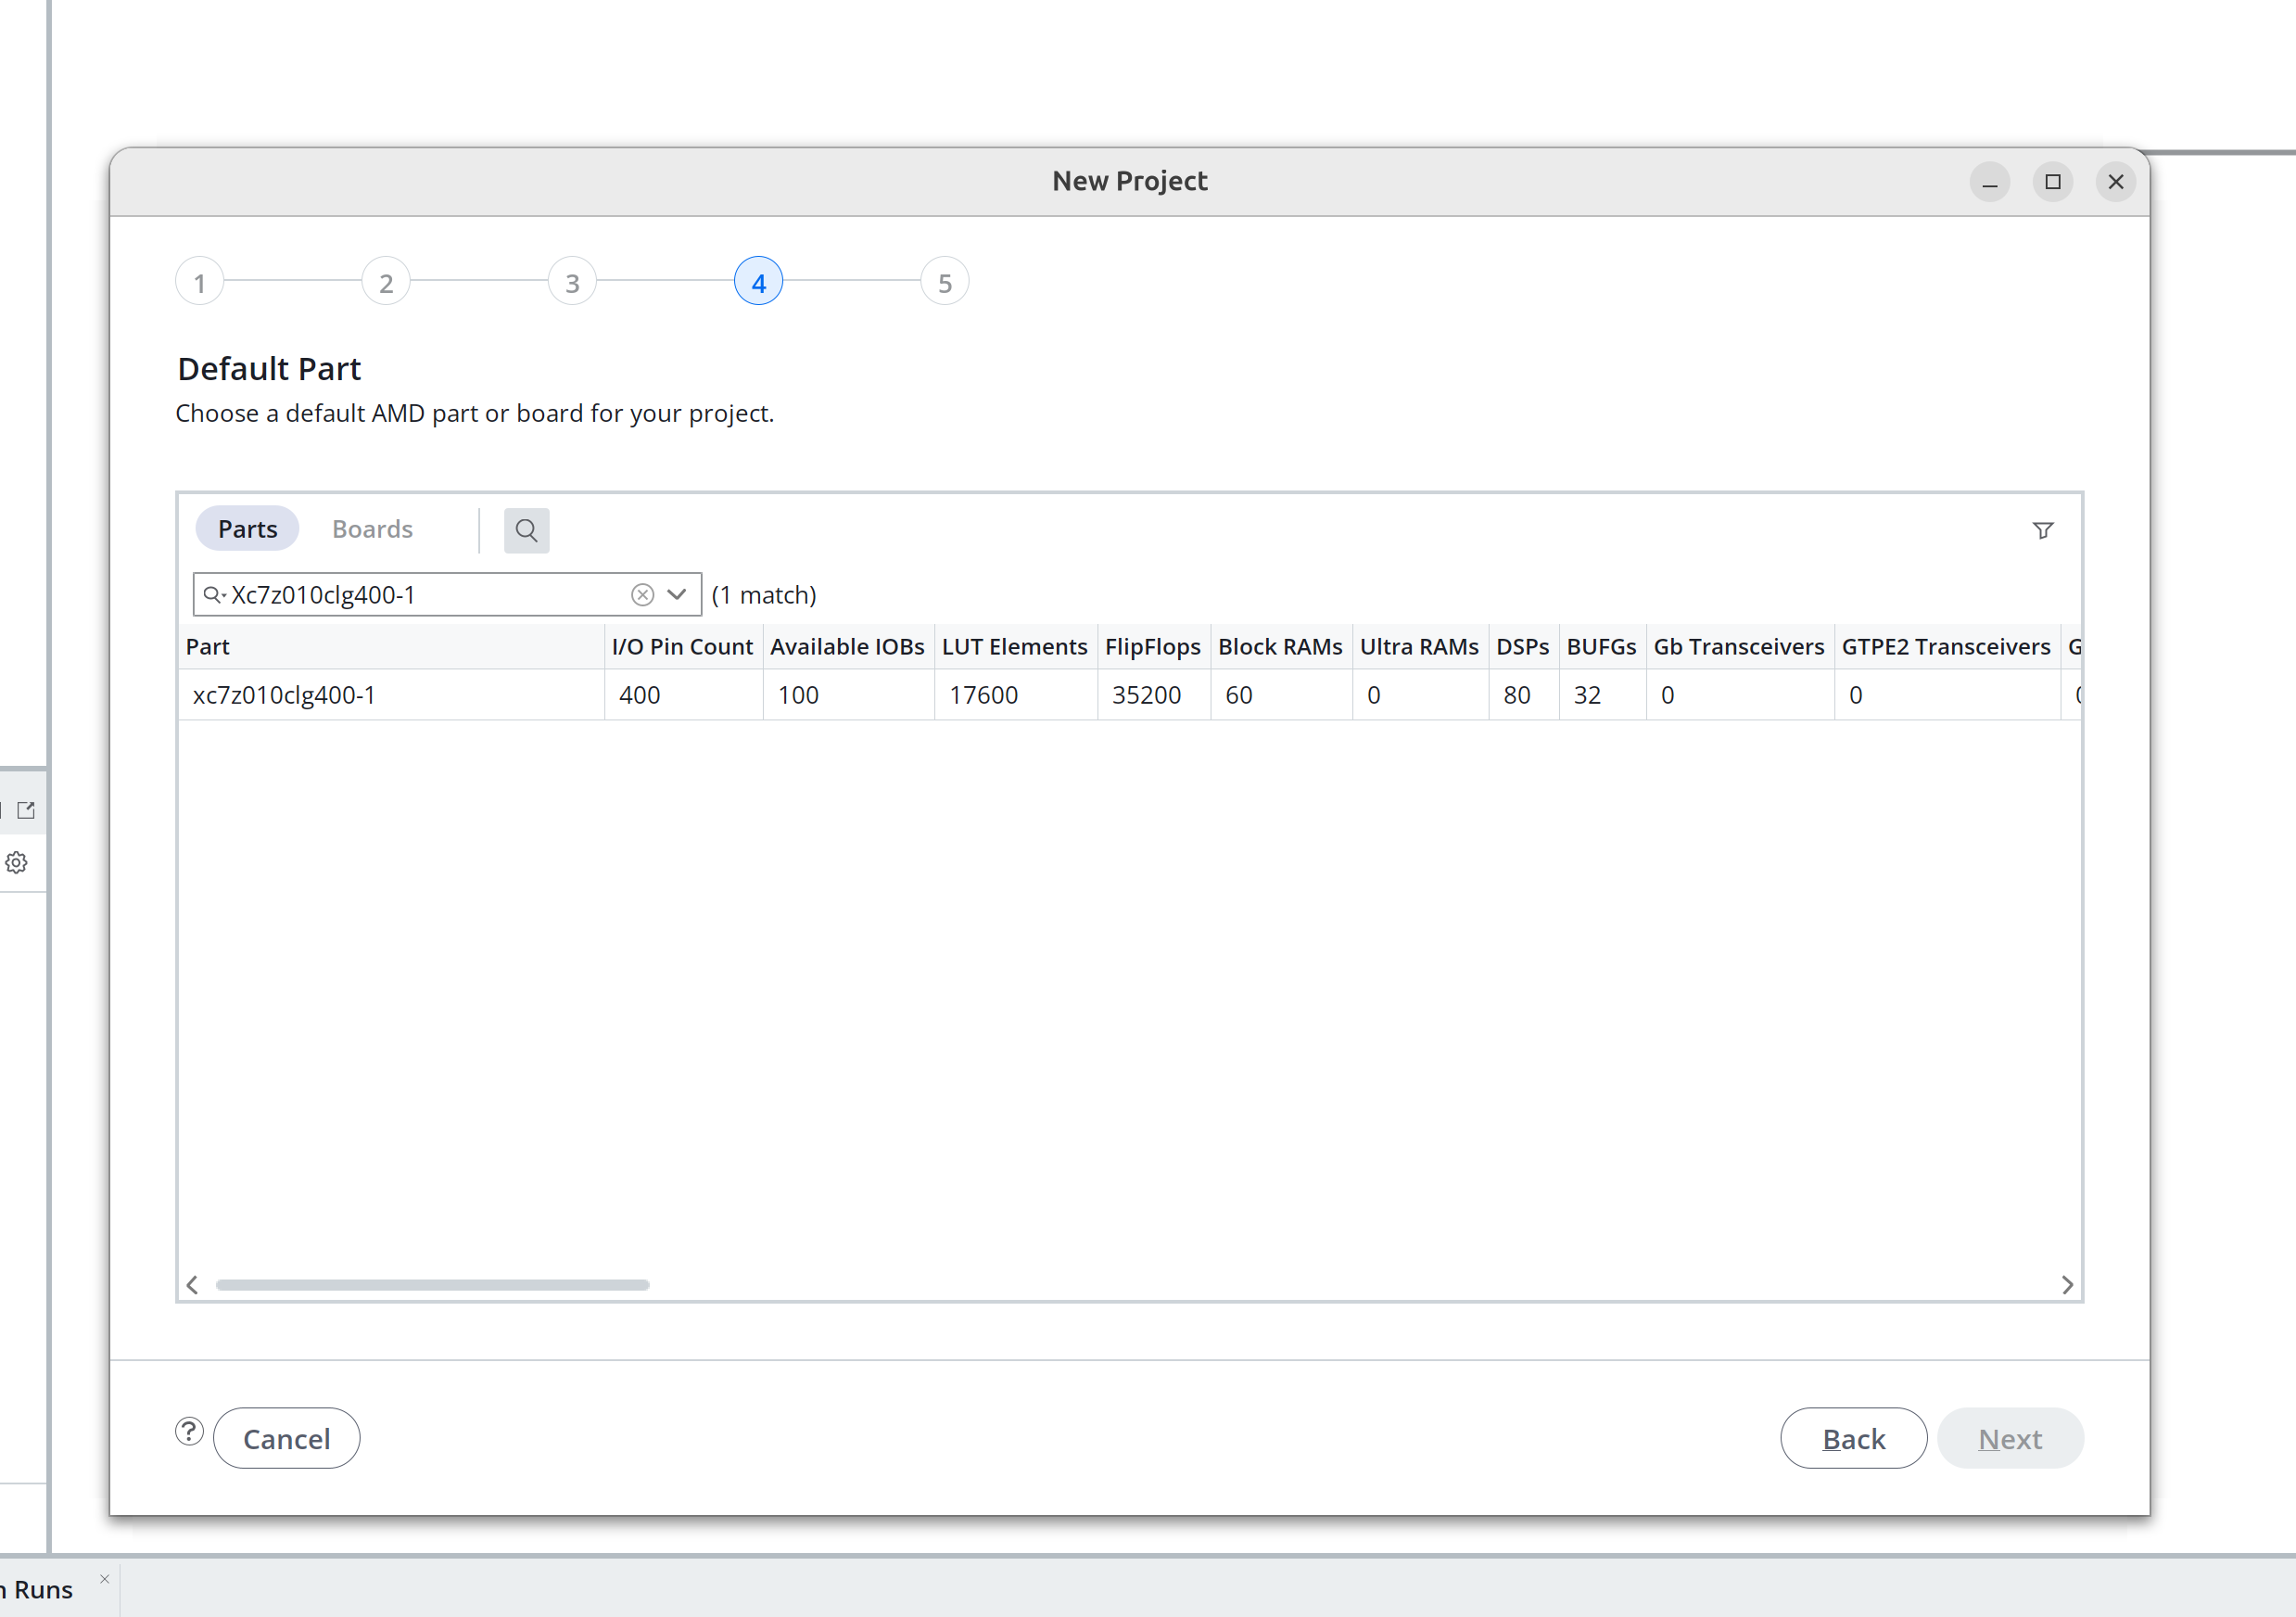
Choose: XC7Z020CLG400-2
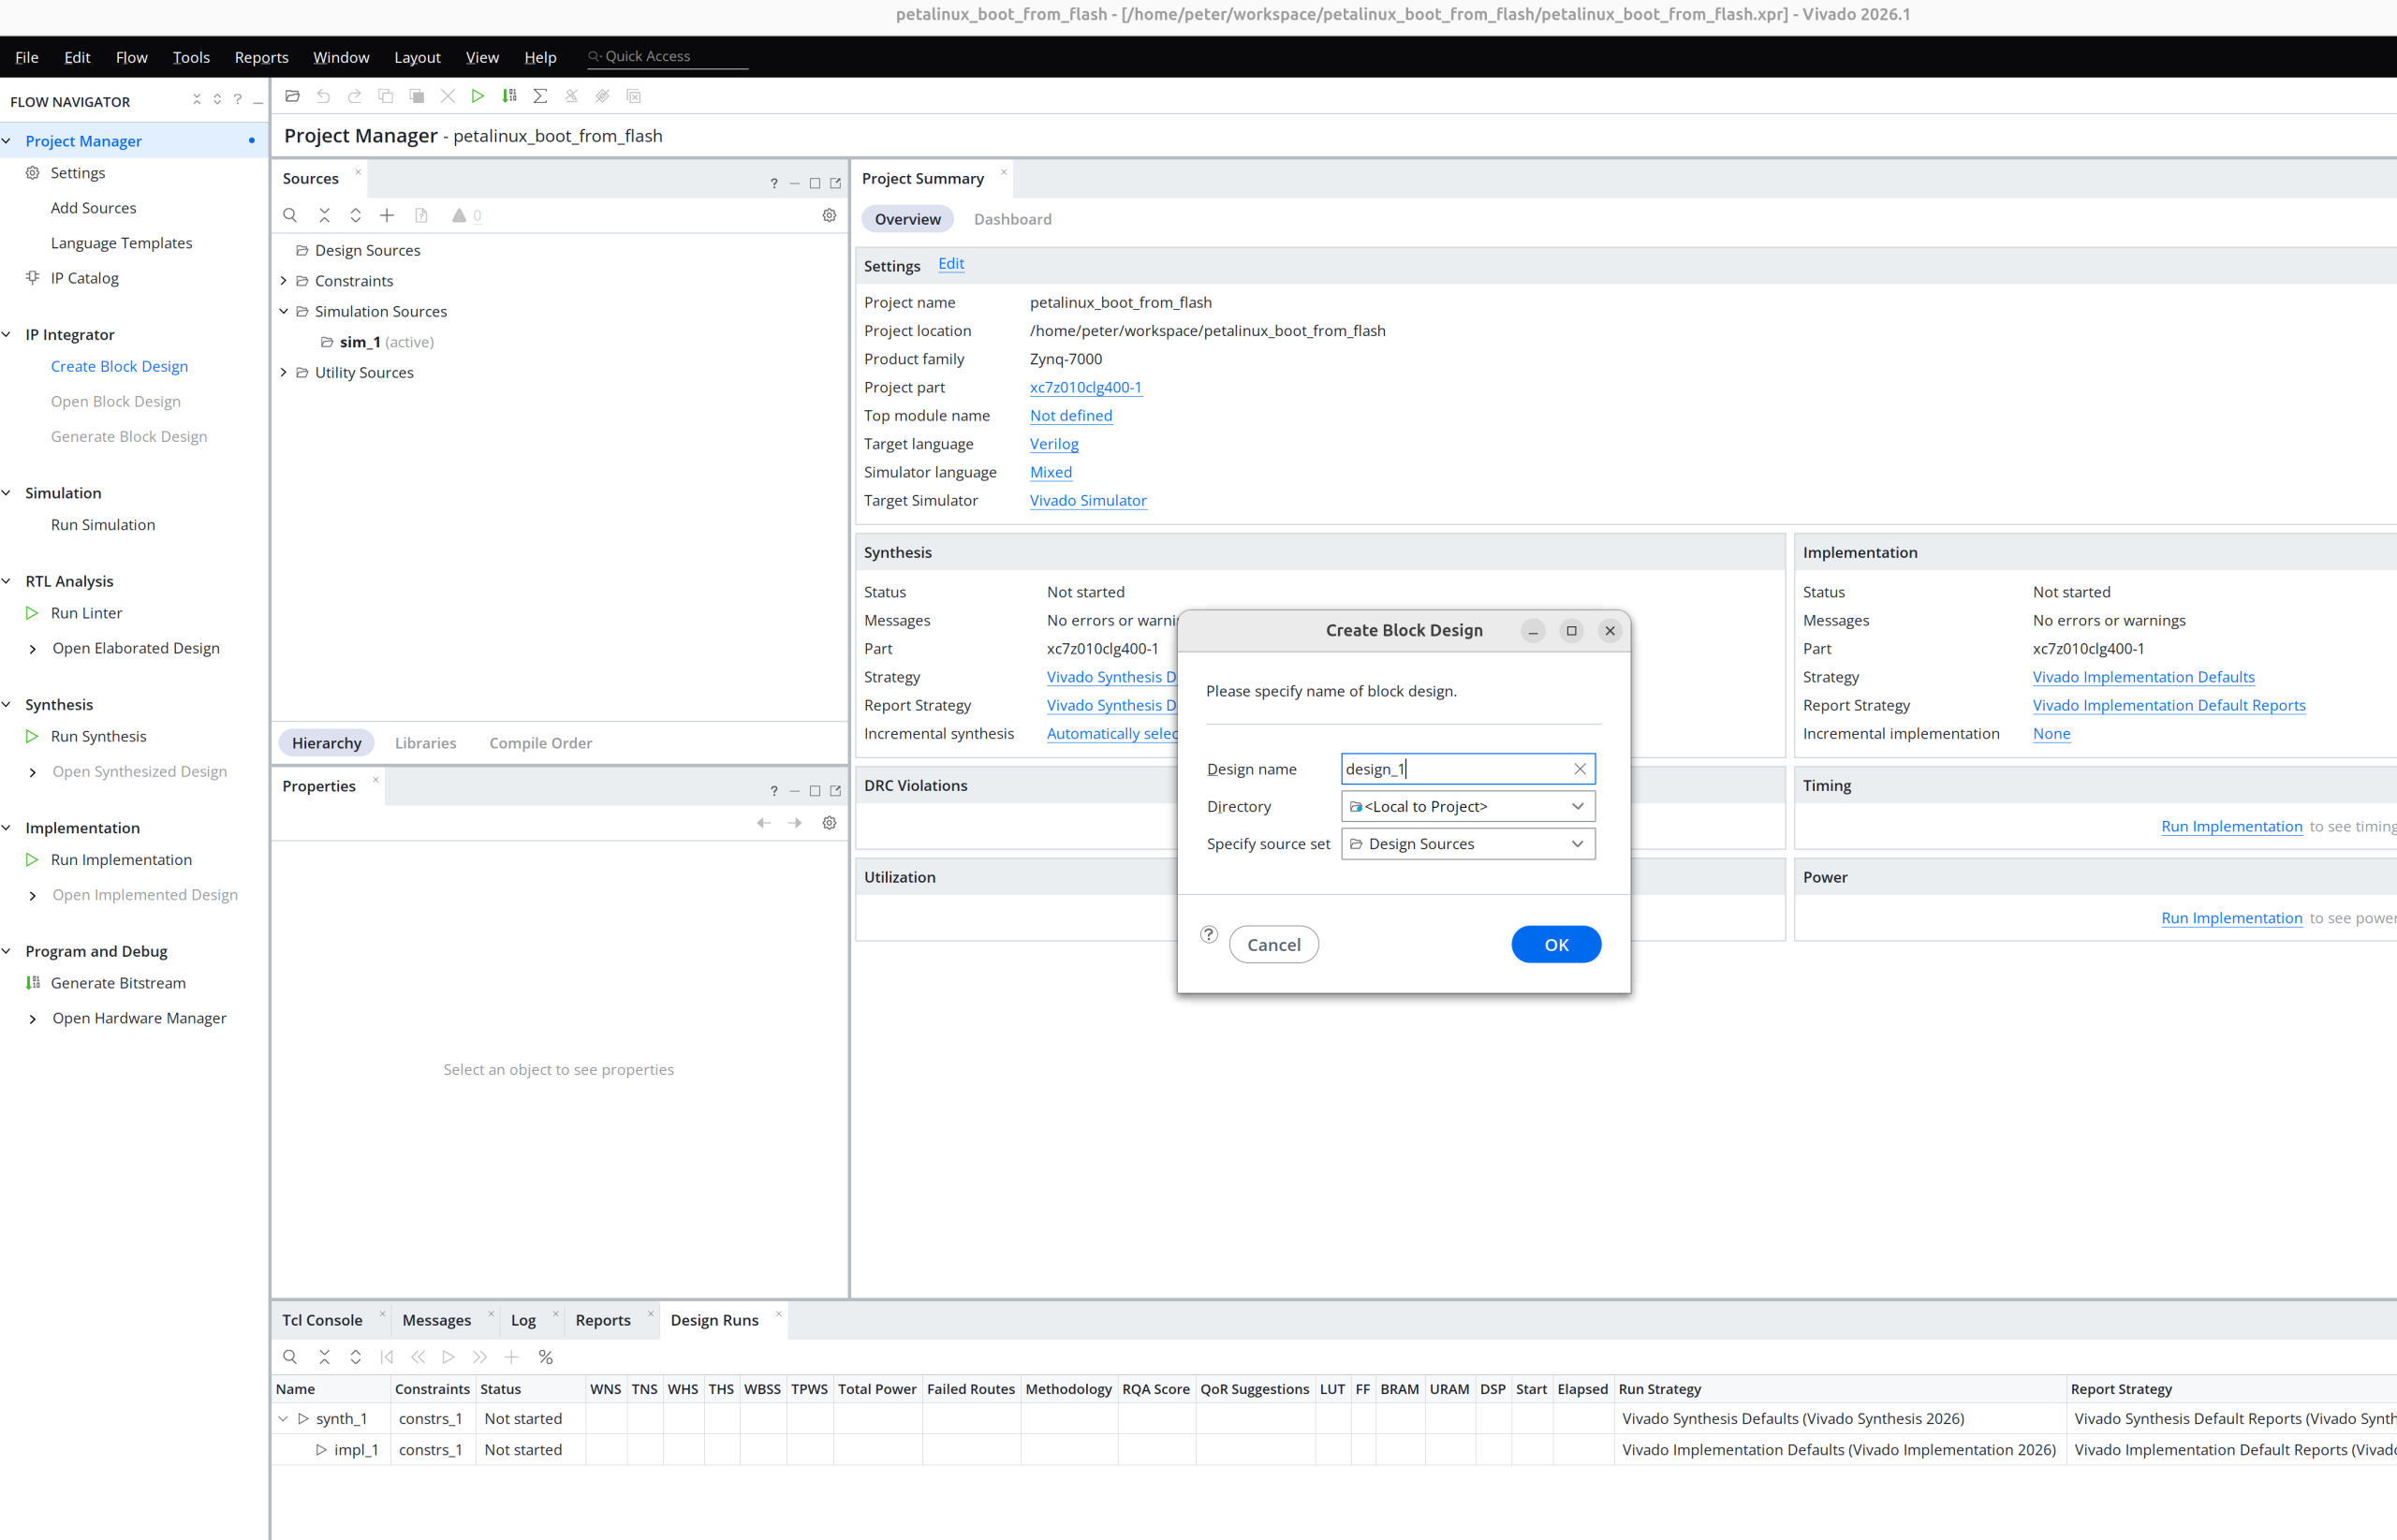
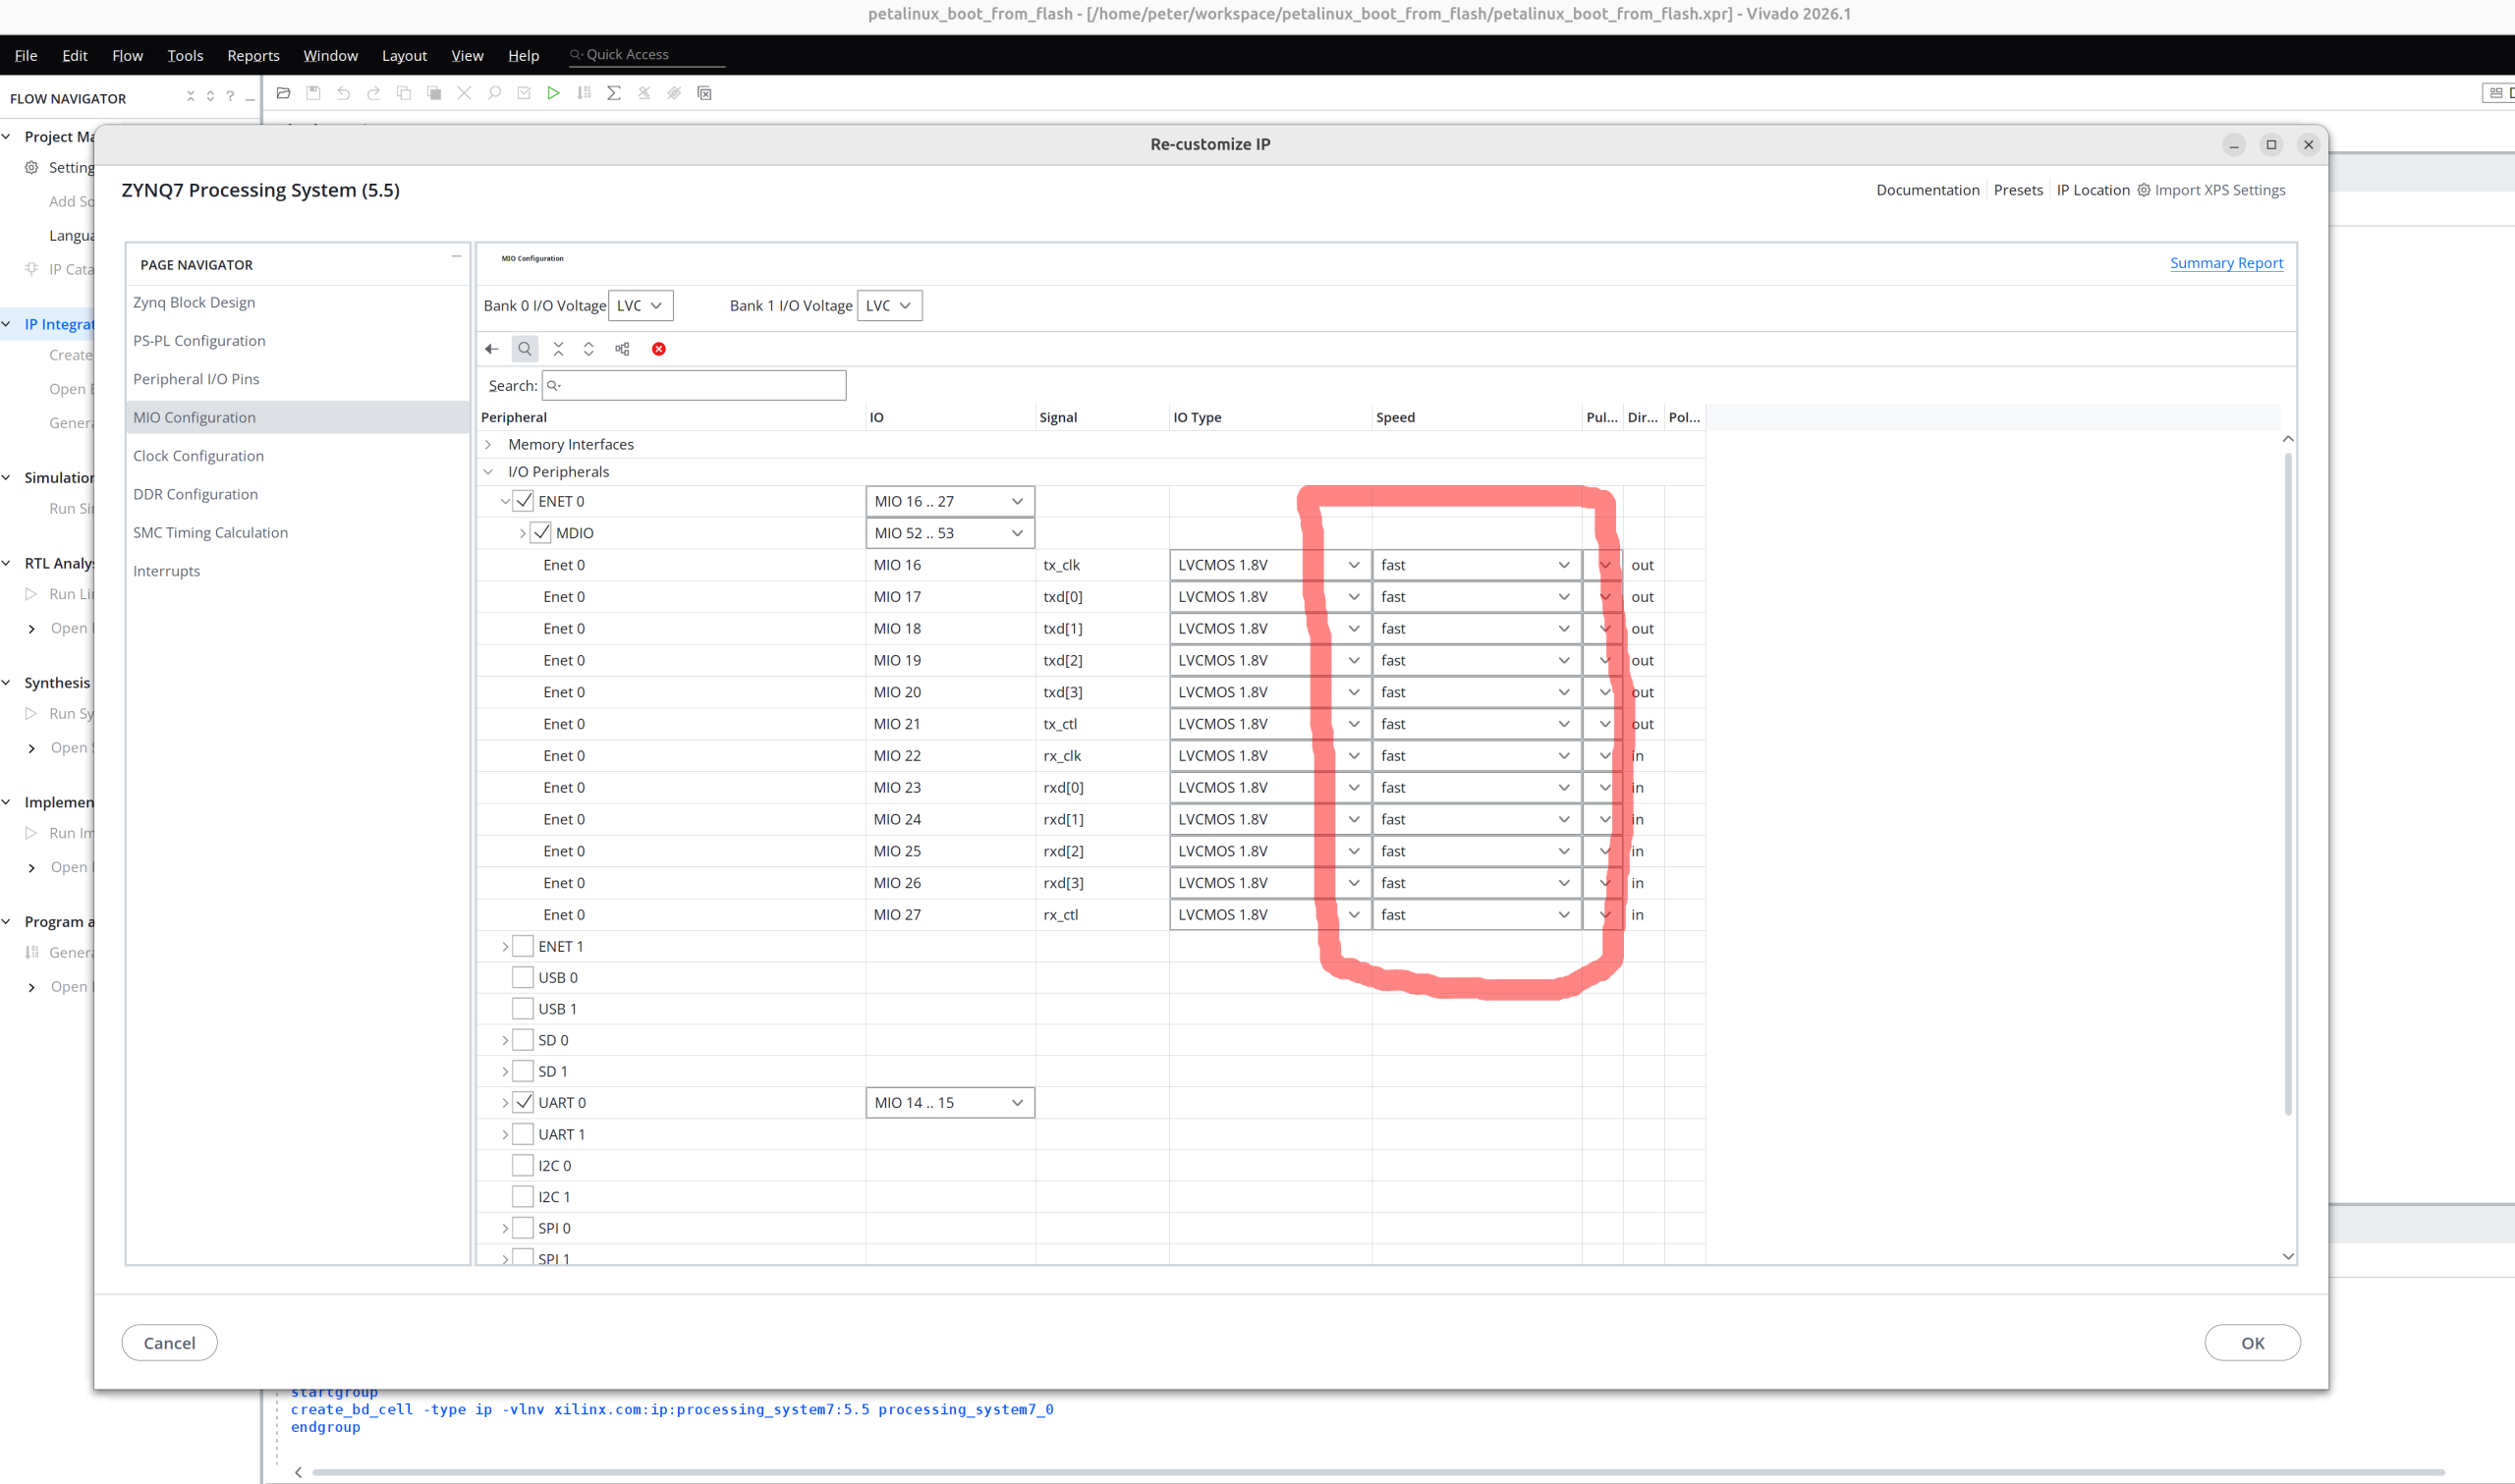
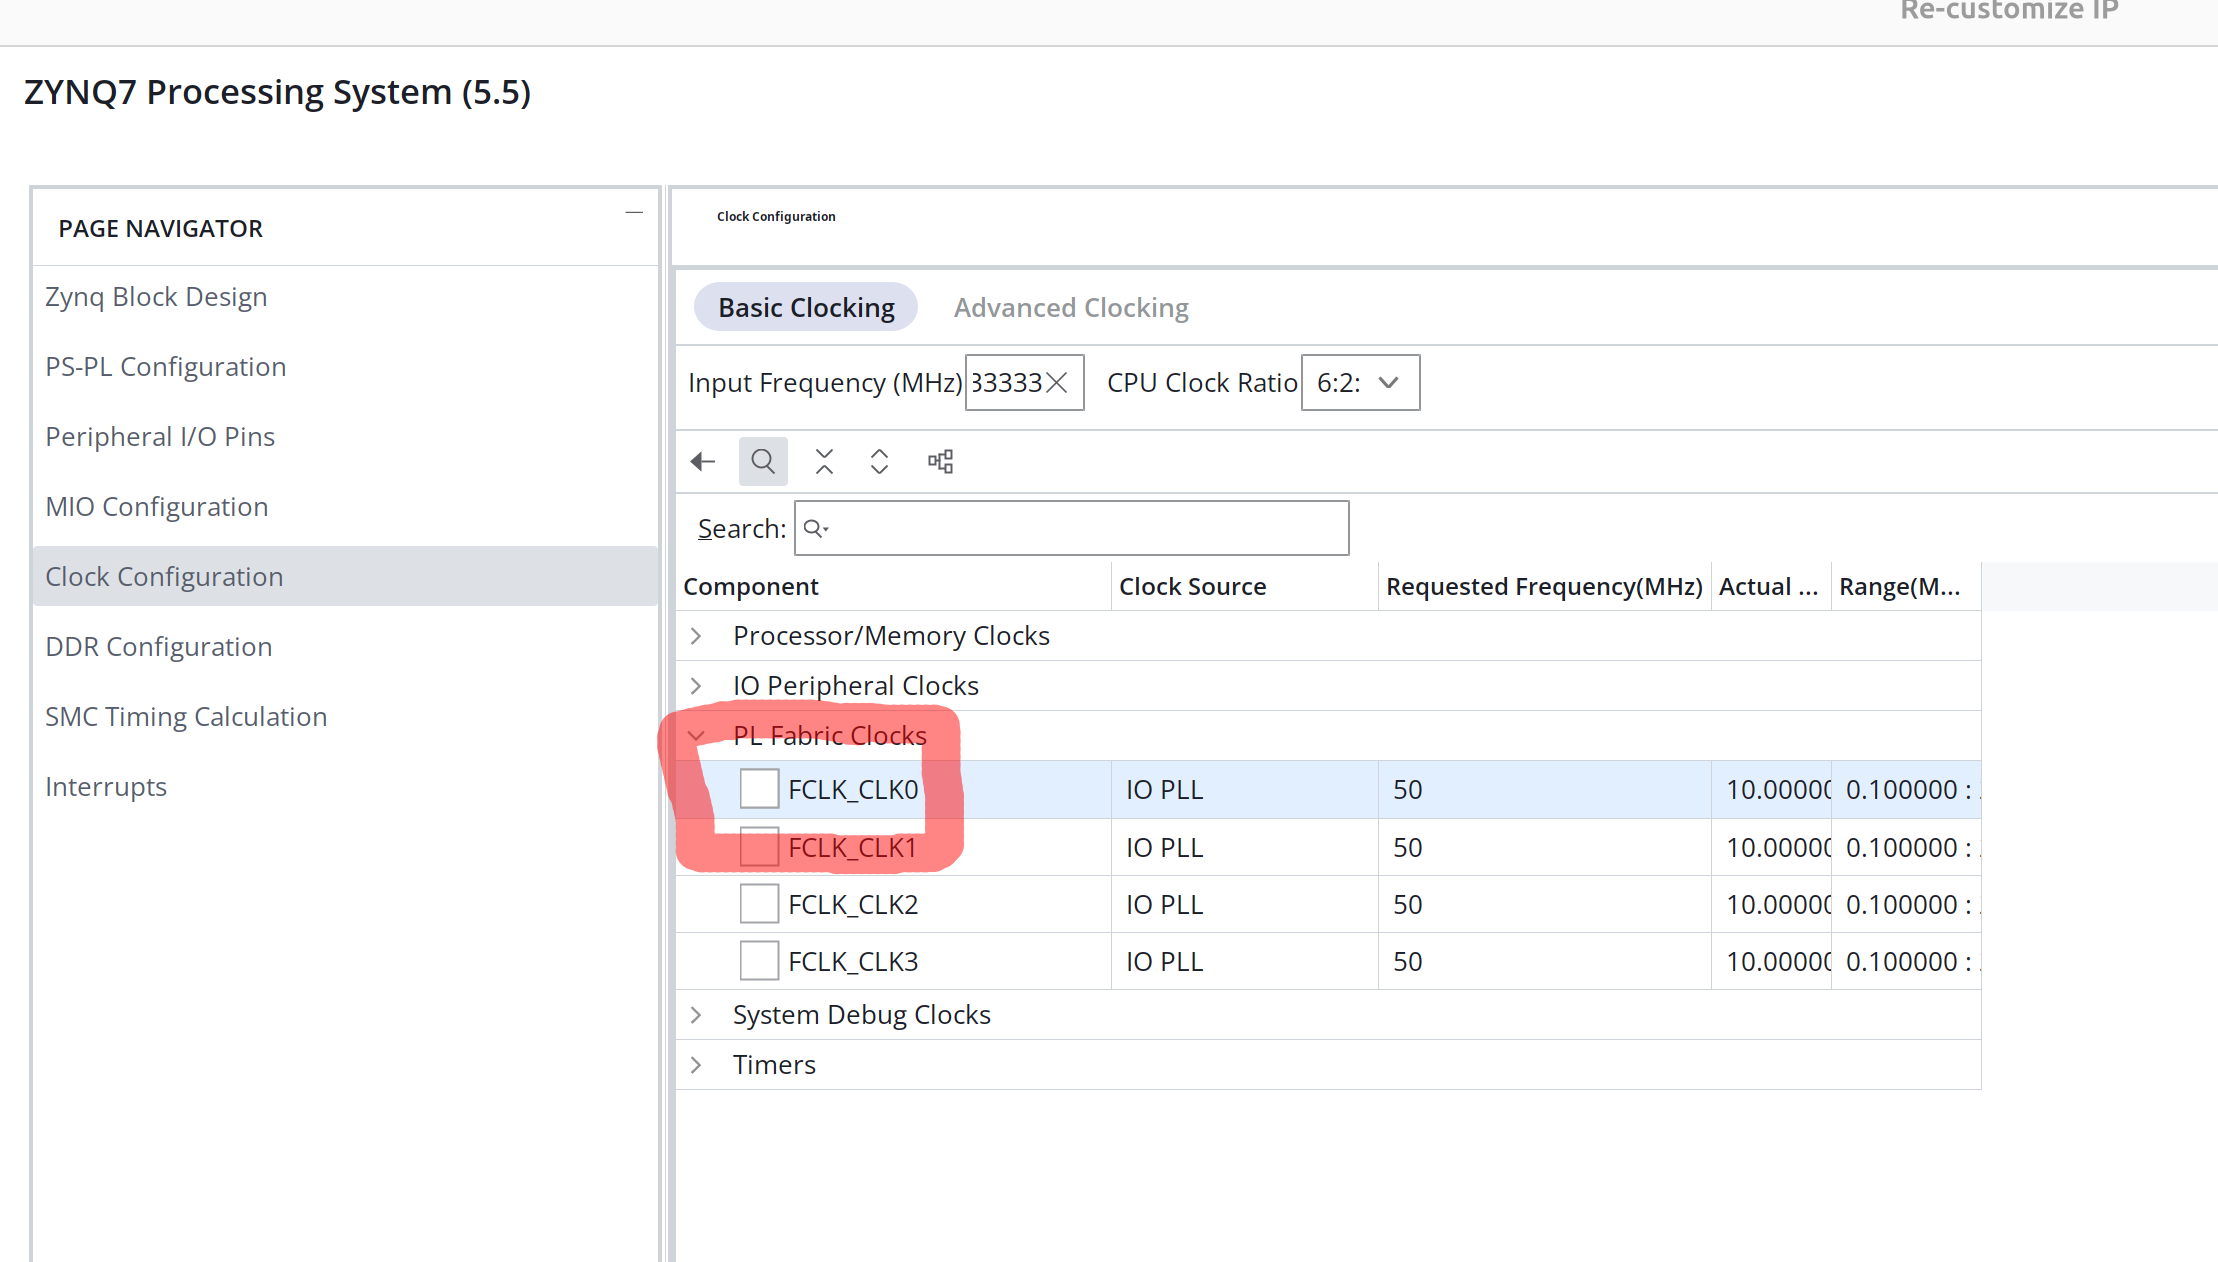
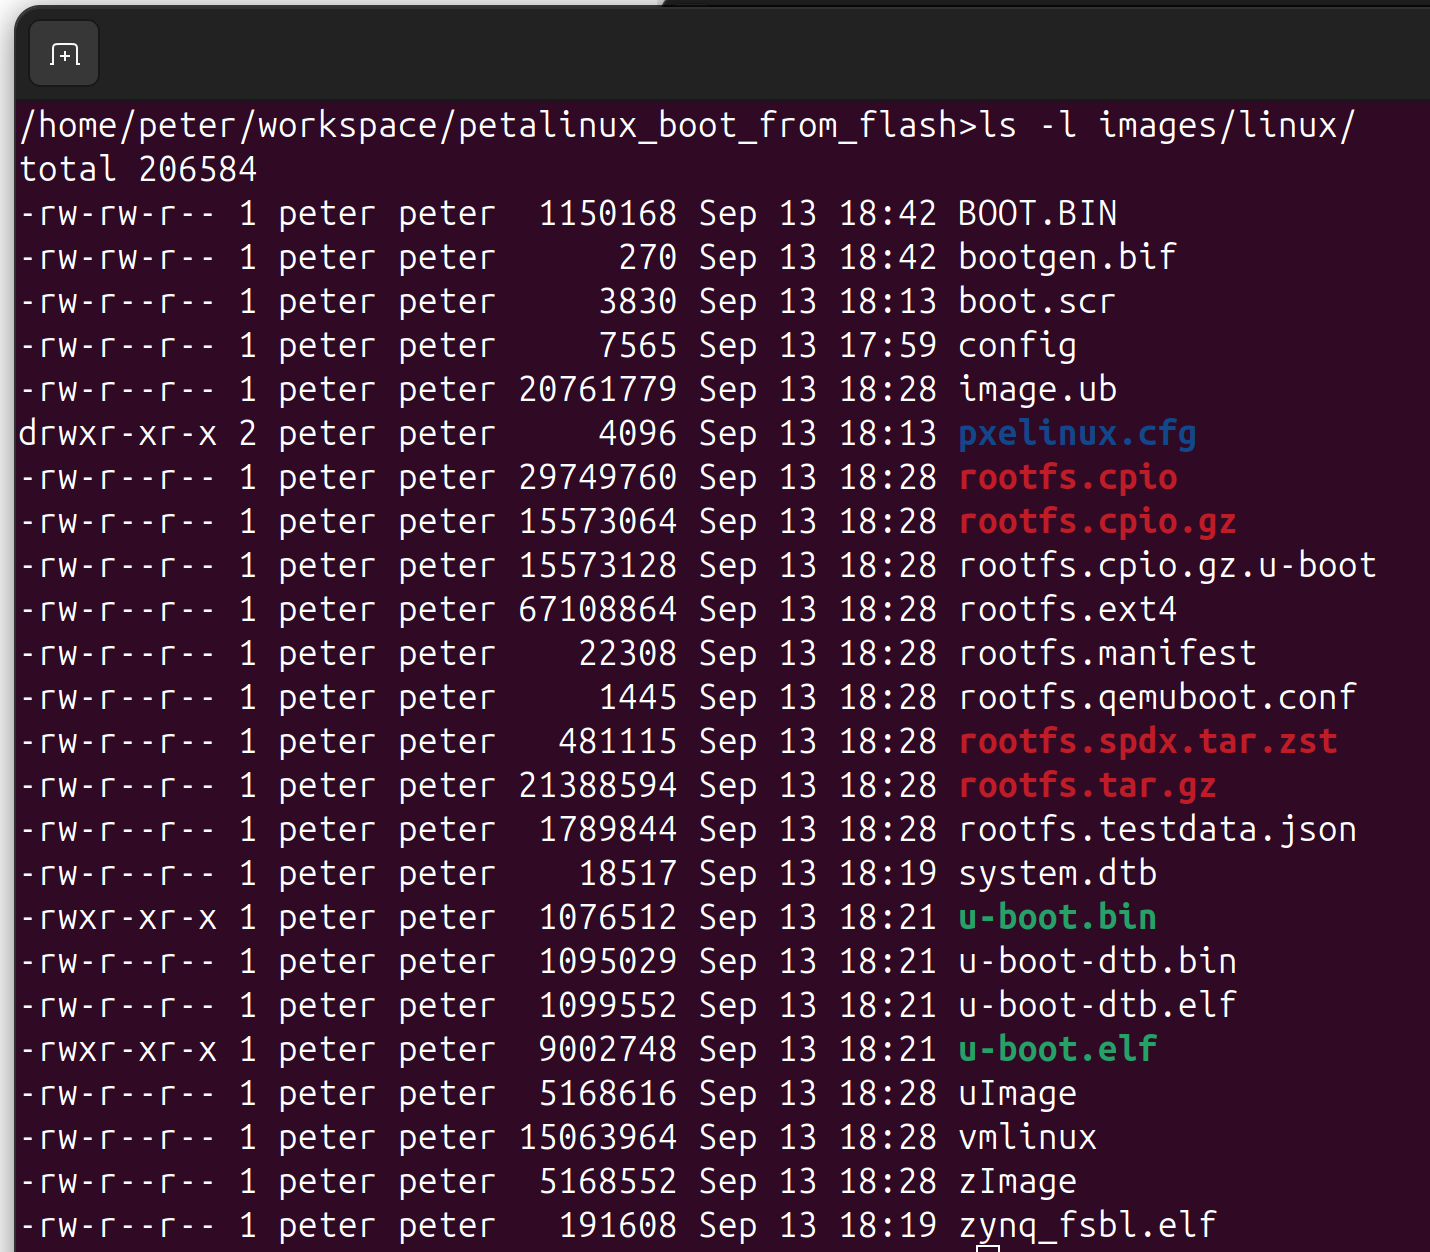
petalinux-package --boot --fsbl images/linux/zynq_fsbl.elf --u-boot images/linux/u-boot.elf --force
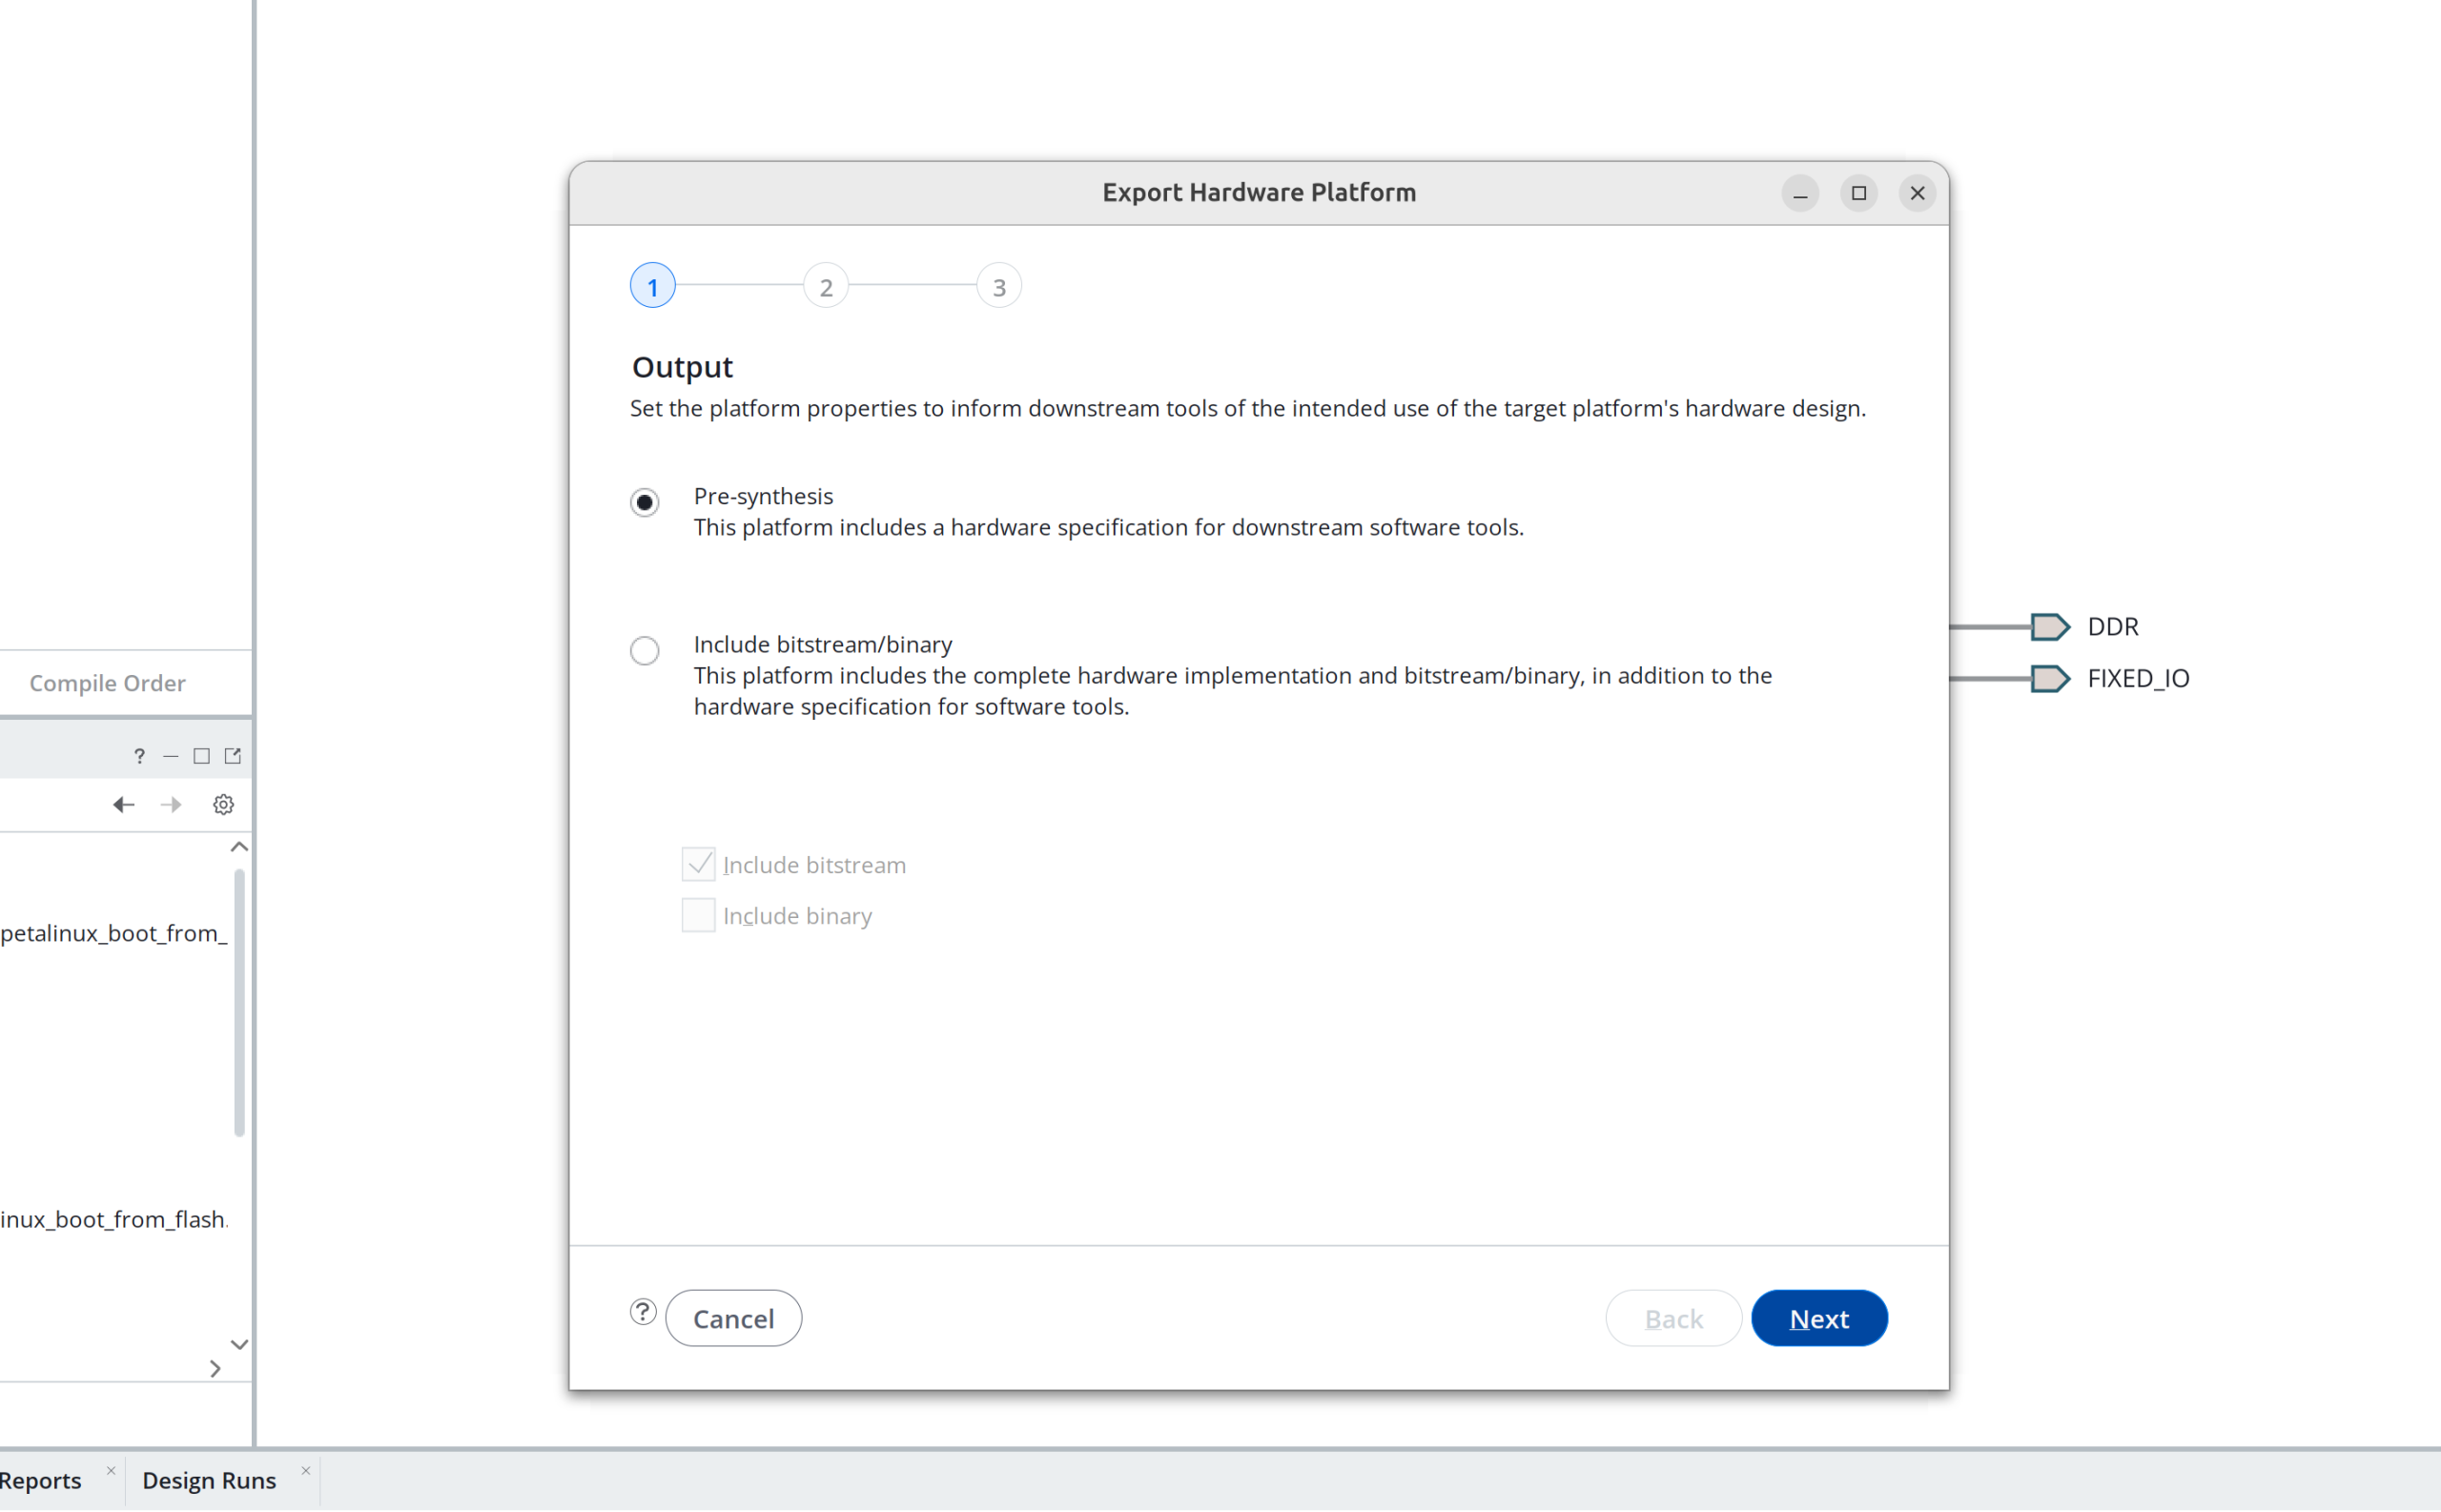
Step 2: Build the image using petalinux
source /opt/petalinux/settings.sh
petalinux-create --type project --template zynq --name petalinux_boot_from_flash
cd petalinux_boot_from_flash
find .. -name "*.xsa"
cp ../petalinux_boot_from_flash_vivado/design_1_wrapper.xsa .
petalinux-config --get-hw-description=.
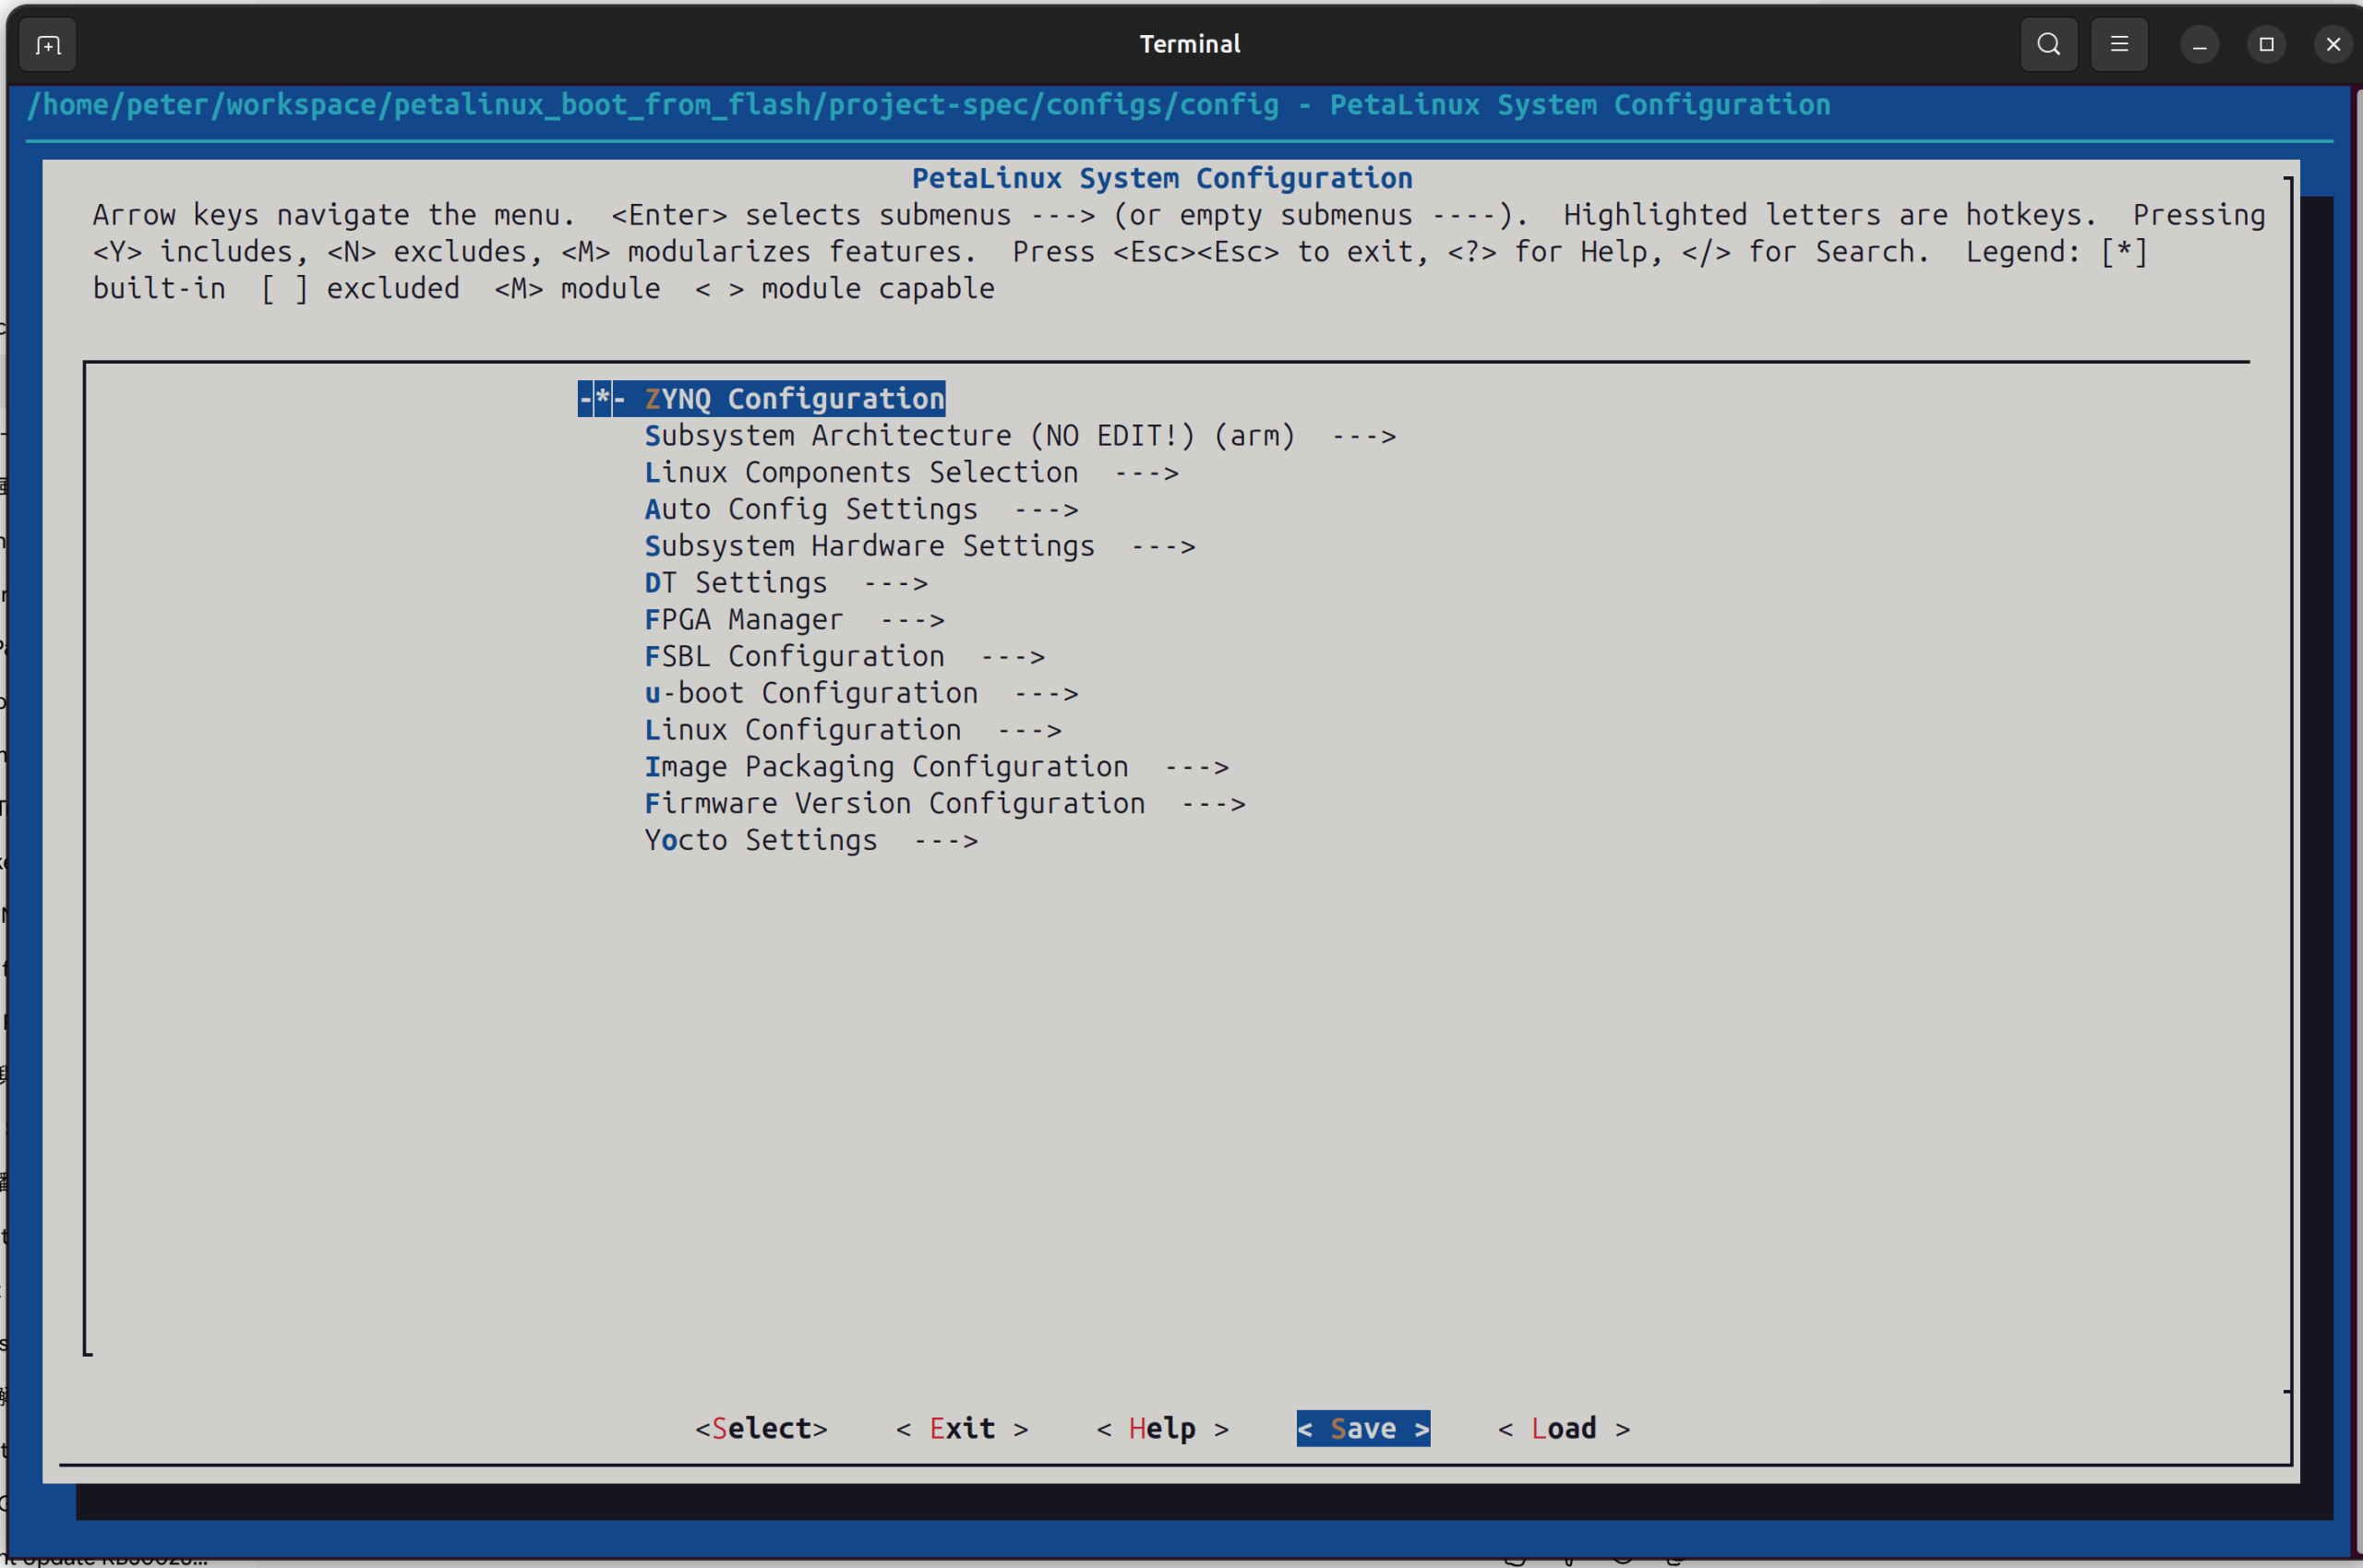
(Just save and exit)
petalinux-package --boot --fsbl images/linux/zynq_fsbl.elf --u-boot images/linux/u-boot.elf --force
now you got BOOT.BIN
~/xilinx/2026.1/Vitis/bin/program_flash -f images/linux/BOOT.BIN \
       -offset 0x0 \
       -fsbl images/linux/zynq_fsbl.elf \
       -flash_type qspi_single \
       -verify \
       -url tcp:localhost:3121
Add macros and the rest of a professional RISC-V assembler
The RISC-V front end already encodes instructions and a handful of data directives. It does not assemble the files you actually write. Those are GNU as: .macro / .endm, \name, numbered local labels, .option, .pushsection. r-test/fp.S is the concrete target.
This document tells you how to add that, in order. Do not expand macros inside the ANTLR grammar. The encoder already advances address in parser actions; a .macro body that is a lines rule will emit bytes at definition time, or fight the address, or both.
The one-line version
Parse once to collect directives, expand macros / conditionals / includes into plain source, then parse again to encode. New language features that invent text belong in a preprocessor. New language features that invent bytes (.align, .globl, .option) belong in the grammar and RISCVEncoder.
source .S → preprocessor → ANTLR parse + encode → bin / ELF
Dialect for everything new is GNU as. Keep the NASM %define / %include that already work so testbench/define.s does not break. Do not add a second full NASM %macro unless a later day needs it.
What already exists
Do not reinvent these. They are incomplete, not absent.
| Piece | Where | What it actually does |
|---|---|---|
preProcess | AssemblerLib.java | Parse, then string-replace %include and %define |
%define | lexer DEFINE, DefineListener | Flat name → value. No parameters. Redefine calls System.exit |
%include | lexer INCLUDE, IncludeListener | Inlines a file. Search path is hardcoded testbench/ |
%ifdef / %elif / %else / %endif | grammar ifdef | Parsed. Never evaluated |
%times / times | lexer TIMES, preProcess | Empty if (content.contains("%times")) |
.byte .half .word .dword .string | grammar dot* | Encoded. .string takes IDENTIFIER, not a quoted string |
. IDENTIFIER | grammar section | Stores a name for the listing. No real section |
| labels | grammar label | IDENTIFIER COLON only. No 1: / 1b / 1f |
| comments | lexer LINE_COMMENT | ; only. GNU as uses # |
| listing | -l, RISCVEncoder.listing | Records the line the parser saw, not an expansion |
| ELF | Assembler.java -f elf | Already writes via executablelibrary |
DefineListener.map and DefineListener.lines are static. A second file in the same JVM inherits the first file's defines. Make them instance state when you touch that class.
The grammar rule named macro is not a macro. It is a bucket for define, ifdef, include, and data:
macro : define | ifdef | include | dotbyte | dothalf | dotword | dotdword | dotstring ;
Leave that name alone until the preprocessor owns define/ifdef/include. Then the rule can shrink to data directives.
Why the preprocessor, not the grammar
RISCVAssemblerParser members hold address and every instruction does address+=encoder.encodeType...(...). A .macro ADD rd, rs whose body is parsed as lines will encode add while you are still defining ADD. The invocation then has nothing to expand, or encodes a second time.
preProcess already does the right shape: walk the text, produce new text, then the real assemble() encodes. Grow that into a package hk.quantr.assembler.riscv.preprocess rather than piling more static maps into AssemblerLib.
Assembler.main must call the preprocessor before the encode parse. Today preProcess is used from tests (TestMacro, TestMissingMacro) and is easy to skip from the CLI path. Grep preProcess( and make every assemble entry go through it.
Files you will touch
src/main/java/hk/quantr/assembler/antlr/RISCVAssemblerLexer.g4
src/main/java/hk/quantr/assembler/antlr/RISCVAssemblerParser.g4
src/main/java/hk/quantr/assembler/AssemblerLib.java
src/main/java/hk/quantr/assembler/Assembler.java
src/main/java/hk/quantr/assembler/riscv/listener/DefineListener.java
src/main/java/hk/quantr/assembler/riscv/listener/IncludeListener.java
src/main/java/hk/quantr/assembler/riscv/RISCVEncoder.java
src/main/java/hk/quantr/assembler/riscv/preprocess/   (new)
src/test/java/hk/quantr/assembler/riscv/TestGasMacro.java  (new)
After any .g4 change: mvn -DskipTests compile so ANTLR regenerates into target/generated-sources/antlr4.
Phase 1: real macros
This is the feature the request named. Do it first and stop to test.
Tokens
In RISCVAssemblerLexer.g4, next to DEFINE / INCLUDE:
DOTMACRO    :   '.macro';
DOTENDM     :   '.endm';
DOTEXITM    :   '.exitm';
Do not add a parser rule that treats the body as lines. The preprocessor reads these as lines of text.
Data
A definition is a name, a list of formal parameters, and the raw body (lines between .macro and .endm, not encoded). An invocation is a name used as an opcode with comma-separated arguments.
GNU as substitution:
| In the body | Becomes |
|---|---|
\formal | the matching argument |
\\@ | a counter that increments every invocation (unique local labels) |
\() | concatenator, so \a\()b is arg a then the letter b |
GAS also allows .macro NAME arg1=default. Defaults can wait until the required-argument form works.
Algorithm
- Walk the source line by line.
#and;comments strip for this walk, but keep the original line text for error reporting. - On
.macro NAME [formals...], slurp until.endm. Nested.macroinside a body is stored, not executed. Missing.endmis an error that names the opening line. - On a line whose first identifier is a defined macro, split arguments on commas that are not inside
(...)or quotes, bind formals, substitute, splice the expansion in place of the invocation, and re-scan from there so macros can call macros. - Recursion depth: cap at something like 100. The error must name the invocation site and the definition site.
- Unknown arity: error, do not encode a truncated body.
Invocations look like instructions (SECTION name, T fld, LDD fs0, d_one). The encode parse must not see those names. After expansion, SECTION is gone and the body (la, call, ...) remains.
What not to put in the grammar
Do not add NAME args as a generic instruction alternative. That would steal real opcodes (add, ld) if someone names a macro after one. Expansion happens first; the parser only ever sees real instructions.
First golden test
r-test/fp.S macros, smallest useful subset:
	.macro	E
	la	a3, 7b
	call	test_end
	.endm

	.macro	LDD freg, sym
	la	a0, \sym
	c.fld	\freg, 0(a0)
	.endm
A file that does LDD fs0, scratch then E must expand to la / c.fld / la / call. Compare bytes to riscv64-elf-as (phase 1 can ignore .option and .pushsection by not using those lines yet).
TestGasMacro outline:
String src = Files.readString(Path.of("src/test/resources/macro_ldd.s"));
String expanded = Preprocessor.expand(src, "rv64");
byte[] ours = assembleRv64(expanded);
byte[] gas = gasAssemble(src);   // riscv64-elf-as -march=rv64imafdc
assertArrayEquals(gas, ours);
gasAssemble writes a temp .s, runs riscv64-elf-as -o t.o, then riscv64-elf-objcopy -O binary t.o t.bin (or read .text from the ELF). Same idea as FullTest versus gas.
Phase 1 is done when that test passes and testbench/define.s still works.
Phase 2: conditionals and repeats
%ifdef is already in the grammar and does nothing. Evaluating it in the parser would still encode the false branch, because both lines alternatives are walked. Evaluate in the preprocessor, then delete the ifdef parser rule or leave it as a no-op that never fires on expanded text.
Add GAS forms. These are what fp.S does not use yet but every real tree has:
.if  expr
.ifdef name
.ifndef name
.else
.endif
.rept N
.endr
.if uses the same expression evaluator as immediates (CalculatorLibrary.cal). A name in .ifdef is defined if it is in the %define / .equ table or is a .macro.
.rept N splices the body N times, then re-scans. That is also the correct implementation of times / %times (the empty branch in preProcess).
.irp reg, t0, t1, t2 can wait until .rept works. It is the same loop with a formal rebound each iteration.
False branches must not define macros and must not invoke them. Skip lines until the matching .else / .endif, tracking nest depth. A dangling .endif is an error.
Phase 3: symbols and local labels
Without this, expanded fp.S still will not assemble.
.equ / .set
Same table as %define. .set may redefine; %define today forbids it and exits. Pick one policy and document it: .set overwrites, %define of an existing name is an error (keep today's behaviour).
Lexer: DOTEQU : '.equ'; DOTSET : '.set';
The encode parse needs these names in immediates. Either the preprocessor substitutes them (like %define already does with replaceAll("\\b"+name+"\\b")) or CalculatorLibrary consults the table. Substitution is simpler and matches the current %define path.
Numbered local labels
GNU as: 1: through 19: (you only need 0–9 to start), referenced as 1b (nearest backward) and 1f (nearest forward). fp.S uses 7: / 7b and 9: / 9b.
This cannot be only a preprocessor rewrite of the current file, because 1f depends on a label that appears later. Do it in the encoder:
- Lexer: allow
labelto be[0-9]+ COLON, and immediates / jump targets to be[0-9]+ [bf]. - First pass, or a collected list: each
N:at address A is pushed on a per-digit list. - When encoding
jal/beq/lathat uses7b, take the last7:whose address is<=current address;7ftakes the next one after.
If you stay strictly one-pass, 7f is unknown when you see it. The encoder already has labels on the parser (ArrayList<Label>). Either two-pass (walk once for labels, once to encode) or record a fixup and patch the immediate when the forward label is defined. Two-pass is less clever and matches how gas works. The current address+= one-pass is why forward regular labels are already shaky; this is the moment to make a label pass explicit if you have to fight it.
# comments
LINE_COMMENT : [;#] ~[\r\n]* ;
GAS also treats /* */ as comments. Not required for fp.S. # is.
Phase 4: sections and options
Needed for a real object, and for fp.S after macros expand.
Sections
Replace the catch-all
section : DOT sectionName=IDENTIFIER IDENTIFIER? ;
with explicit directives so .macro / .equ / .option are not eaten as section names (today . plus an identifier is a section).
.text
.data
.rodata
.bss
.align  N
.globl  name
.asciz  "string"
.ascii  "string"
.pushsection name
.popsection
.byte already exists. Add .asciz (NUL-terminated) distinct from .string if .string stays identifier-only; or teach .string to take DOUBLE_QUOTATION ... DOUBLE_QUOTATION. fp.S uses .asciz.
RISCVEncoder must keep a current section and a stack for .pushsection / .popsection. Bytes go into that section's buffer, not one flat out. ELF output (-f elf) already exists; point it at those buffers instead of a single blob. bin output can concatenate .text then .data the way a raw image expects, or refuse and require -f elf. Pick one and test it.
.align N on RISC-V gas is power-of-two (.align 3 means 8 bytes). Pad with zeros or nop/c.nop in .text. Wrong interpretation here will fail every gas comparison.
.option
.option rvc
.option norvc
.option push
.option pop
LDD in fp.S wraps c.fld in .option push / rvc / pop. Without this, either you always accept compressed (current behaviour) or you reject c.fld when someone writes .option norvc. Store a stack of flags on the encoder. encodeType* for compressed opcodes checks rvcEnabled.
Phase 5: professional tooling
Do this after the language works. None of it changes what bytes mean.
- Include path.
preProcessIncludeFileopens"testbench/" + to. Resolve against the including file's directory, then each-IfromAssembler.main. Add the CLI option next to-a/-o. - Listing of expansions.
-lalready writeslisting. After preprocess, each encoded line should carry the invocation that produced it, so a failure in an expandedT fldnamesTand the.macro Tline. - Errors. Invocation site plus definition site, for macros, includes, and missing
.endm. Stop callingSystem.exitfromDefineListener/preProcess; throw or record onMessageHandlerand letmainset the exit code. Tests cannot survive an exit. - Instance state.
DefineListener.mapand friends must not be static.
How to test, every phase
Always compare to GNU as. That is the project's existing contract (FullTest / gas vs quantr).
# gas
riscv64-elf-as -march=rv64imafdc -o gas.o t.s
riscv64-elf-objcopy -O binary --only-section=.text gas.o gas.bin

# ours, after you wire preProcess into main
java -jar target/assembler-*-jar-with-dependencies.jar -a rv64 -f bin -o ours.bin t.s

cmp gas.bin ours.bin
Keep a table of fixtures under src/test/resources/riscv/:
| File | Phase | What it proves |
|---|---|---|
define_still_works.s | 1 | %define + addi unchanged |
macro_ldd.s | 1 | .macro args, \formal |
macro_nested.s | 1 | macro calls macro |
macro_count.s | 1 | \\@ unique labels |
ifdef_false.s | 2 | false branch emits nothing |
rept_3.s | 2 | body appears three times |
local_label.s | 3 | 1: ... j 1b |
option_rvc.s | 4 | c.fld only with .option rvc |
pushsection.s | 4 | string lands in .rodata, code in .text |
testbench/define.s and testbench/macro.s stay green.
Acceptance
Phase 1–4 together: this jar assembles r-test/fp.S (or a copy with the # comments and .equ values it already has) and the .text bytes match riscv64-elf-as -march=rv64imafdc. That file uses every phase: macros with arguments, # comments, 7: / 7b, .option push/rvc/pop, .pushsection, .asciz.
Until that works, do not start ia32 macros, a C preprocessor, or a relocating linker. Those are different jobs.
Out of scope
- Rewriting the encoder into a full relocating linker (relocs,
-shared) - ia32 / NASM
%macro/%endmacro - Running
cppfor#include/#ifdef/#define(GAS#is a comment, not cpp, unless you pass-x assembler-with-cpp) - Changing instruction encodings or the disassembler
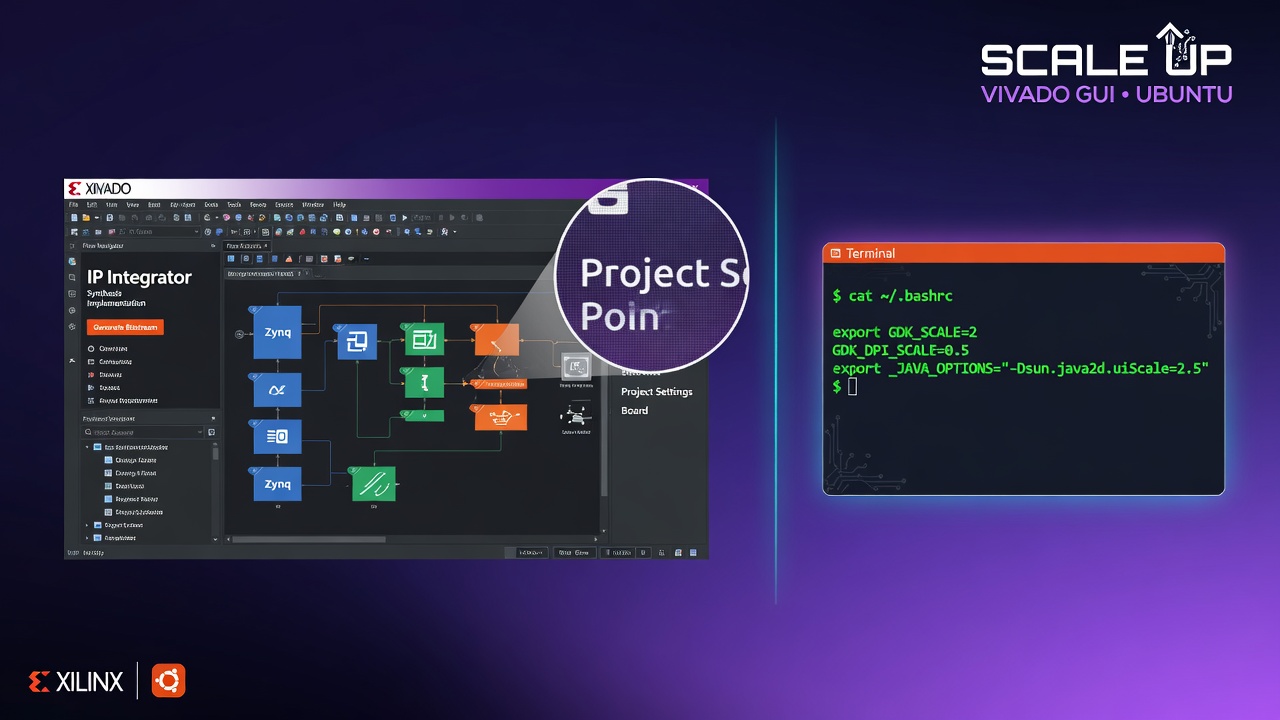
Add this to your .bashrc
export GDK_SCALE=2 GDK_DPI_SCALE=0.5
export _JAVA_OPTIONS="-Dsun.java2d.uiScale=2.5"
!!! This is not the perfect guide, during the compilation it got errors, ask gemini. https://share.gemini.google/bFyDzMtkYZVk
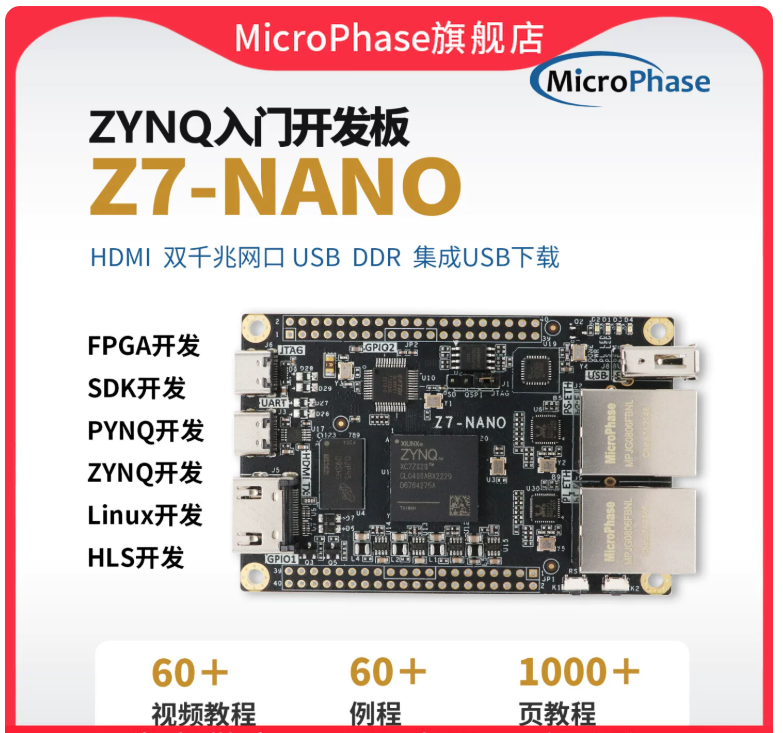
I am using this board
Step 1: Install Vitis (it has Vivado)
Step 2: Install petalinux https://www.amd.com/en/products/software/adaptive-socs-and-fpgas/embedded-software/petalinux-sdk.html
chmod +x petalinux-v20XX.X-final-installer.run
./petalinux-v20XX.X-final-installer.run
Step 3: Add the board files to Vivado
git clone https://github.com/karolzmijewski/z7-nano-7020.git
mkdir /home/peter/xilinx/2026.1/data/boards/board_files
cp -r z7-nano-7020/board_files/z7-nano-7020 /home/peter/xilinx/2026.1/data/boards/board_files/
Step 4: Build a minimal hardware design in Vivado
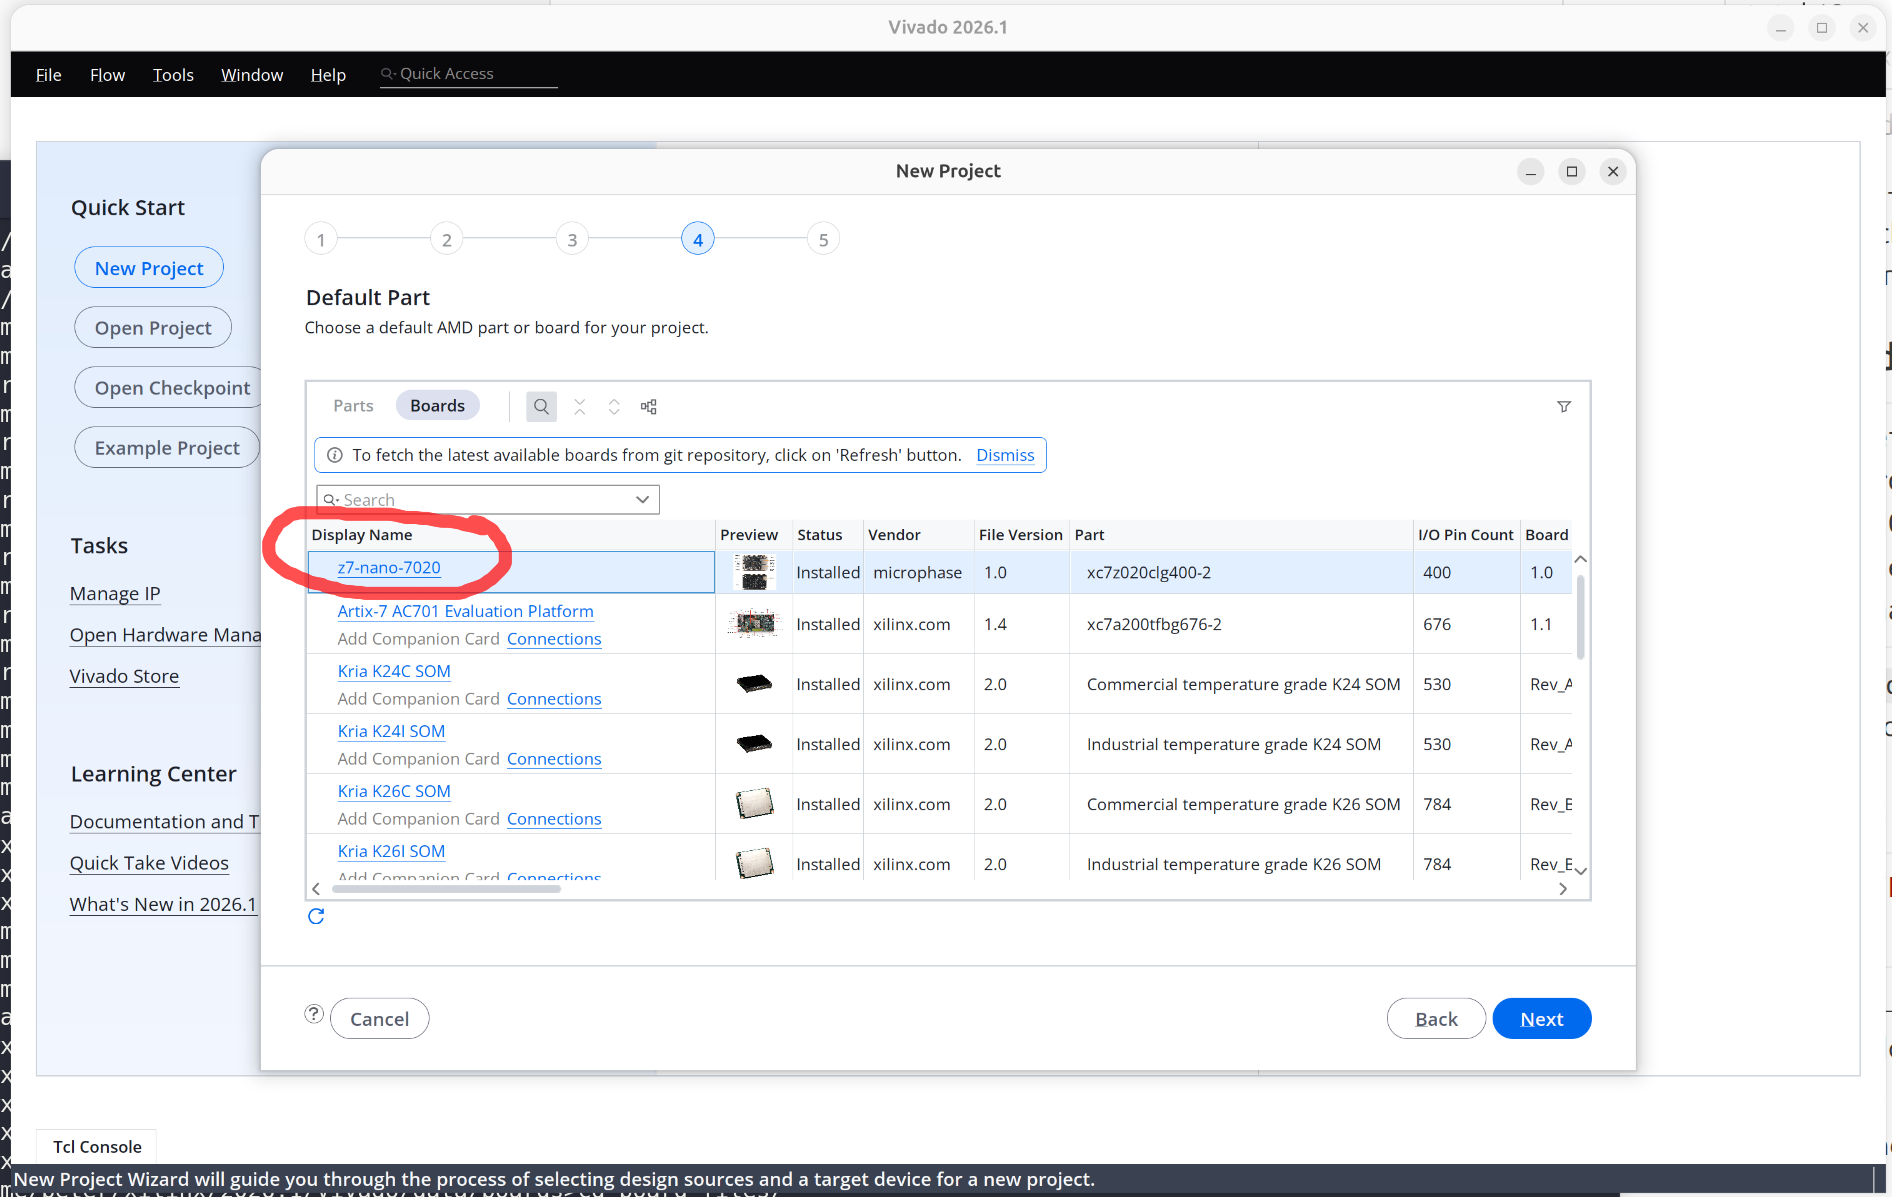
vivado→ Create New Project → RTL Project, no sources- Choose Boards tab → select Z7-Nano-7020 (now visible thanks to step 2)
- Create Block Design → add ZYNQ7 Processing System → click Run Block Automation (it will apply the board preset automatically: DDR3, UART, SD, ETH, USB)
- Validate the design (F6), no errors
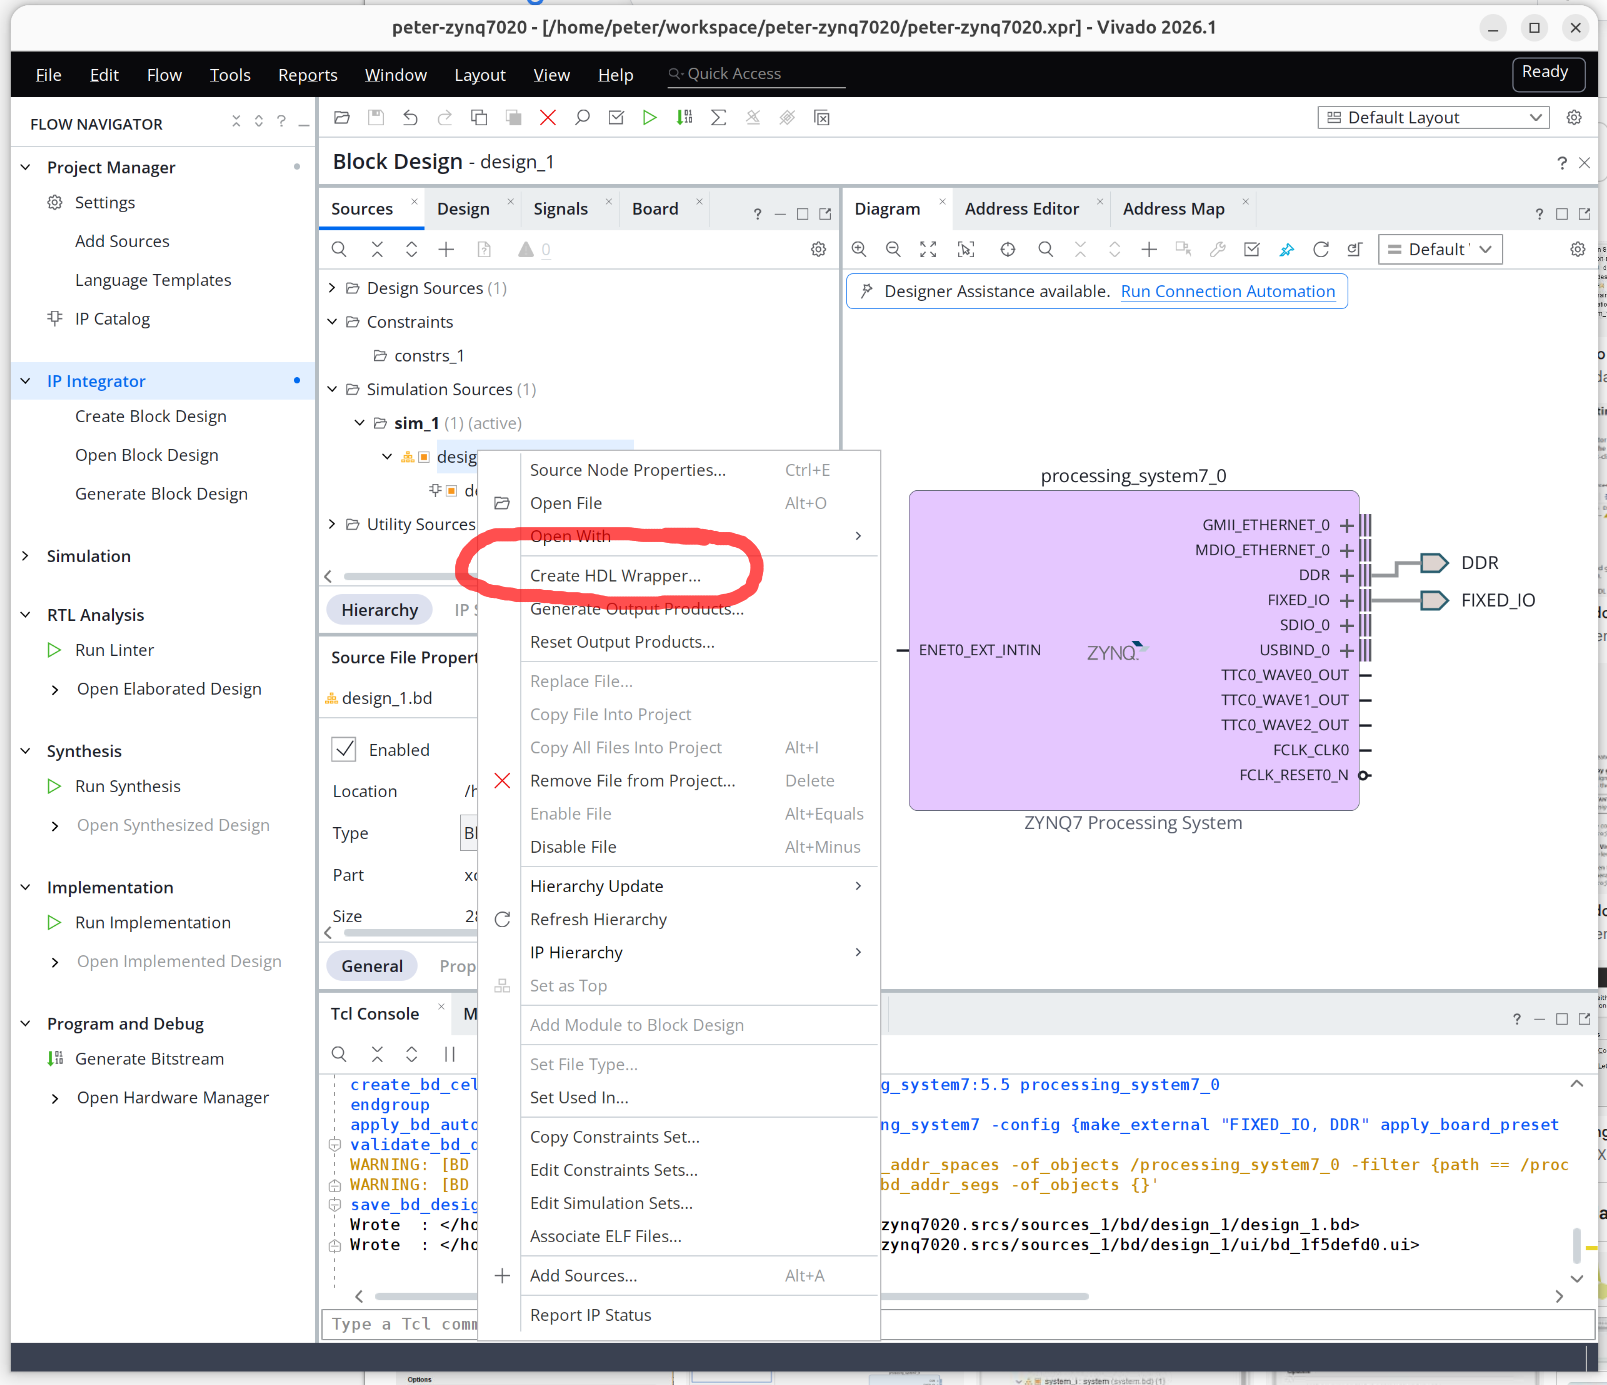
- Create HDL wrapper → right click wrapper → Generate Bitstream
- File → Export → Export Hardware → check Include bitstream → produces a
.xsafile (e.g.z7nano_wrapper.xsa)
Step 5: Create the PetaLinux project
source home/peter/xilinx/2026.1/Model_Composer/settings64.sh
source /opt/petalinux/settings.sh
petalinux-create -t project --template zynq -n z7nano-linux
cd z7nano-linux
petalinux-config --get-hw-description=/path/to/xsa/dir
In the config menu that opens:
- Subsystem AUTO Hardware Settings → confirm/adjust serial console (should be
ps7_uart_1or_0matching your design), Ethernet, SD - Image Packaging Configuration → Root filesystem type → set to
EXT4 (SD/eMMC/USB)(so rootfs lives directly on the SD card, not inside an initramfs) - Boot Image Settings → FSBL and u-boot should default correctly for Zynq-7000
petalinux-config -c kernel
petalinux-config -c rootfs
Step 6: Build
petalinux-build
This produces (under images/linux/): zynq_fsbl.elf, u-boot.elf, image.ub (kernel+devicetree+ramdisk fitImage), system.dtb, rootfs.tar.gz.
Then package the boot binary:
petalinux-package --boot --fsbl images/linux/zynq_fsbl.elf \
                   --fpga images/linux/system.bit \
                   --u-boot --force

petalinux-package --boot --fsbl images/linux/zynq_fsbl.elf --u-boot images/linux/u-boot.elf --force
This creates images/linux/BOOT.BIN.
Step 7: Prepare the microSD card
Partition it with two partitions (use fdisk/gparted):
| Partition | Size | Type | Contents |
|---|---|---|---|
| 1 | ~500MB | FAT32, boot flag | BOOT.BIN, image.ub, boot.scr (if generated) |
| 2 | remainder | ext4 | extracted rootfs |
sudo mkfs.vfat -F 32 -n BOOT /dev/sdX1
sudo mkfs.ext4 -L rootfs /dev/sdX2
sudo mount /dev/sdX1 /mnt/boot
sudo cp images/linux/BOOT.BIN images/linux/image.ub /mnt/boot/
sudo umount /mnt/boot
sudo mount /dev/sdX2 /mnt/root
sudo tar xzf images/linux/rootfs.tar.gz -C /mnt/root
sudo umount /mnt/root
Step 8: Set the boot mode jumper
On the Z7-Nano, boot mode is set by jumper J1 ("MODE" pins) — set it to the SD boot position (JTAG/QSPI/SD options are silkscreened near J1; check the reference manual's Boot Config diagram or the schematic if the silkscreen is unclear — standard Zynq-7000 SD boot mode pins are MIO[6:2] = 1 0 1 0 1).
Step 9: Boot it
- Insert the microSD card
- Connect the USB-UART port to your PC (
/dev/ttyUSB0, appears as CH340 device) - Open a serial terminal:
screen /dev/ttyUSB0 115200(orminicom -D /dev/ttyUSB0 -b 115200) - Power the board via USB
- You should see FSBL → U-Boot → kernel boot messages, ending in a login prompt (default PetaLinux root/root or root/petalinux depending on version config)
Troubleshooting notes
- DDR/FSBL hangs at boot: usually a MIG/PS7 DDR config mismatch — re-run Block Automation in Vivado rather than hand-editing PS7 DDR settings, since the board preset already has correct MT41K256M16 timings.
- No Ethernet: the RTL8211F PHY sometimes needs a reset GPIO toggle in the device tree (
phy-reset-gpio) — checkkarolzmijewski/z7-nano-7020examples for the exact PHY reset pin if this happens. - U-Boot doesn't find
image.ub: confirm the FAT32 partition has the boot flag set and file names match whatpetalinux-packageproduced. - Faster iteration: once this works, you can skip re-running Vivado each time and just re-run
petalinux-build+petalinux-packagefor software-only changes (keep the same.xsaunless you change PL hardware).
Alternative: PYNQ instead of plain PetaLinux
Since the board explicitly advertises a microSD slot "for PYNQ," if your goal is Python/Jupyter-based FPGA development rather than a bare Linux console, you can follow the same Vivado XSA export above but instead build via the PYNQ SD card image build flow, which layers Jupyter + the PYNQ Python overlay framework on top of a PetaLinux-built image. It's more work (bigger BSP customization, xilinx-pynq recipe) but gives you a full Jupyter notebook environment on the board out of the box.
Let me know which route you want (plain embedded Linux console vs. PYNQ/Jupyter), and whether you'd like help writing the actual Vivado TCL block-design script or PetaLinux device-tree overlay for specific peripherals (Ethernet, HDMI, GPIO) — I can generate those files for you.
1. Install Git LFS
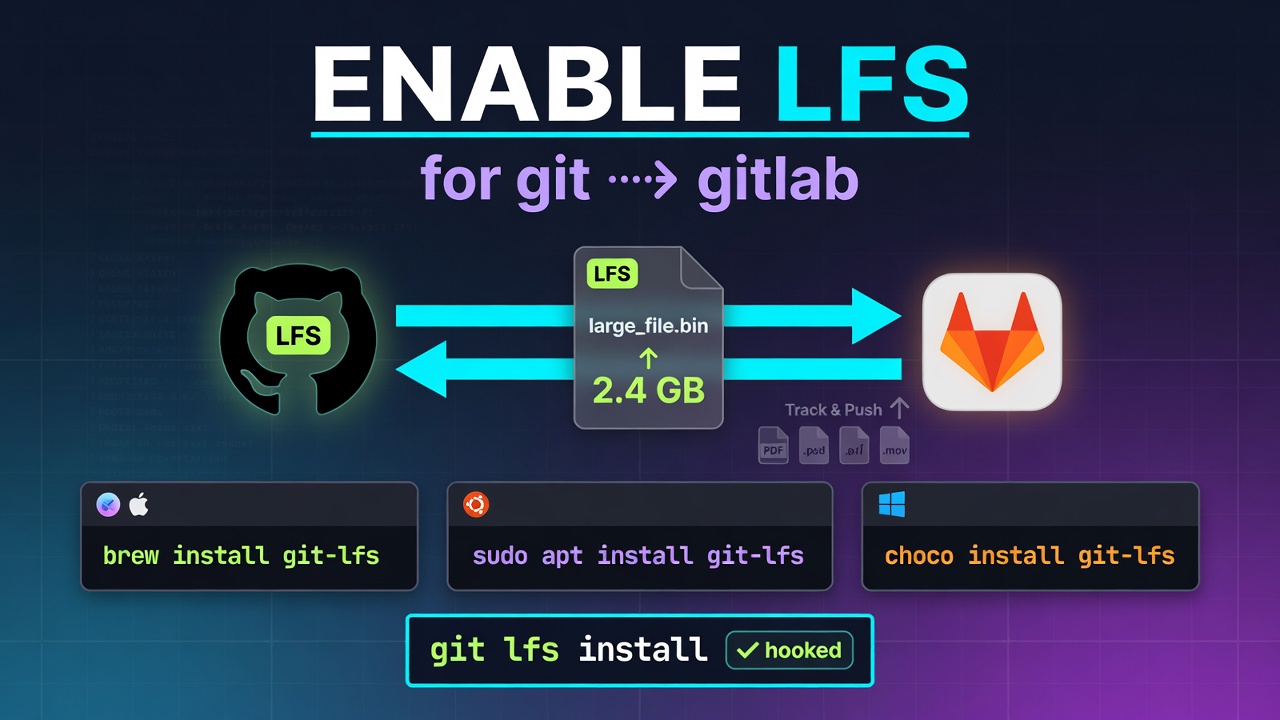
- macOS (via Homebrew):
brew install git-lfs - Ubuntu / Debian:
sudo apt install git-lfs - Windows (via Chocolatey or standalone installer):PowerShell
choco install git-lfs
2. Initialize Git LFS
Run this command once on your computer to hook it into Git:
Bash
git lfs install
Step 4: Track and Push Large Files in a Repository
To use LFS inside a repository, point Git to the specific file types you want to manage.
- Clone your repository and navigate into it:
git clone [email protected]:group/my-project.git cd my-project - Tell Git LFS which file extensions or patterns to track (e.g.,
.psd,.iso,.zip,.mp4):git lfs track "*.iso"This command automatically creates or updates a.gitattributesfile. - Important: Ensure the
.gitattributesfile is committed to your repository, otherwise collaborators will run into errors cloning LFS files:git add .gitattributesgit commit -m "Configure Git LFS tracking" - Add, commit, and push your large files as you normally would with Git:
cp ~/Downloads/large-file.iso ./git add large-file.isogit commit -m "Add large file via Git LFS"git push origin main
You will see output indicating that Git LFS is uploading the binary blobs separately from the standard Git commit metadata.
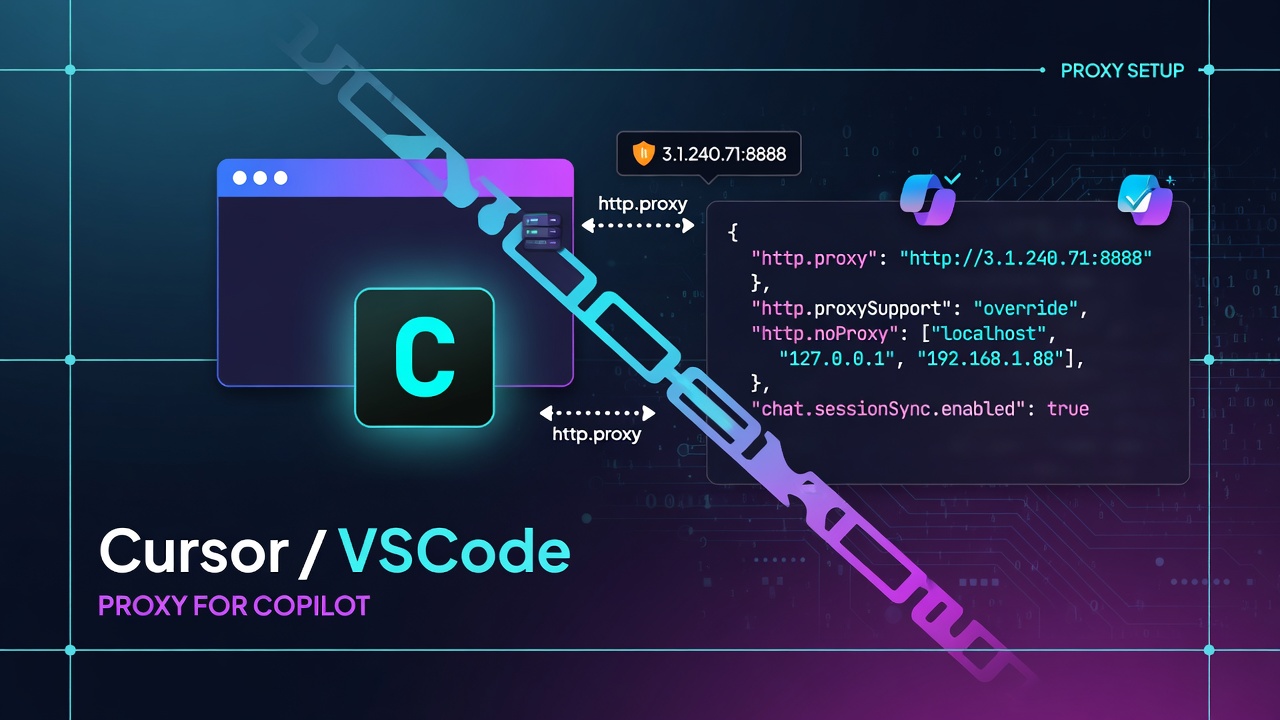
    "http.proxy": "http://3.1.240.71:8888",
    "http.proxySupport": "override",
    "http.noProxy": [
        "localhost",
        "127.0.0.1",
        "192.168.1.88",
        "192.168.1.88:1234",
        "61.244.87.154",
        "github.com",
        "gitlab.quantr.hk",
        "gitlab.hkprog.org"
    ],
    "chat.sessionSync.enabled": true,
    "cursor.general.disableHttp2": true
Tested in mac m5
Step 1: Qemu. First test the default qemu, then modify in step 3
git clone [email protected]:qemu/qemu.git

export PATH="$(brew --prefix bison)/bin:$PATH"
export PKG_CONFIG_PATH="$(brew --prefix glib)/lib/pkgconfig:$PKG_CONFIG_PATH"

# ./configure --extra-cflags="-I/opt/homebrew/opt/libiconv/include -I/usr/local/include" --extra-ldflags="-L/opt/homebrew/opt/libiconv/lib -L/usr/local/lib" --target-list=riscv64-softmmu --enable-plugins

./configure --extra-cflags="-I$(brew --prefix libiconv)/include -I/usr/local/include" --extra-ldflags="-L$(brew --prefix libiconv)/lib -L/usr/local/lib" --target-list=riscv64-softmmu --enable-plugins

make -j
sudo make install
Step 2: xv6-riscv
brew install riscv64-elf-gcc riscv64-elf-binutils riscv64-elf-gdb
git clone [email protected]:mit-pdos/xv6-riscv.git
make -j
make qemu
If you meet this, comment the variable out
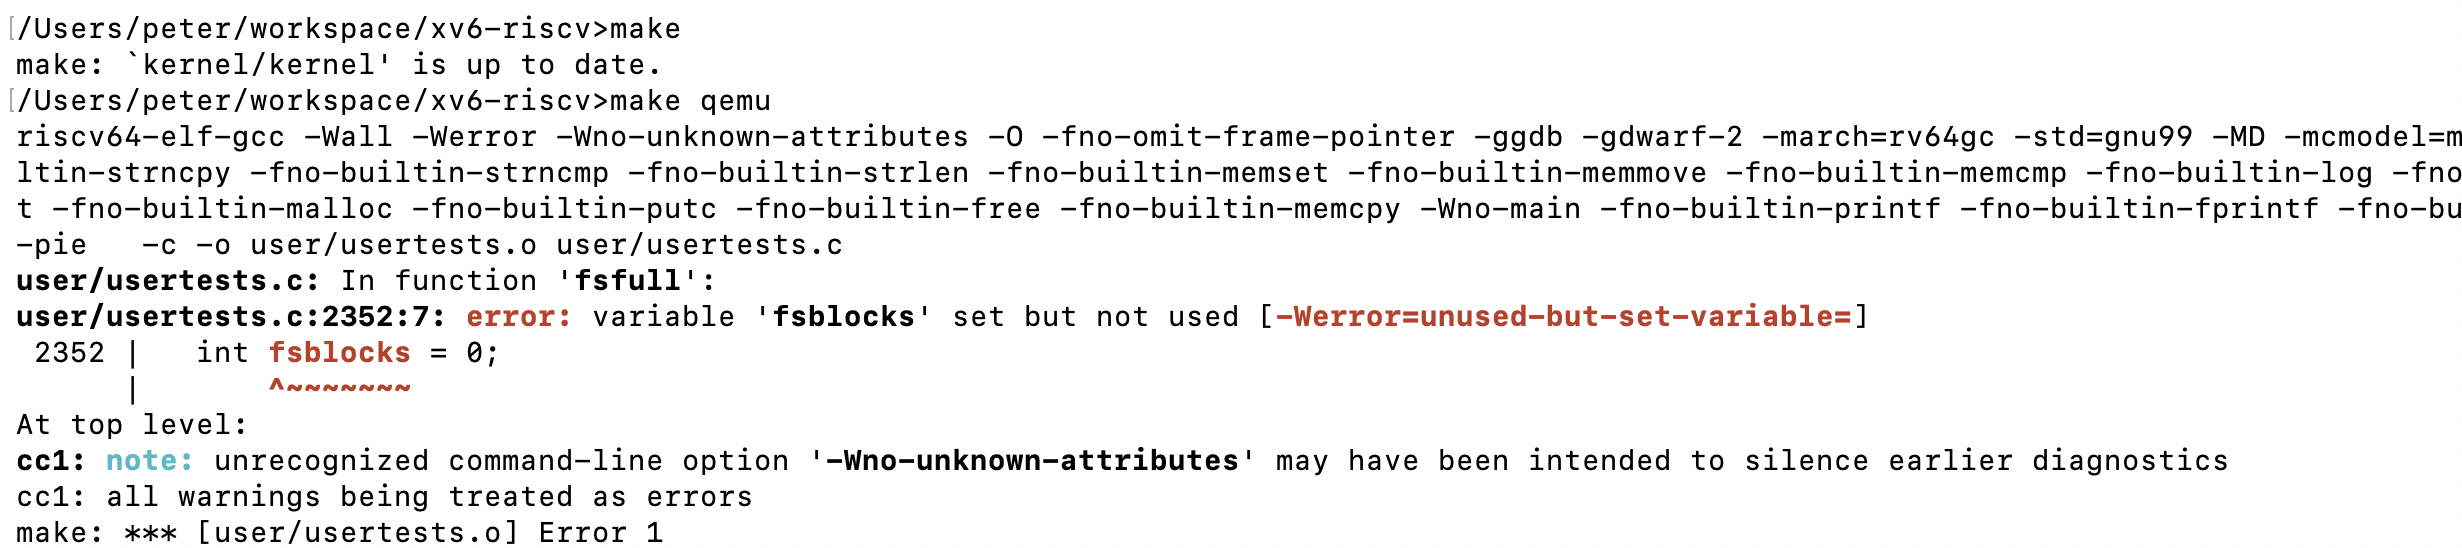
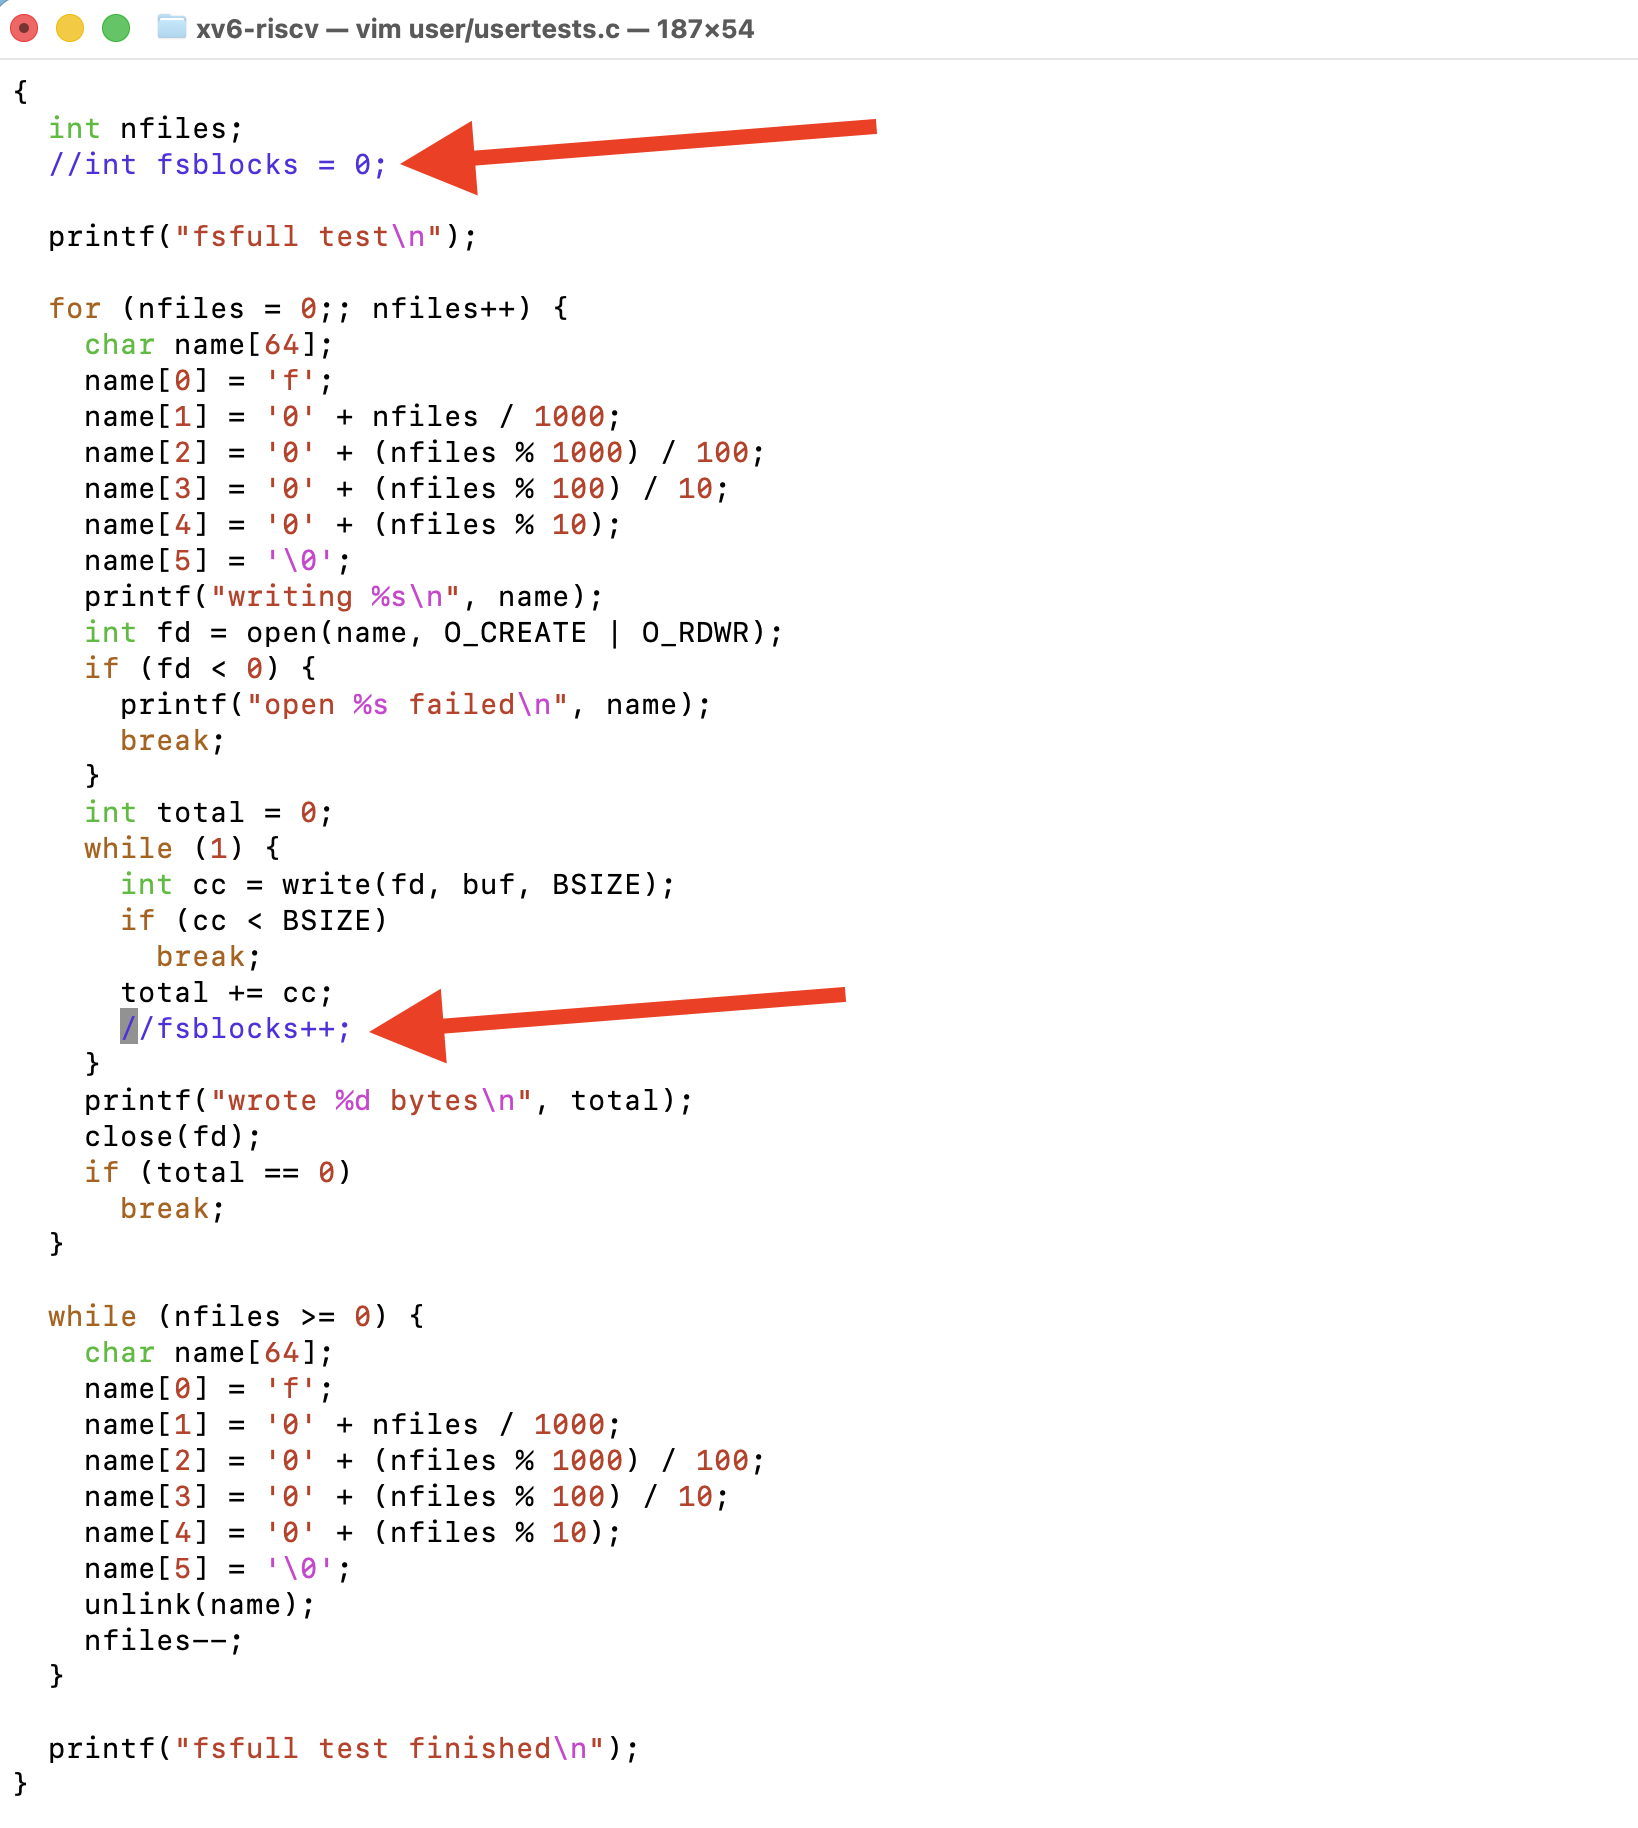
Step 3: modify the qemu
follow this https://www.quantr.foundation/project/?project=QEMU%20Log%20Panel
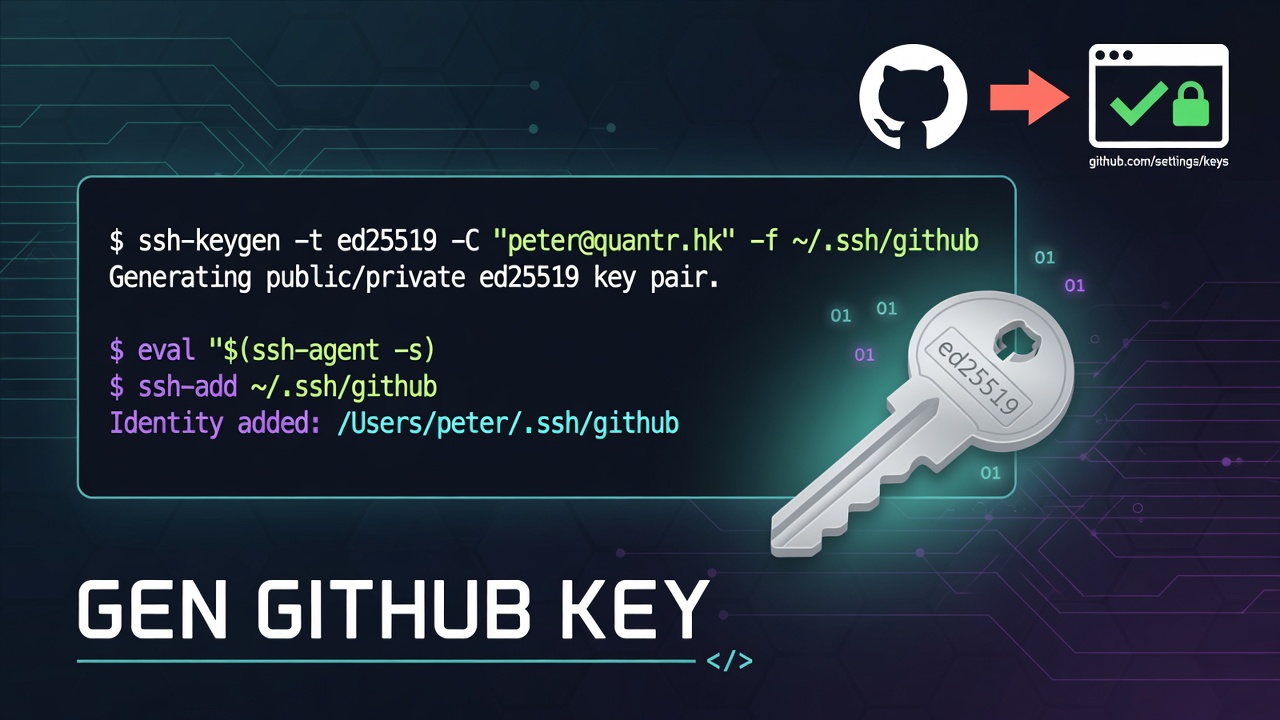
ssh-keygen -t ed25519 -C "[email protected]" -f ~/.ssh/github
eval "$(ssh-agent -s)"
ssh-add ~/.ssh/github
cat ~/.ssh/github.pub

https://github.com/settings/keys
Add key permanently
vi ~/.ssh/config
Host github.com
  HostName github.com
  User git
  IdentityFile ~/.ssh/github
  AddKeysToAgent yes

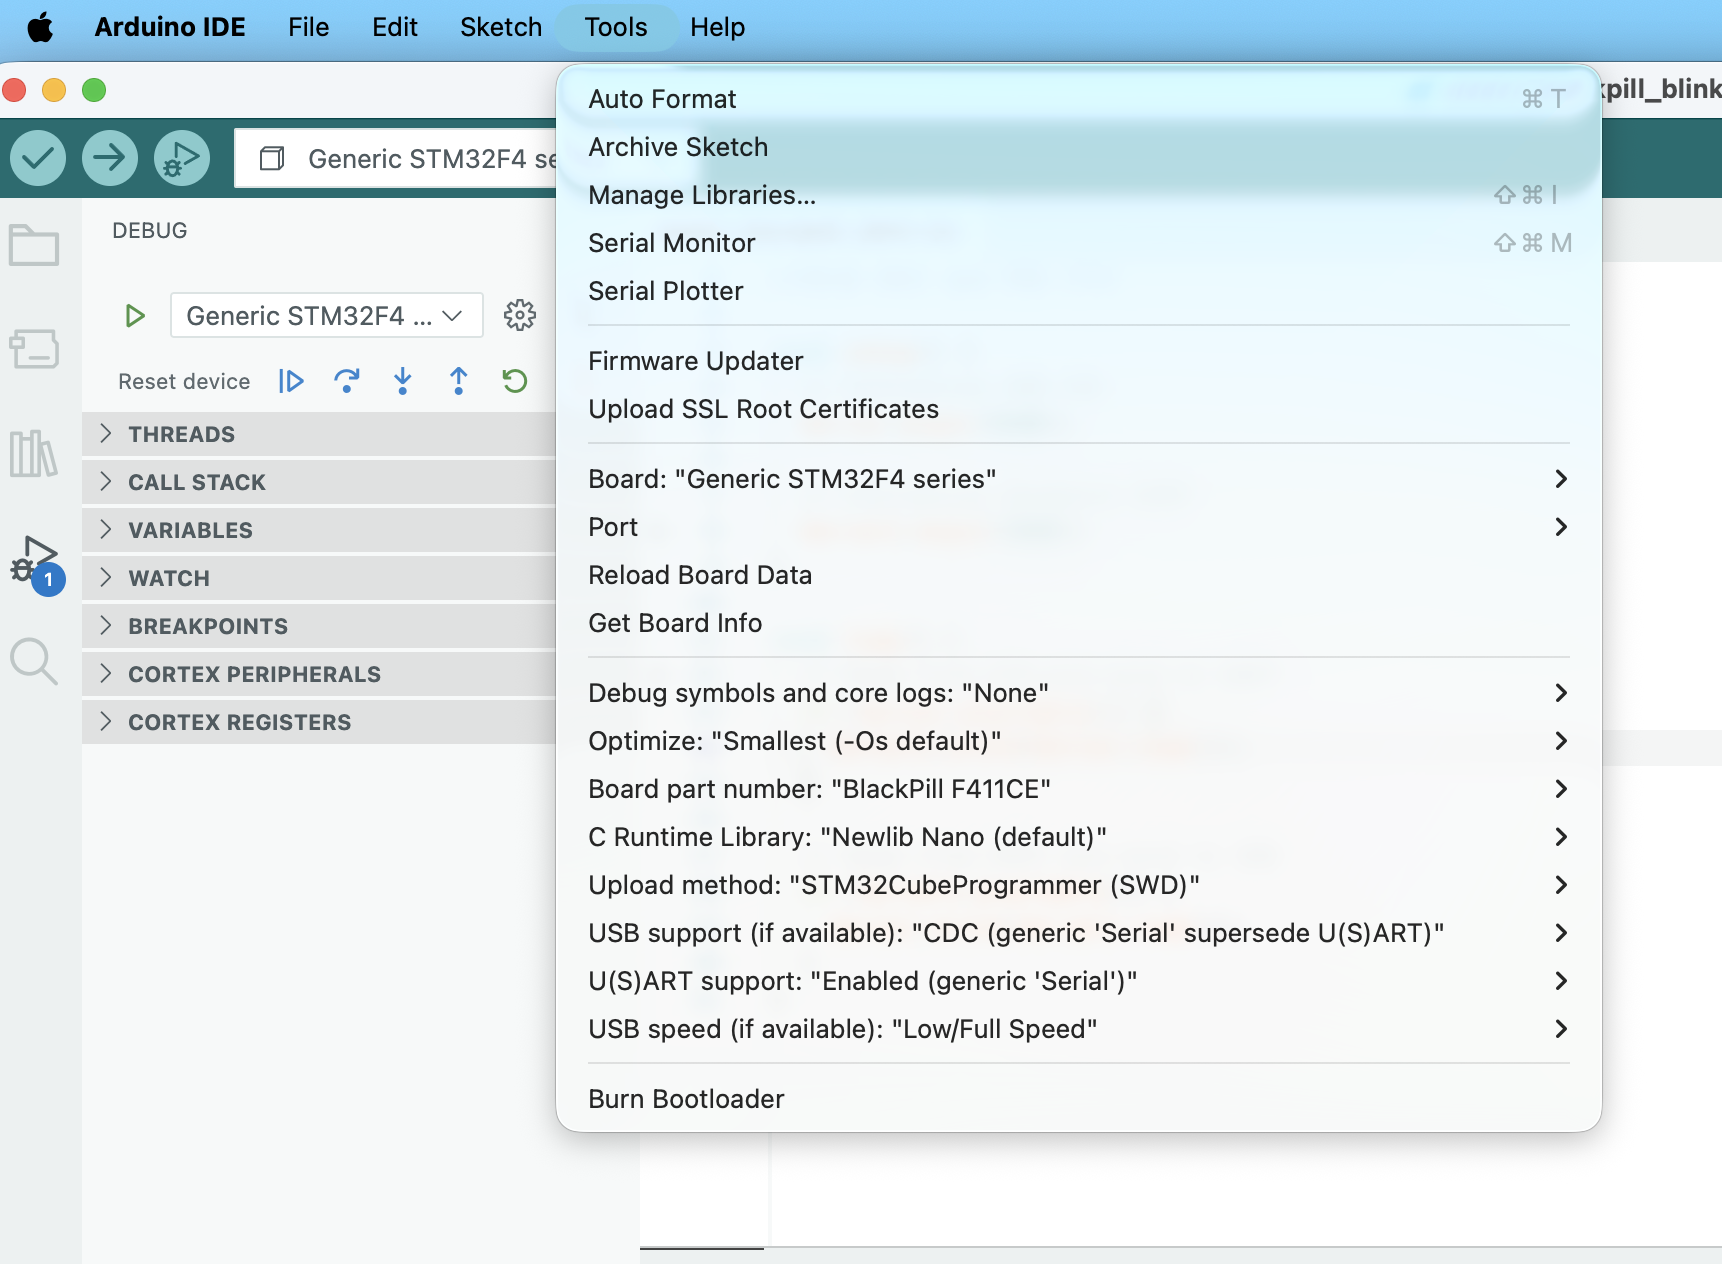
Step 1:
Check your Tools menu and make sure your settings look exactly like this:
- Board: Generic STM32F4 series
- Board Part Number: BlackPill F411CE (Do not pick the generic F411 options)
- U(S)ART support: Enabled (generic 'Serial')
- USB support: CDC (generic 'Serial' supersede U(S)ART)
//PA10 (RX) and PA9 (TX)

void setup() {
  // Initialize USB CDC
  Serial.begin(9600);

  // Initialize Hardware UART
  Serial1.begin(9600);
}

void loop() {
  // Read from USB and send to UART
  if (Serial.available()) {
    Serial1.write(Serial.read());
  }

  // Read from UART and send to USB
  if (Serial1.available()) {
    Serial.write(Serial1.read());
  }
}
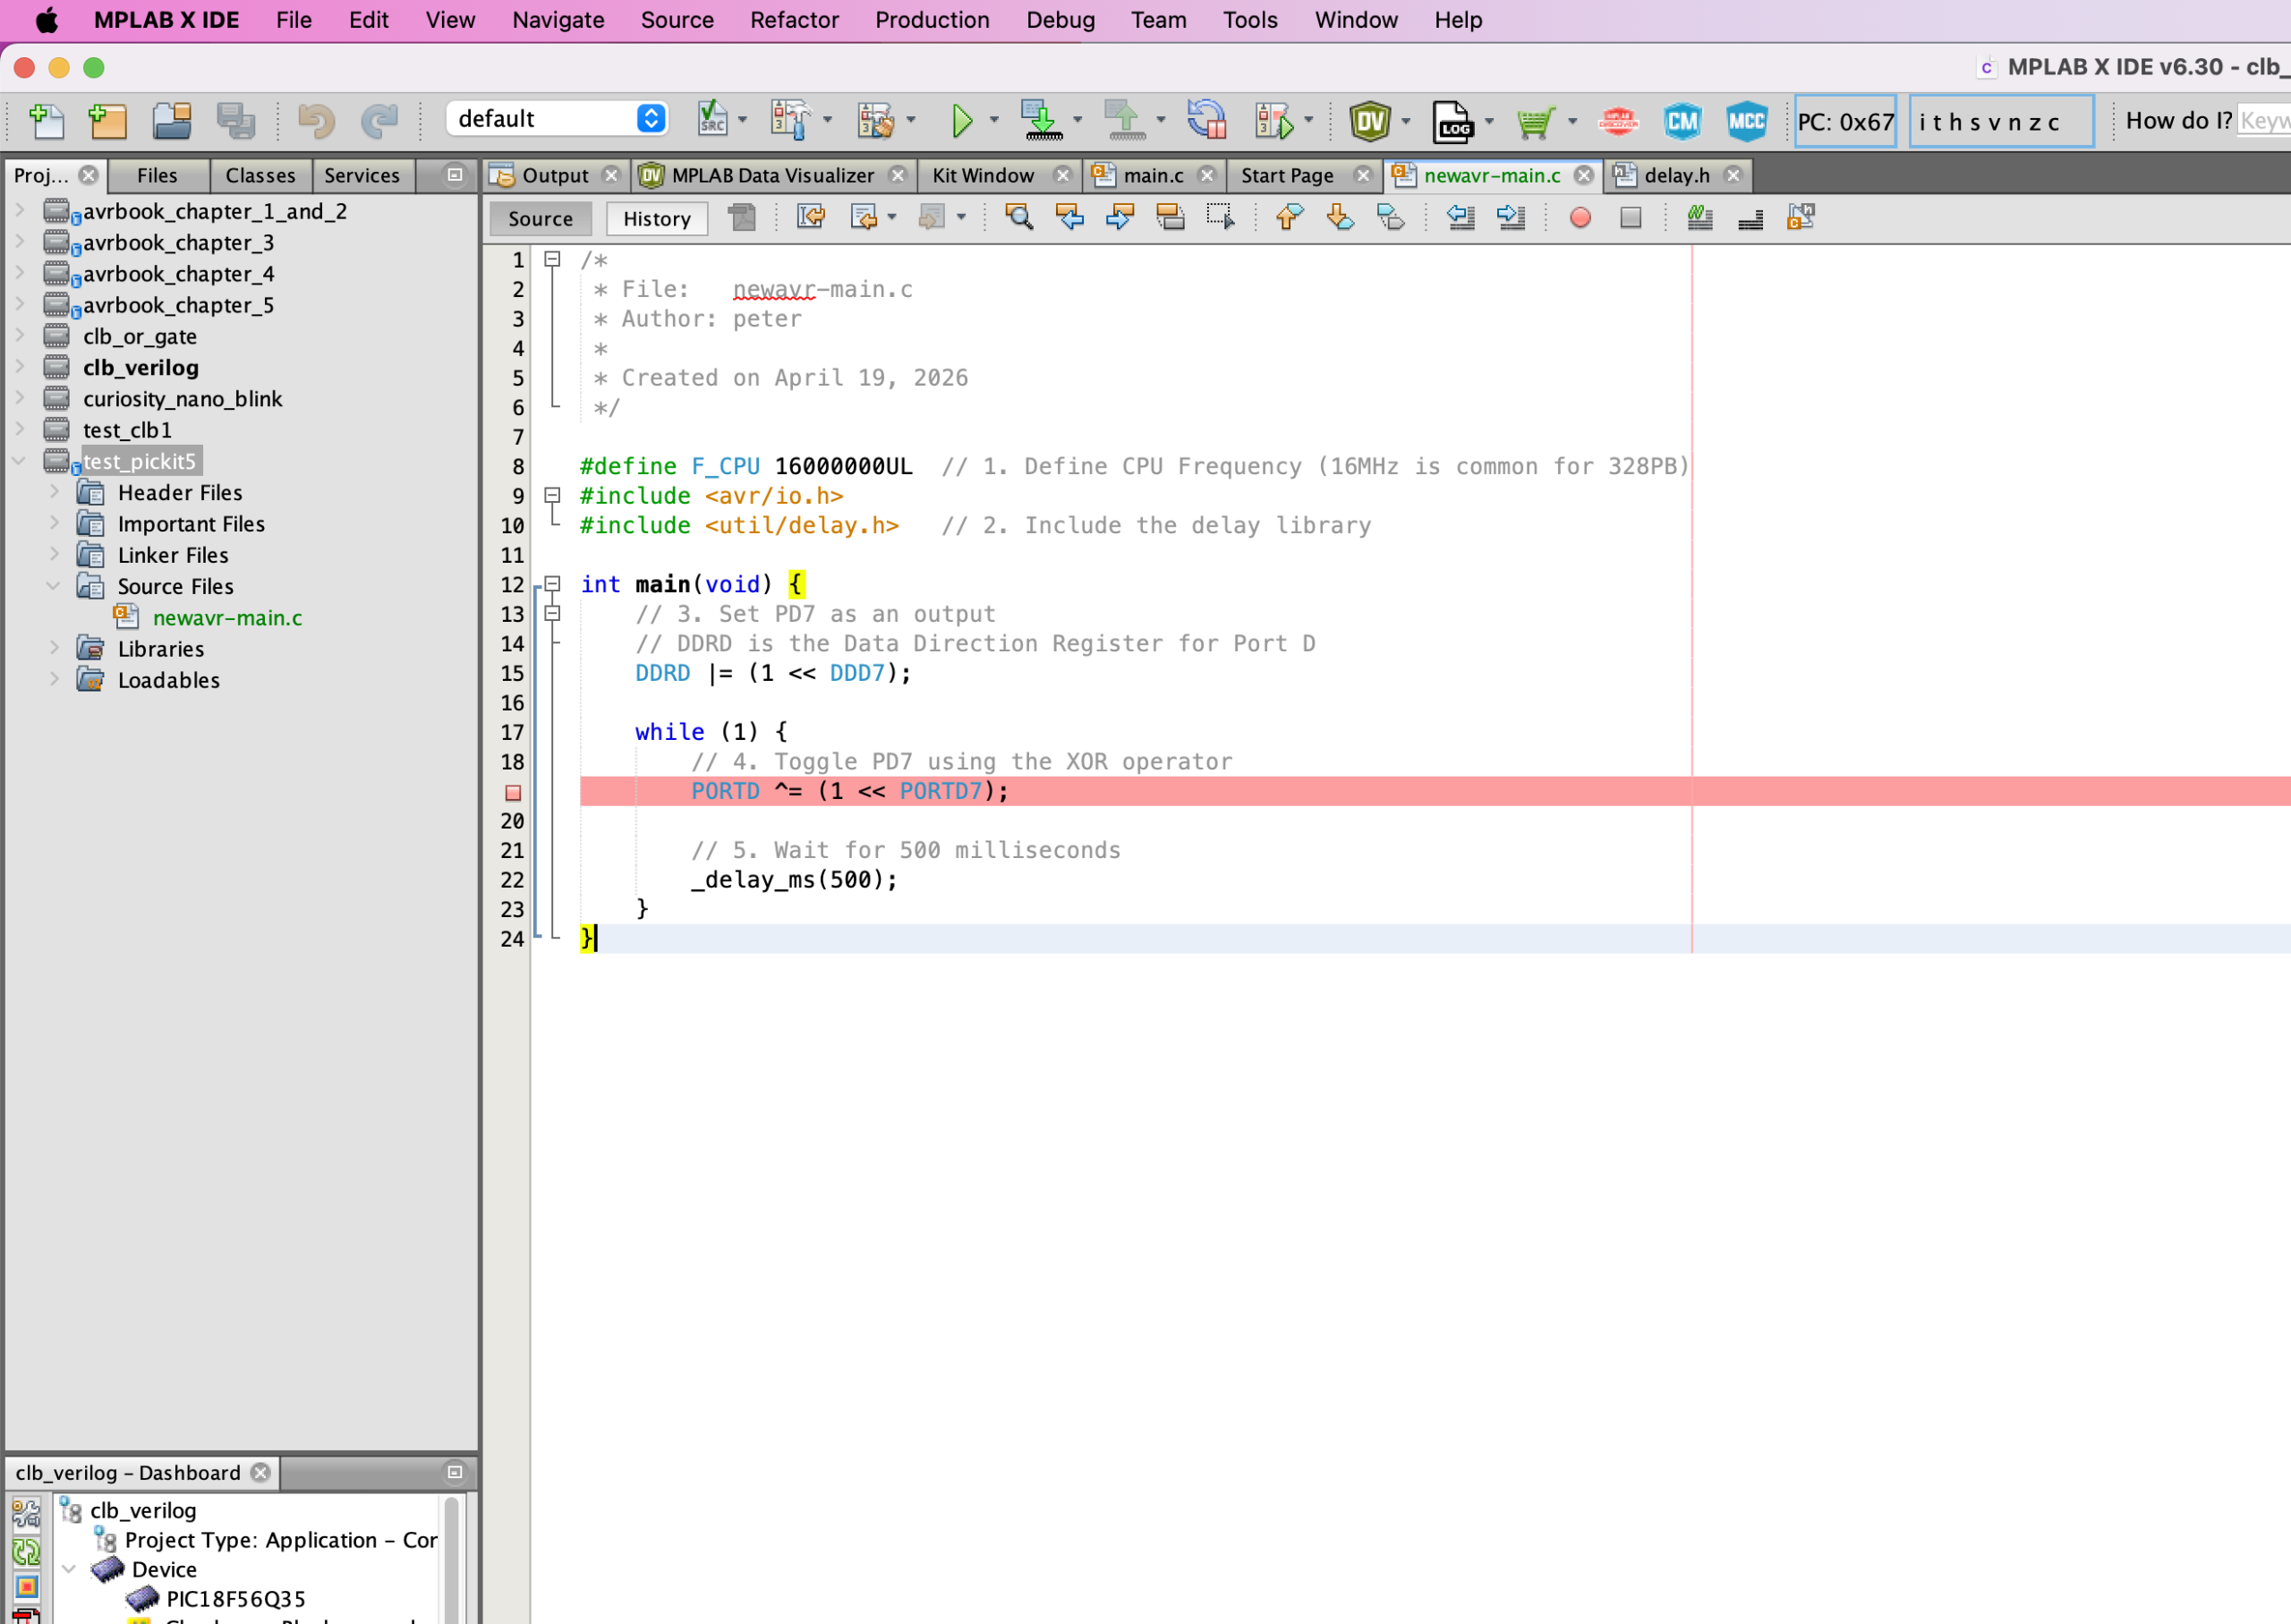
#define F_CPU 16000000UL  // 1. Define CPU Frequency (16MHz is common for 328PB)
#include <avr/io.h>
#include <util/delay.h>   // 2. Include the delay library

int main(void) {
    // 3. Set PD7 as an output
    // DDRD is the Data Direction Register for Port D
    DDRD |= (1 << DDD7);

    while (1) {
        // 4. Toggle PD7 using the XOR operator
        PORTD ^= (1 << PORTD7);

        // 5. Wait for 500 milliseconds
        _delay_ms(500);
    }
}
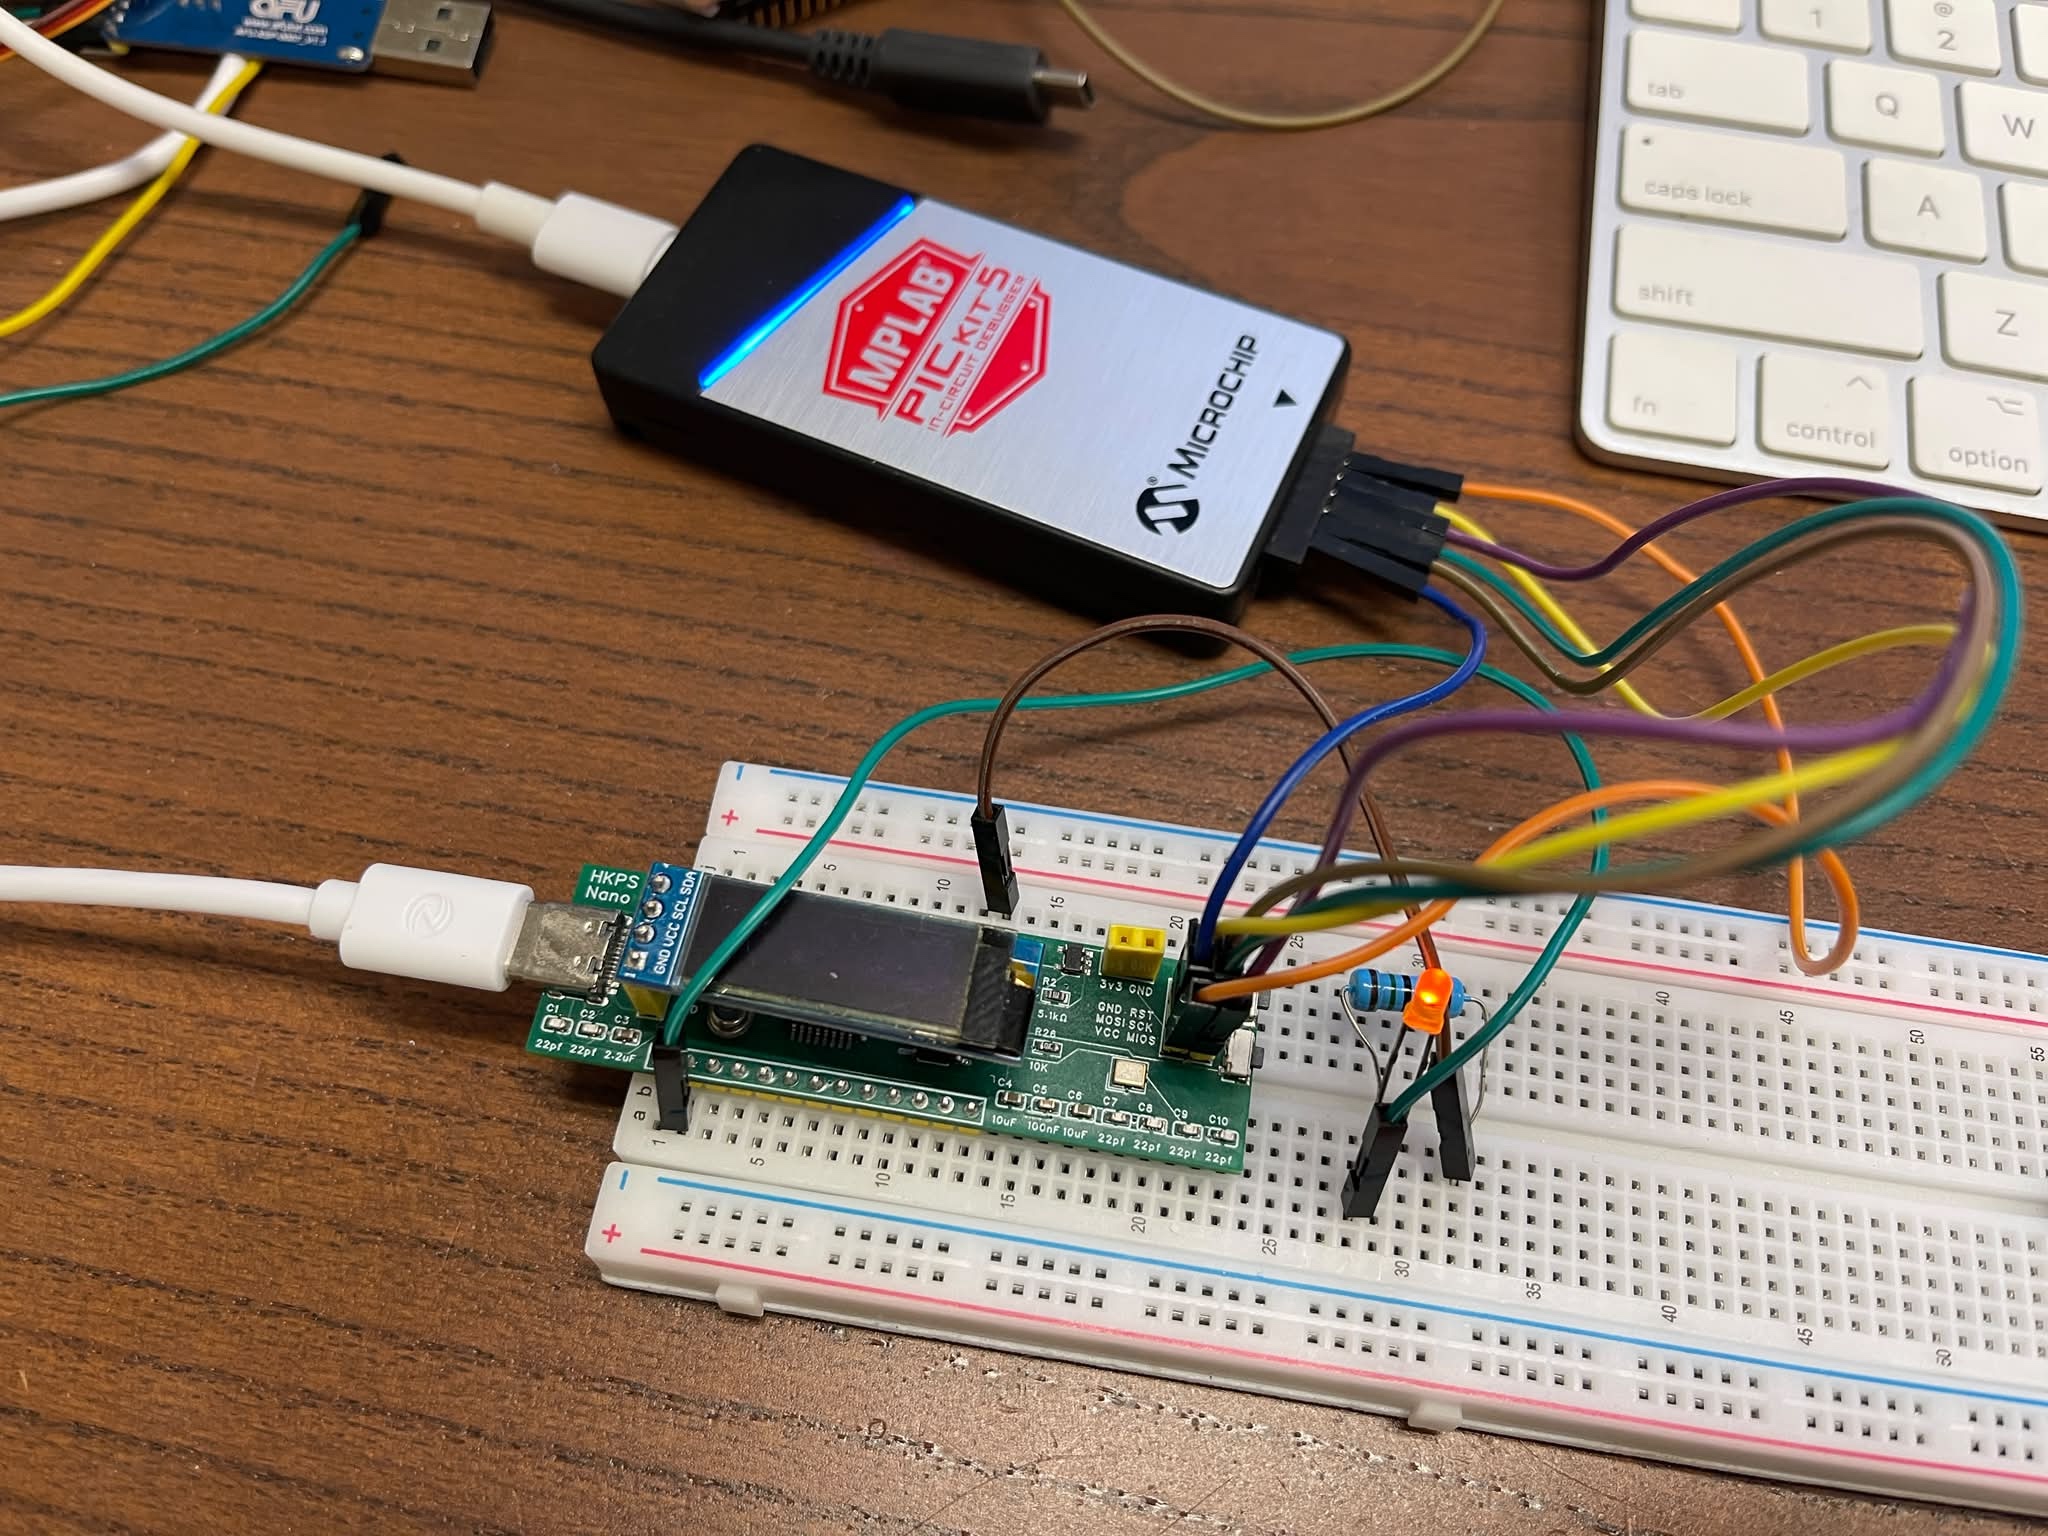
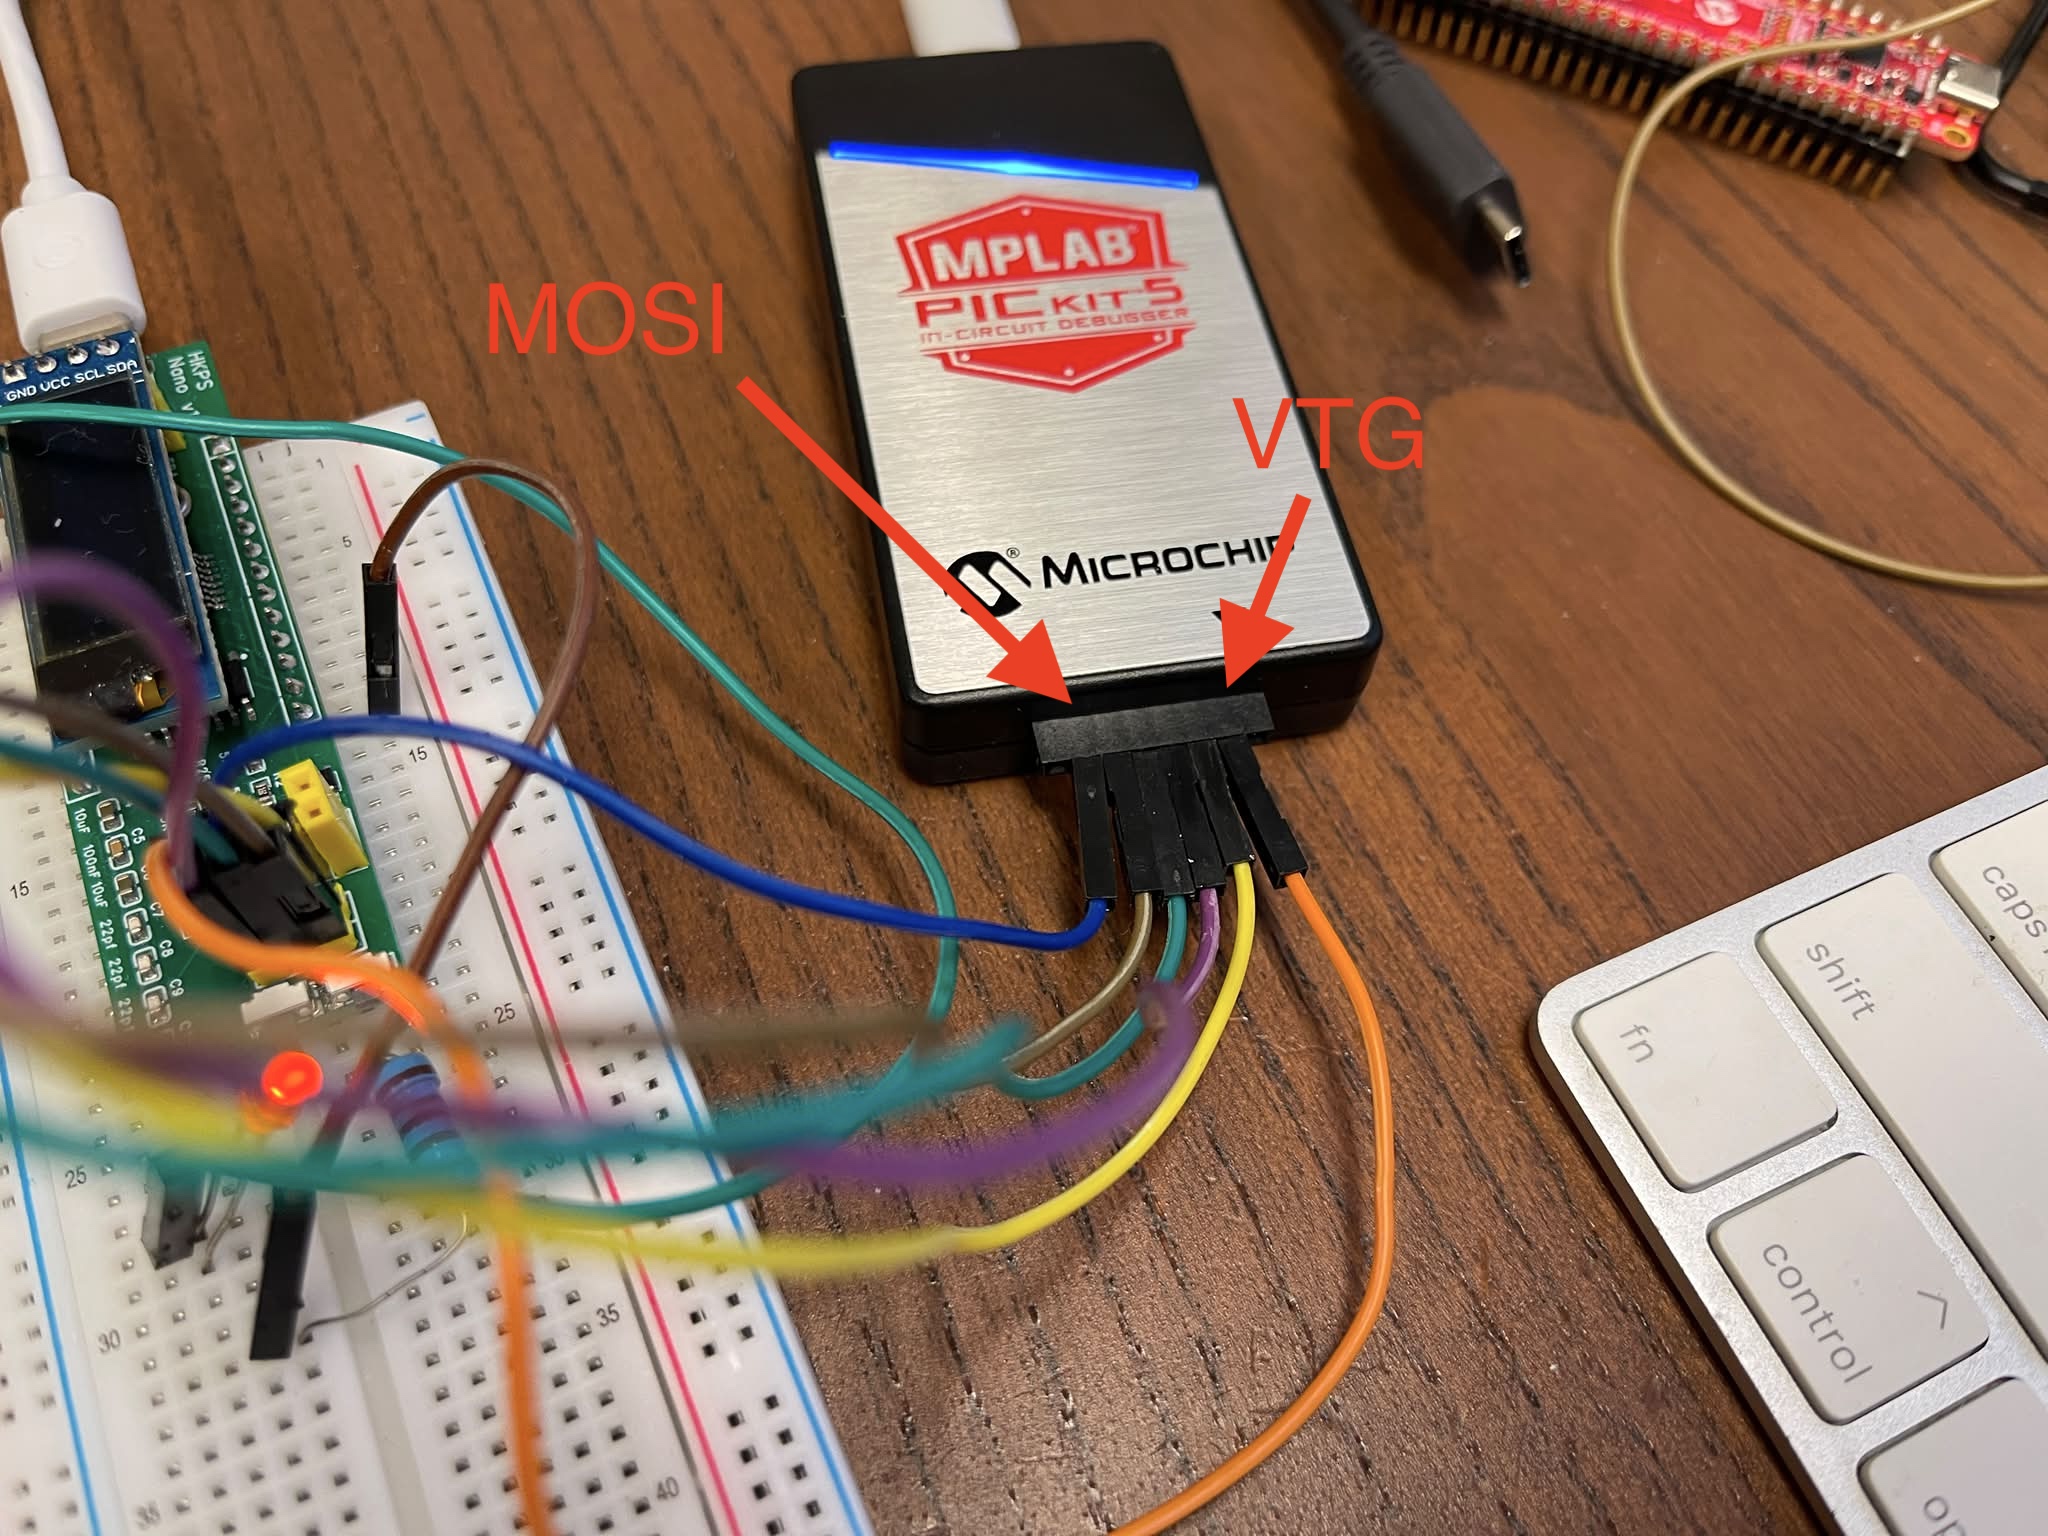
To burn the hex to avr in mac using command line, use this Makefile
export PATH="/Applications/microchip/mplabx/v6.30/mplab_platform/mplab_ipe/:$PATH"
MODEL=atmega328p
MODEL_AVRDUDE=m328pb
# MODEL_ISP=usbasp-clone
MODEL_ISP=avrisp2 # mkII

# For Microchip IPECMD, the device name usually needs to match the exact chip
MODEL_IPE=ATmega328PB
# IPECMD Tool Configuration
# -TPPK5 tells IPE to use the PICkit 5
TOOL_IPE=-TPPK5

all: SSD1306.o TWI.o main.hex

SSD1306.o: ssd1306/SSD1306.c
	avr-gcc -mmcu=$(MODEL)  -Wall -Os -c $? -o $@

TWI.o: ssd1306/TWI.c
	avr-gcc -mmcu=$(MODEL)  -Wall -Os -c $? -o $@

main.hex: main.c
	avr-gcc -mmcu=$(MODEL)  -Wall -Os -o main.elf SSD1306.o TWI.o main.c
	avr-objcopy -j .text -j .data -O ihex main.elf main.hex
	avr-size --format=avr --mcu=$(MODEL) main.elf

upload:
	avrdude -c $(MODEL_ISP) -p $(MODEL_AVRDUDE) -U flash:w:main.hex

upload_pickit5:
	ipecmd.sh $(TOOL_IPE) -P$(MODEL_IPE) -F"$(CURDIR)/main.hex" -M

readfuse:
	avrdude -c $(MODEL_ISP) -p $(MODEL_AVRDUDE) -U hfuse:r:-:h -U lfuse:r:-:h

writefuse:
	avrdude -c $(MODEL_ISP) -p $(MODEL_AVRDUDE) -U lfuse:w:0x62:m -U hfuse:w:0xD9:m -U efuse:w:0xFF:m -U lock:w:0xFF:m

clean:
	-rm *.o
	-rm main.hex
	-rm main.elf
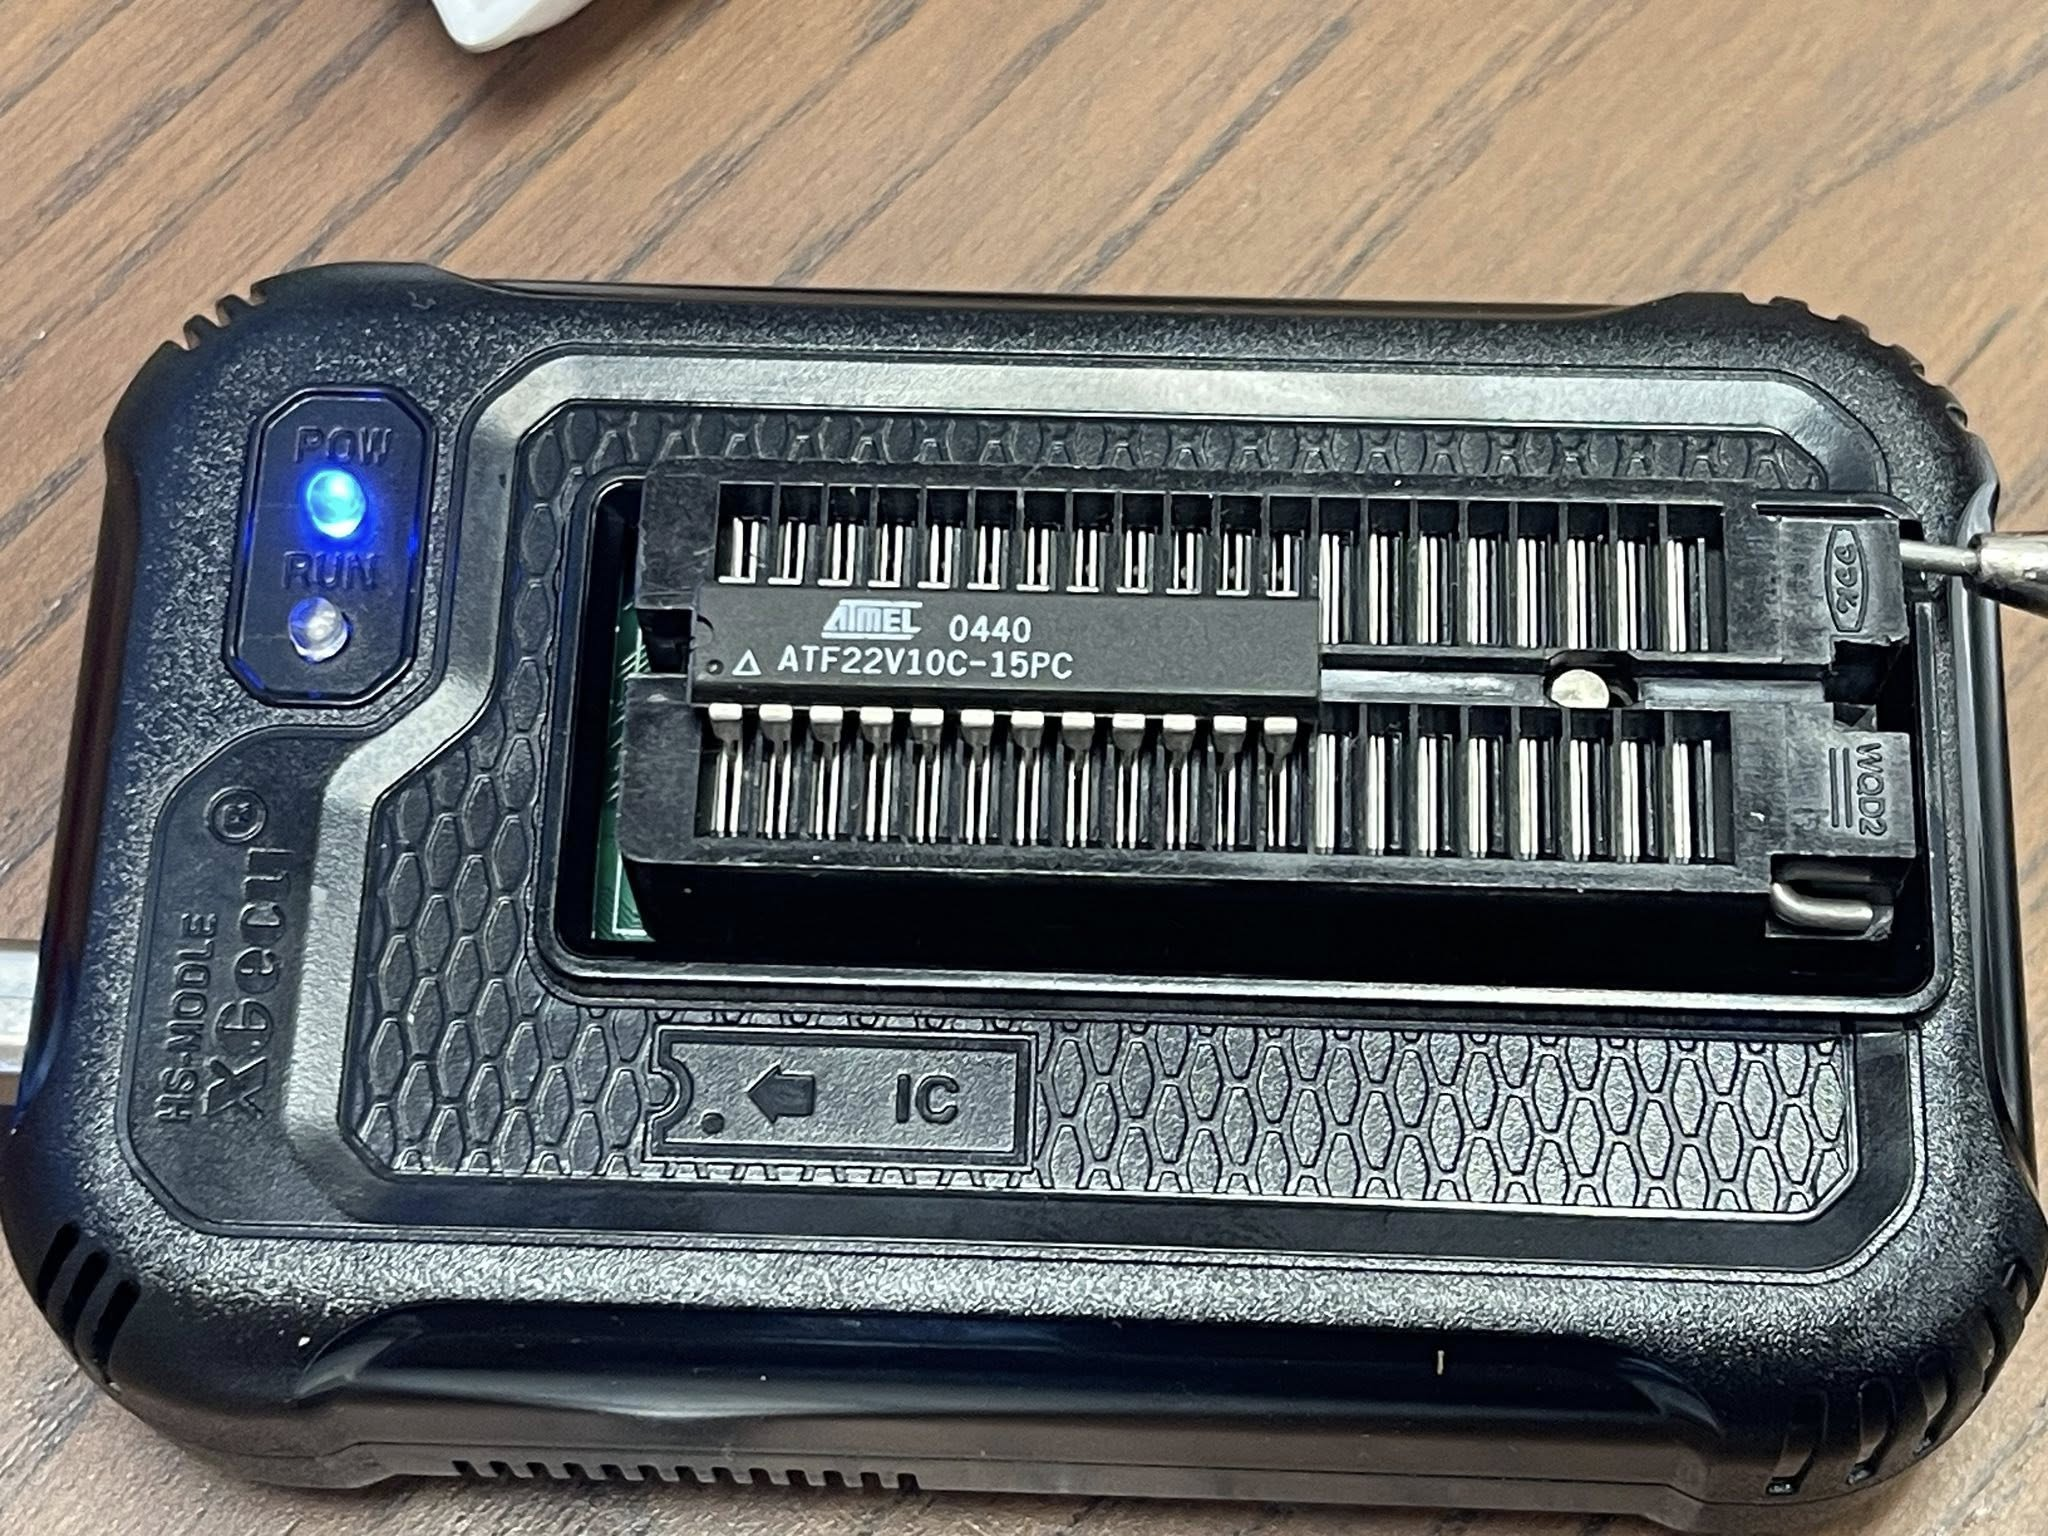
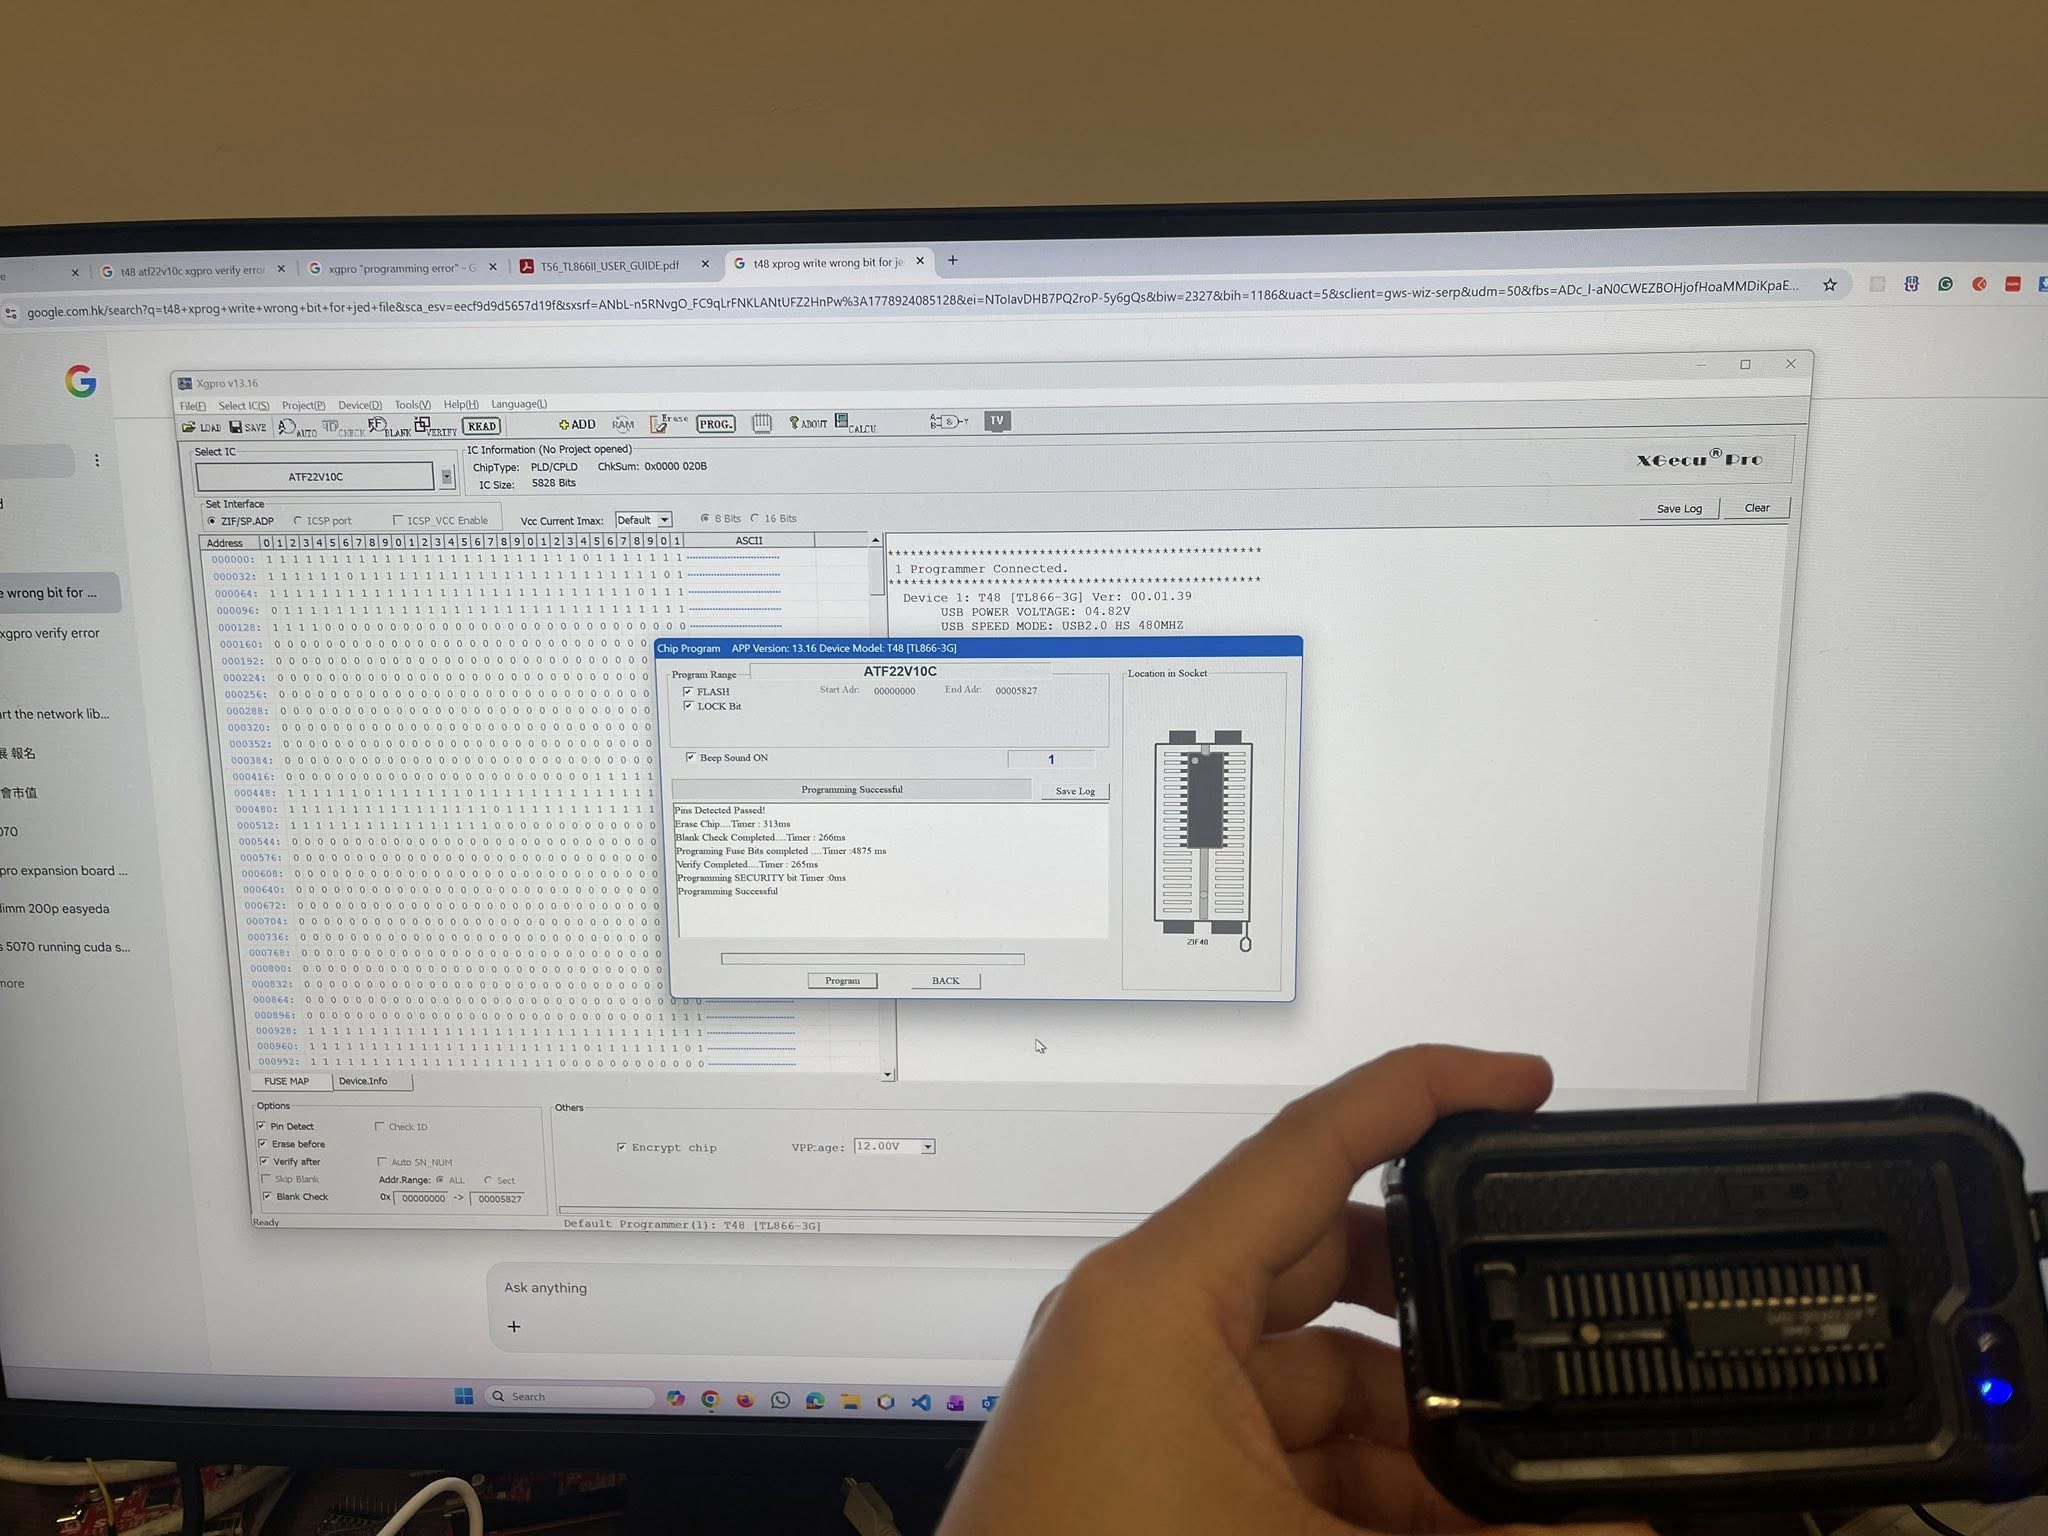
I bought 10 ATF22V10C from here and T48 programmer here, got 1 broken. First, here is the simple and gate program, save it to and.pld
GAL22V10
AND_Gate

Clock A  B  NC NC NC NC NC NC NC NC GND
NC    NC NC NC NC NC NC NC NC NC Y  VCC


Y = A * B			; AND gate: Y is high only when both A and B are high


DESCRIPTION
Simple 2-input AND gate example using a GAL22V10.
Inputs:  A (pin 2), B (pin 3)
Output:  Y (pin 23) - combinatorial output
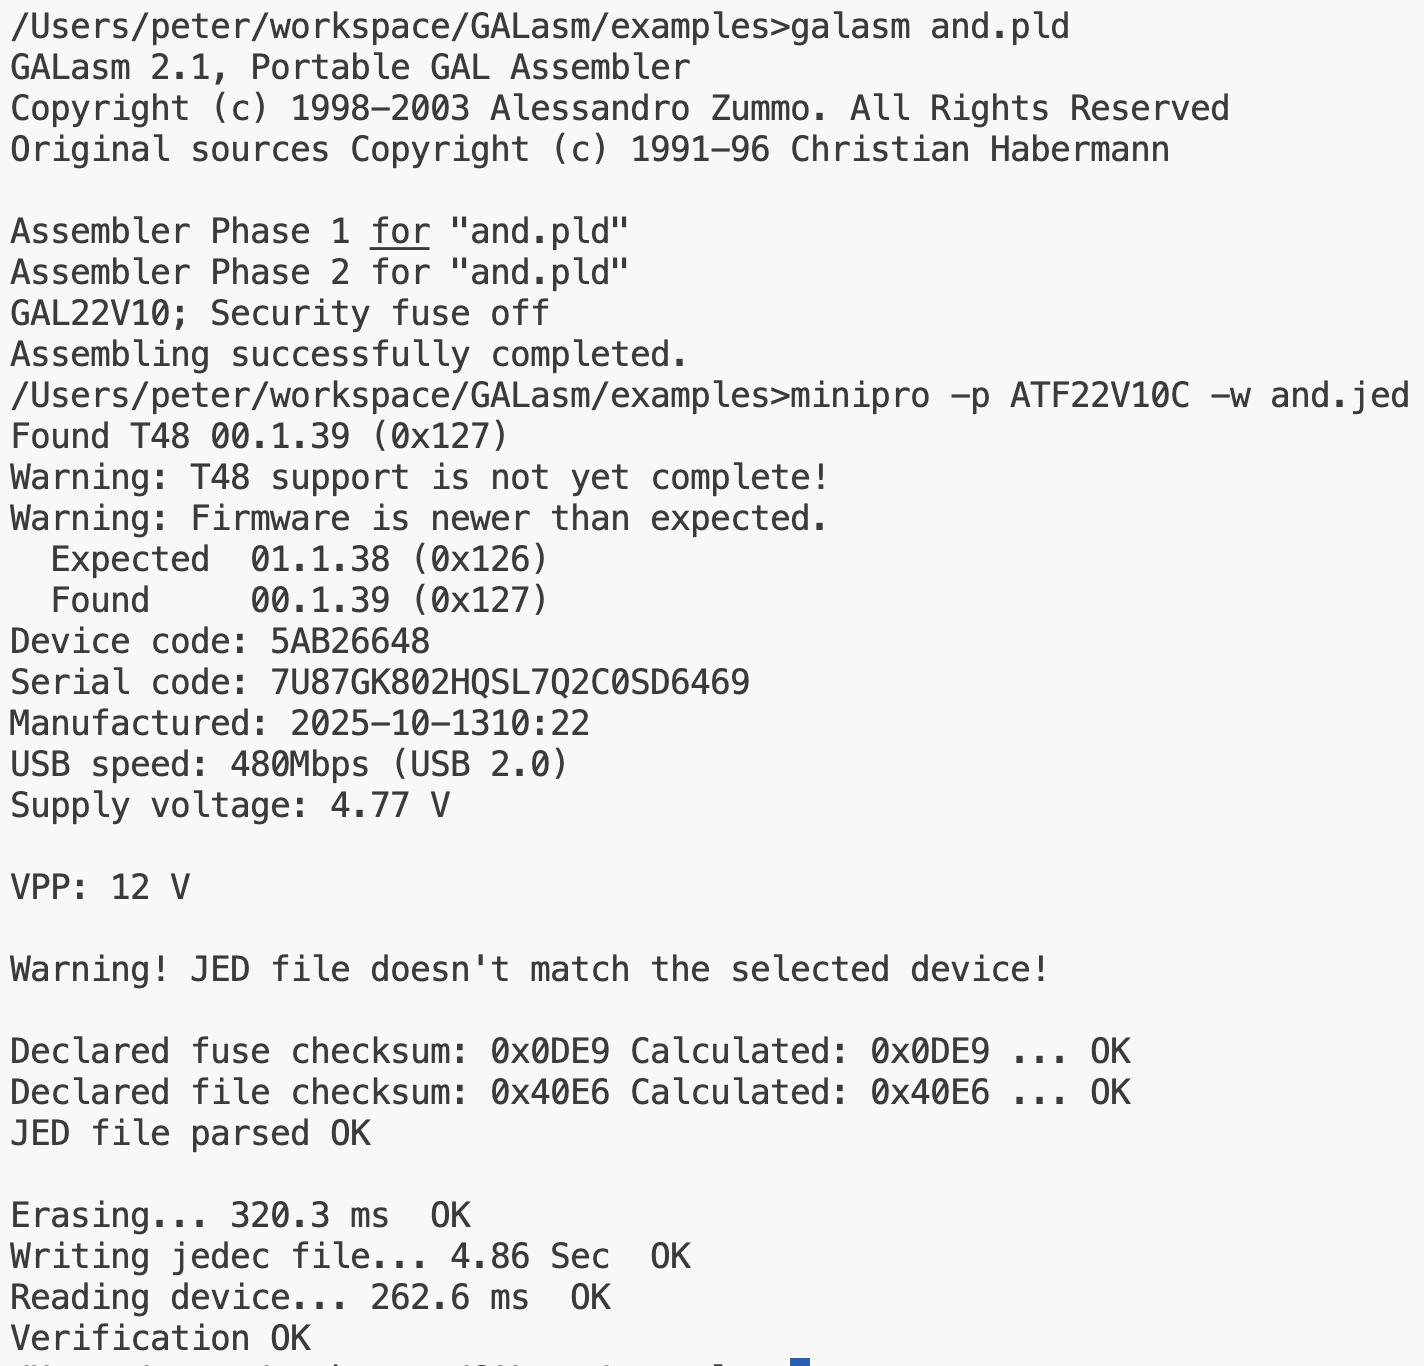
Build galasm and minipro. Then compile and burn it by:
galasm and.pld
minipro -p ATF22V10C -w and.jed
To read back the jed from chip, you can
minipro -p ATF22V10C -r output.jed
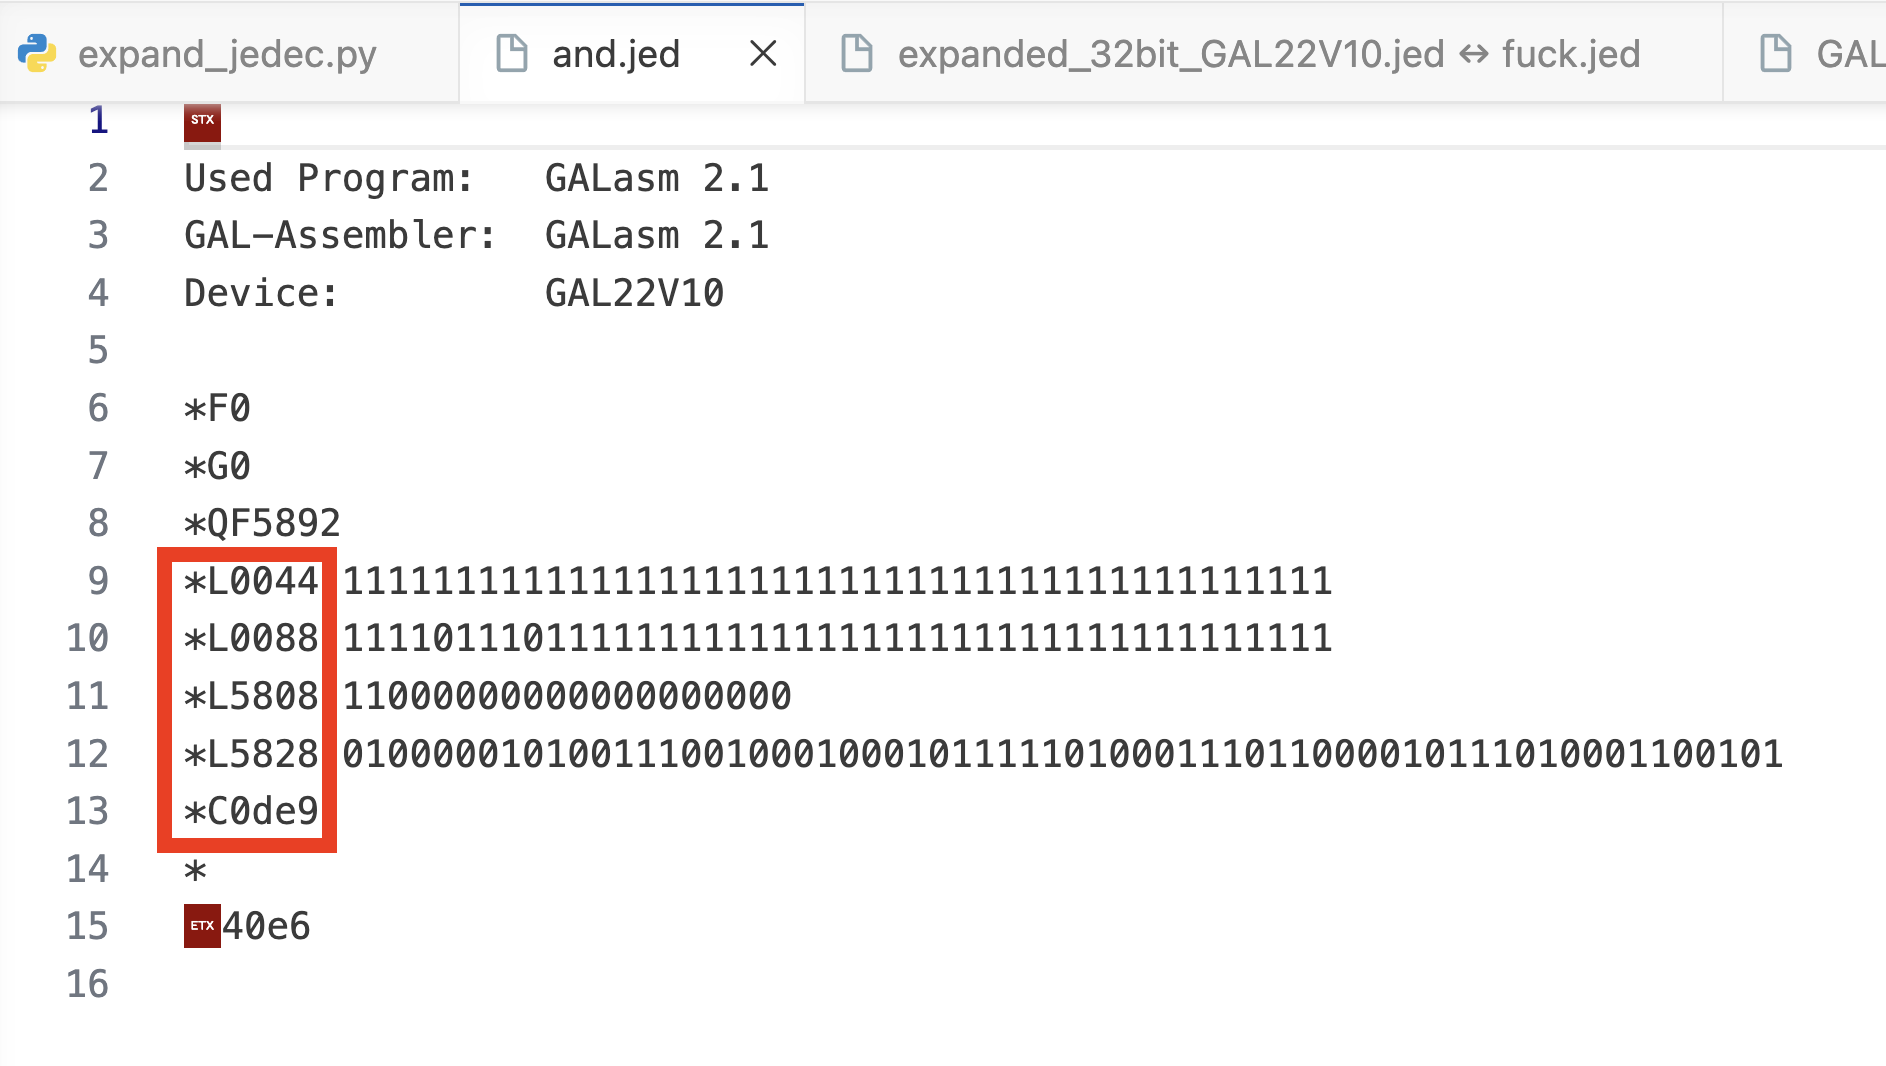
You can just compare the output.jed to your original and.jed, because and.jed is compiled by galasm and shortformed. I have a python to expand the jed, so the addresses in both jed files will be aligned.
See the address on left hand side then you see it is shortformed
import re
import sys

def expand_jedec_32bits(input_text):
    # 1. Determine default value from *F flag
    default_val = '0' if '*F0' in input_text else '1'

    qf_match = re.search(r'\*QF(\d+)', input_text)
    if not qf_match:
        raise ValueError("Could not find fuse count (*QF) field in JEDEC file.")
    total_fuses = int(qf_match.group(1))

    # 2. Initialize the entire fuse array with the default value
    fuse_array = [default_val] * total_fuses

    # 3. Parse and fill explicit allocation fields (*LXXXX)
    l_fields = re.findall(r'\*L(\d+)\s+([01\s]+)', input_text)

    for start_index_str, bit_string in l_fields:
        start_index = int(start_index_str)
        bits = bit_string.replace(" ", "").replace("\n", "").replace("\r", "")

        for i, bit in enumerate(bits):
            if start_index + i < total_fuses:
                fuse_array[start_index + i] = bit

    # 4. Calculate Fuse Checksum (Sum of all 8-bit fuse bytes)
    fuse_checksum = 0
    for i in range(0, total_fuses, 8):
        byte_bits = "".join(fuse_array[i:i+8])
        if len(byte_bits) < 8:
            byte_bits = byte_bits.ljust(8, '0')
        # Standard JEDEC checksum mirrors the bit order of each byte
        byte_val = int(byte_bits[::-1], 2)
        fuse_checksum = (fuse_checksum + byte_val) & 0xFFFF

    # 5. Construct the Longform Output Body (Row width = 32 bits)
    output_lines = []

    # Grab everything before the QF tag to keep original headers/comments
    header_end_idx = input_text.find('*QF')
    output_lines.append(input_text[:header_end_idx].strip())
    output_lines.append(f"*QF{total_fuses}*")

    row_size = 32  # 32 bits per row configuration
    for addr in range(0, total_fuses, row_size):
        chunk = fuse_array[addr:addr+row_size]
        chunk_str = "".join(chunk)

        # Append row format: *L<address> <bits>*
        # Keeping a space here as it is standard formatting for readability
        output_lines.append(f"*L{addr:05d} {chunk_str}")

    # Add the generated fuse checksum
    output_lines.append(f"*C{fuse_checksum:04X}*")

    # End of text transmission block
    output_body = "\n".join(output_lines) + "\n\x03"

    # 6. Calculate File Checksum (ASCII sum from STX to ETX)
    file_checksum = sum(ord(c) for c in output_body) + 0x02  # Include STX (0x02)
    file_checksum &= 0xFFFF

    final_jedec = f"\x02\n{output_body}{file_checksum:04x}"
    return final_jedec

# --- Execution ---
if __name__ == "__main__":
    if len(sys.argv) < 2:
        print("Usage: expand_jedec.py <input.jed> [output.jed]")
        sys.exit(1)

    input_file = sys.argv[1]
    output_file = sys.argv[2] if len(sys.argv) > 2 else input_file.rsplit(".", 1)[0] + "_expanded.jed"

    try:
        with open(input_file, "r", encoding="ascii") as f:
            shortform_data = f.read()

        longform_jedec = expand_jedec_32bits(shortform_data)
        with open(output_file, "w", encoding="ascii") as f:
            f.write(longform_jedec)
        print(f"Success! Generated '{output_file}' with 32-bit width arrays.")
    except FileNotFoundError:
        print(f"Error: Input file '{input_file}' not found.")
        sys.exit(1)
    except Exception as e:
        print(f"Error expanding JEDEC map: {e}")
        sys.exit(1)
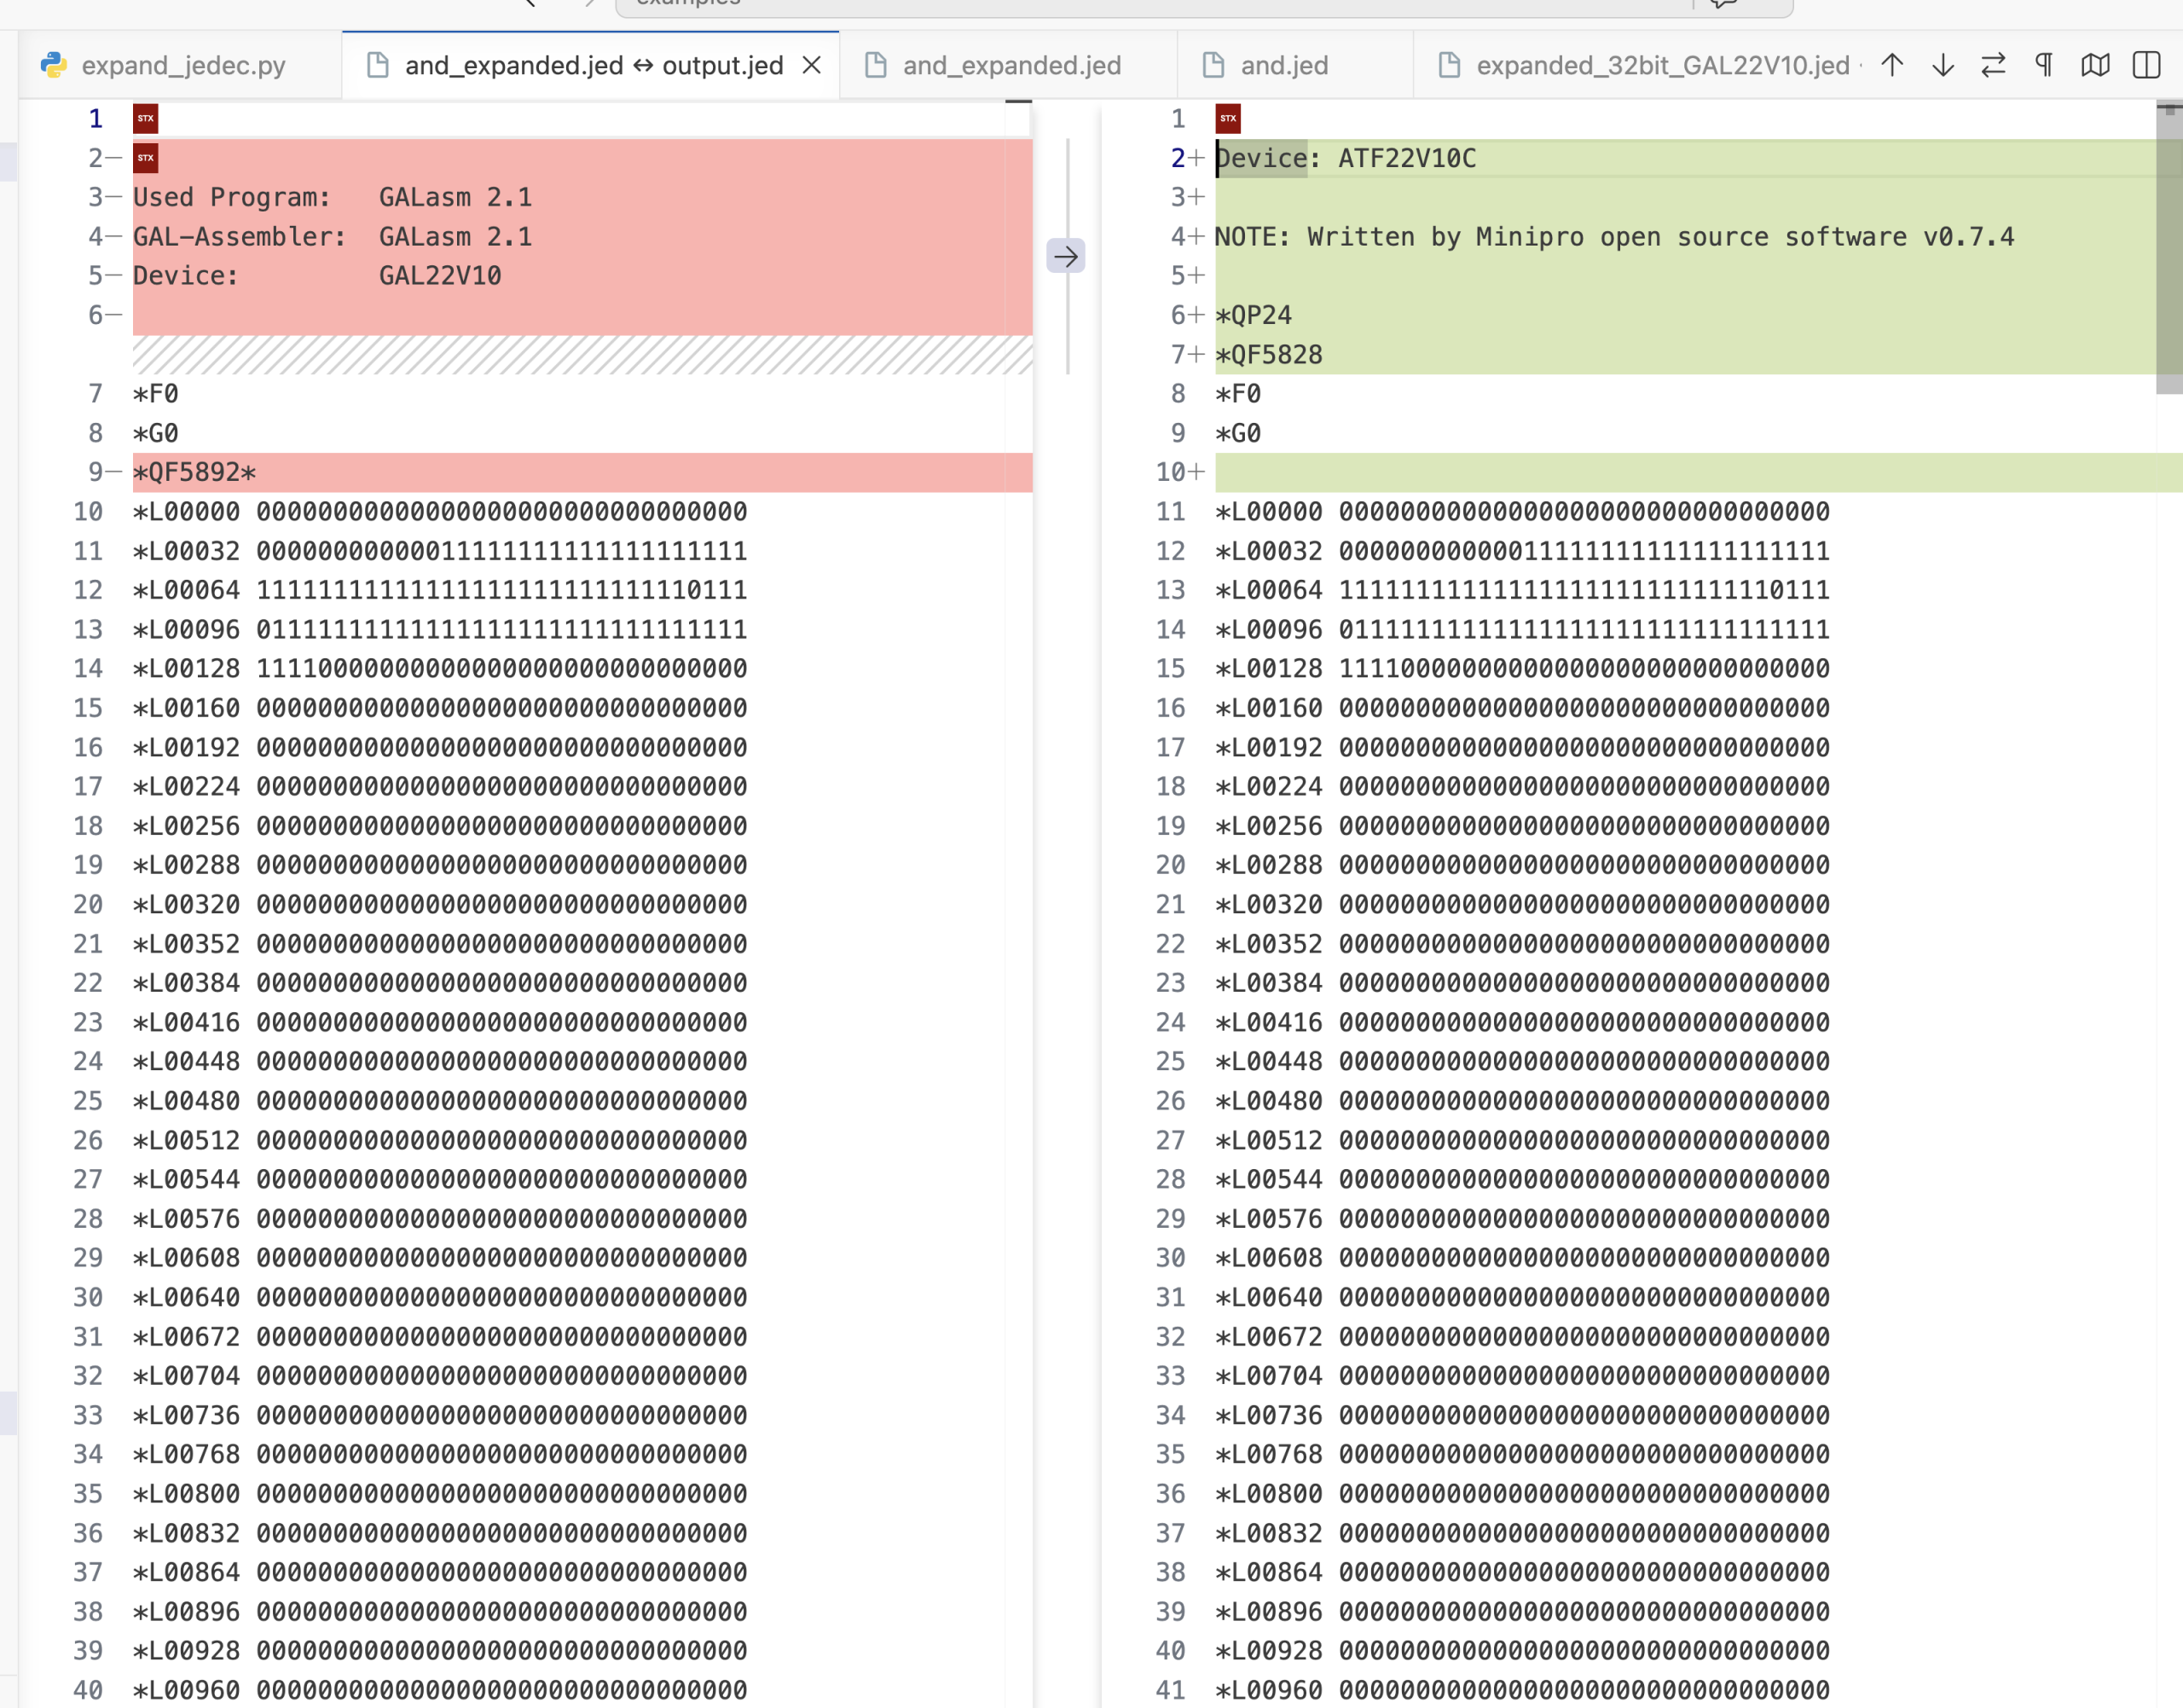
run "python expand_jedec.py and.jed", then you got and_expand.jed, then you can diff and_expand.jed and and.jed to provide they are the same, so the program you burn to ATF22V10C are same as what you want (and.jed)
Disable cursor capturing my project's information to prevent leaking. Open settings.json and set
    "telemetry.enableTelemetry": false,
    "telemetry.telemetryLevel": "off"
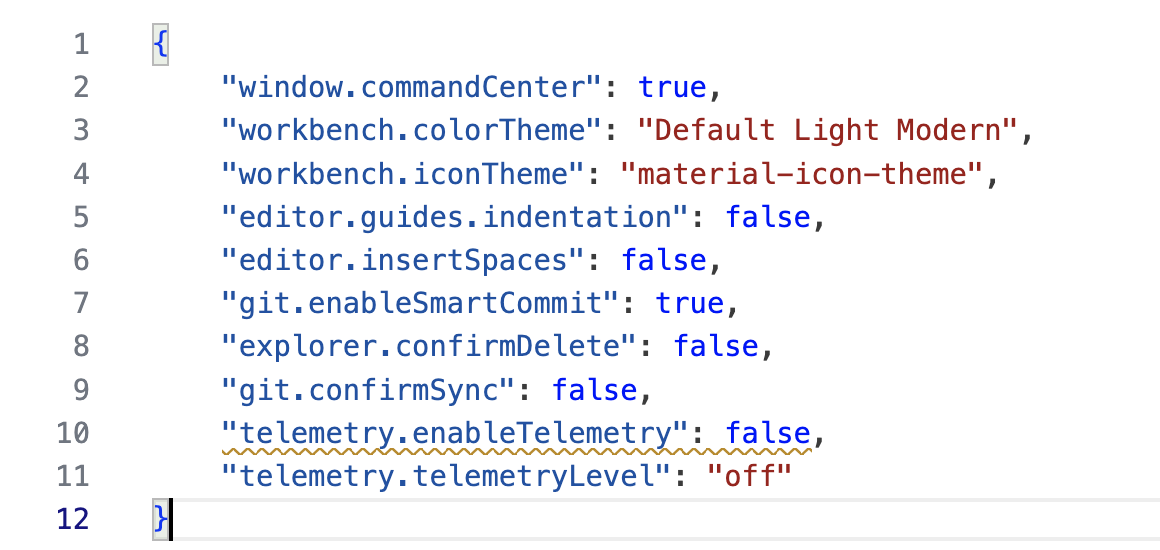
If you build pulseview in mac, you got "fatal error: 'glib.h' file not found". Do these
cd /opt/homebrew/lib/pkgconfig   # or /usr/local/lib/pkgconfig if on Intel Mac
ln -s glibmm-2.68.pc glibmm-2.4.pc

cd /Users/peter/workspace/pulseview
rm -rf CMakeCache.txt CMakeFiles/
make clean   # or just rm -rf the build artefacts if needed
export PKG_CONFIG_PATH="/usr/local/opt/glib/lib/pkgconfig:/usr/local/opt/qt@6/lib/pkgconfig:$PKG_CONFIG_PATH"
cmake .
make -j
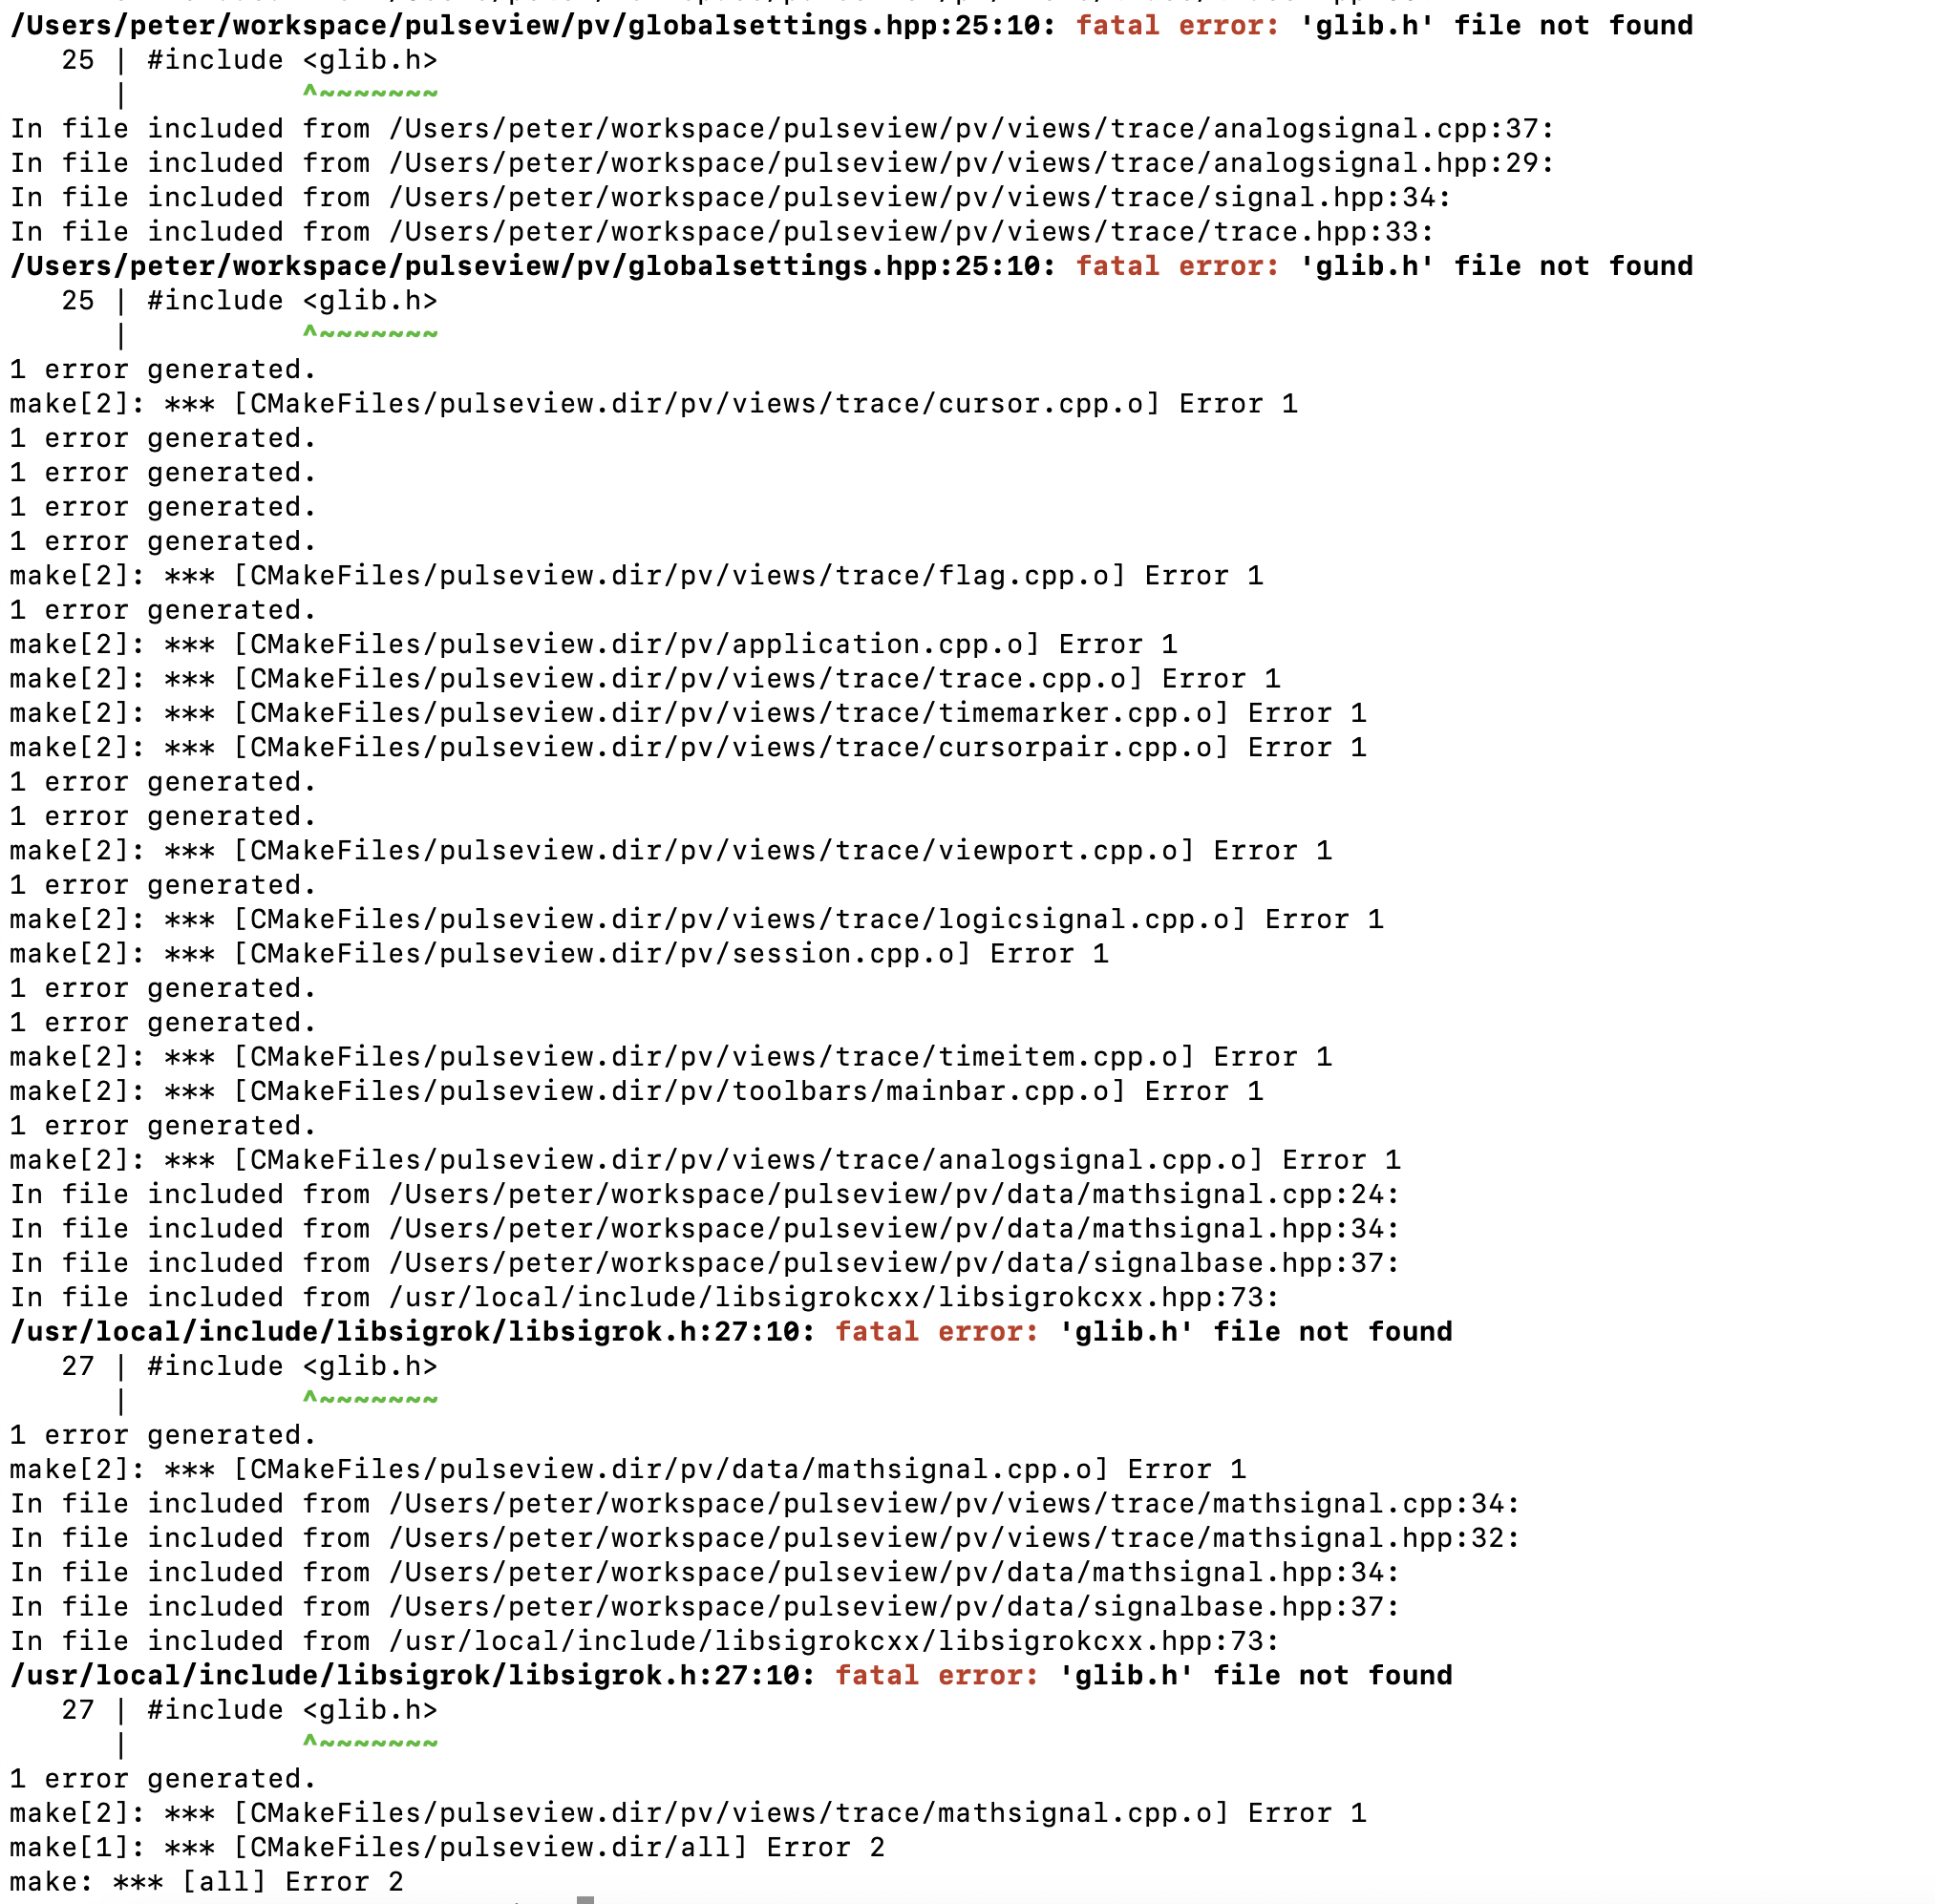
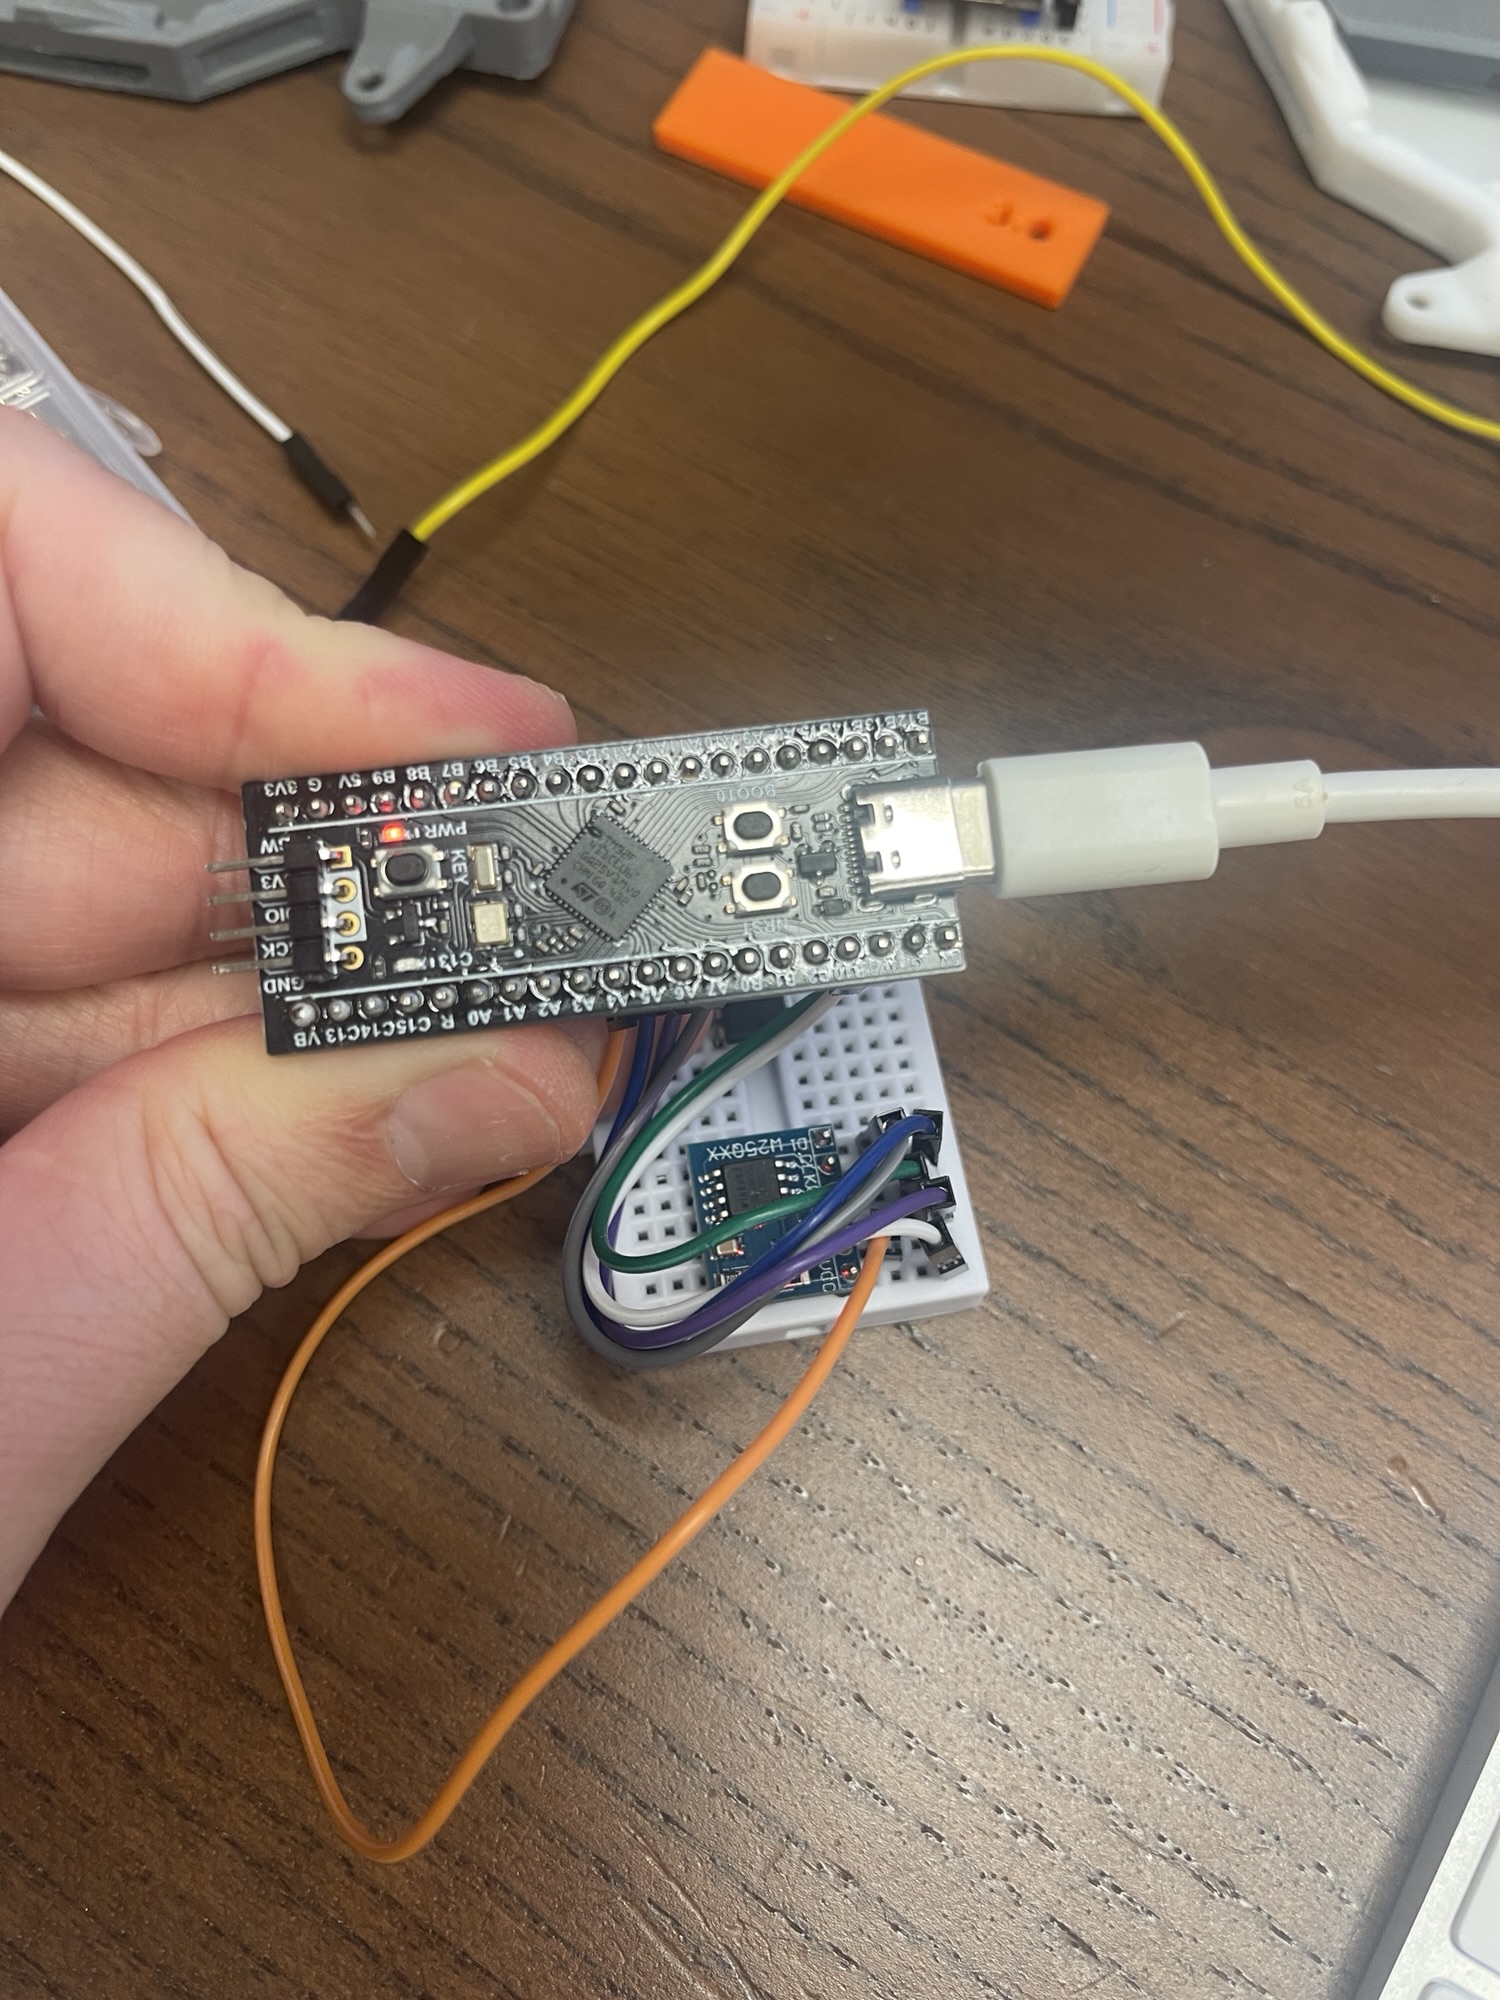
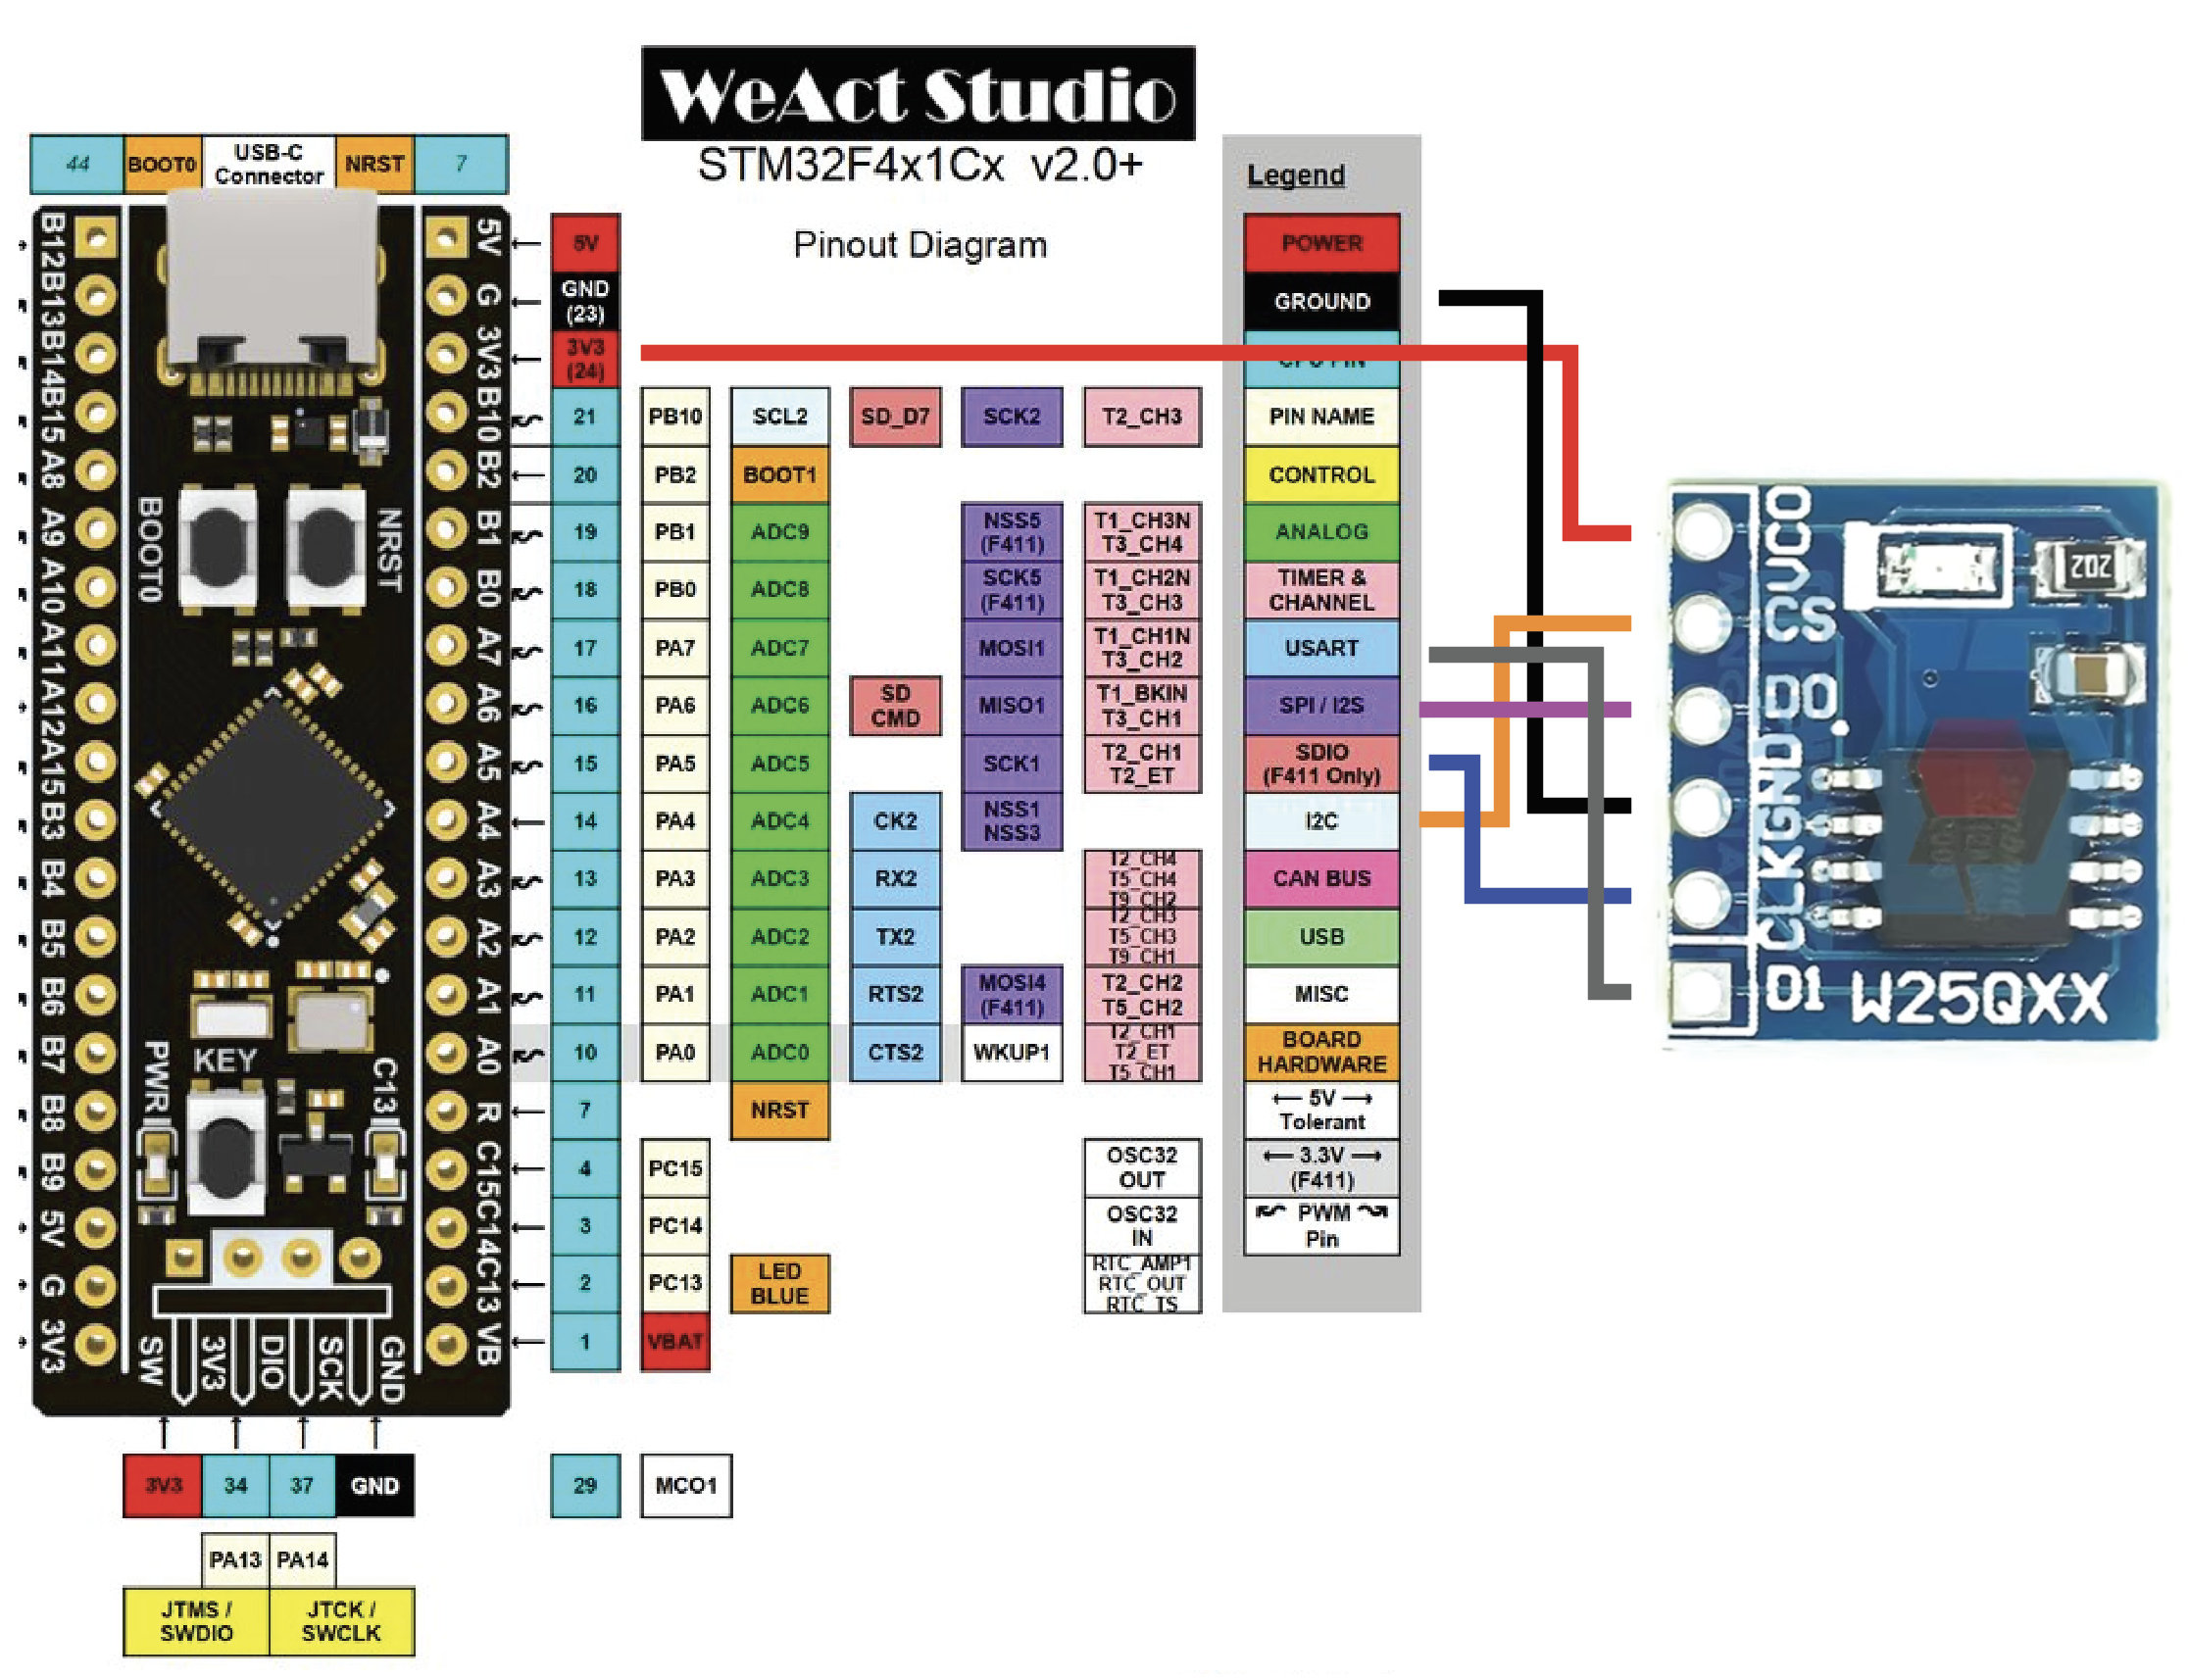
How to Run
mpremote exec "import flashRead_w25; flashRead_w25.dump_flash(0, 1280)"
mpremote exec "import flashWrite_w25; flashWrite_w25.write('w 2 0x23 3 0x45')"
Write
import machine
import time
import ssd1306
from machine import SPI, Pin

# W25Q128 SPI Flash Configuration
# W25Q128 has 16MB (16777216 bytes) = 128 Mbit
# Page size: 256 bytes
# Sector size: 4KB
# Block size: 64KB

# W25Q128 Commands
CMD_WRITE_ENABLE = 0x06
CMD_WRITE_DISABLE = 0x04
CMD_READ_STATUS = 0x05
CMD_READ_STATUS2 = 0x35
CMD_READ_STATUS3 = 0x15
CMD_WRITE_STATUS = 0x01
CMD_READ_DATA = 0x03
CMD_PAGE_PROGRAM = 0x02
CMD_SECTOR_ERASE = 0x20
CMD_BLOCK_ERASE_32K = 0x52
CMD_BLOCK_ERASE_64K = 0xD8
CMD_CHIP_ERASE = 0xC7
CMD_READ_ID = 0x9F
CMD_POWER_DOWN = 0xB9
CMD_RELEASE_POWER_DOWN = 0xAB
CMD_RESET_ENABLE = 0x66
CMD_RESET_MEMORY = 0x99

# SPI Configuration
spi = None
cs = None

def init_spi():
    global spi, cs
    # Initialize SPI bus (SPI1) for WeAct BlackPill
    # SCK=PA5, MISO=PA6, MOSI=PA7
    try:
        spi = machine.SPI(
            1,
            baudrate=1000000,
            polarity=0,
            phase=0,
            bits=8,
            firstbit=machine.SPI.MSB,
            sck=machine.Pin('A5'),
            mosi=machine.Pin('A7'),
            miso=machine.Pin('A6'),
        )
    except (ValueError, TypeError):
        try:
            spi = machine.SPI(1, baudrate=1000000, polarity=0, phase=0)
        except Exception:
            spi = machine.SoftSPI(
                baudrate=500000,
                polarity=0,
                phase=0,
                sck=machine.Pin('A5'),
                mosi=machine.Pin('A7'),
                miso=machine.Pin('A6'),
            )

    # CS pin (adjust based on your wiring)
    cs = machine.Pin('A4', machine.Pin.OUT, value=1)
    time.sleep_ms(1)

    flash_wake()
    flash_reset()

    disable_protection()

    # Check device ID
    device_id = read_device_id()
    if device_id == 0x000000:
        time.sleep_ms(5)
        device_id = read_device_id()
    print(f"W25Q128 Device ID: {device_id:06X}")
    if device_id == 0xEF4018:
        print("W25Q128 detected successfully")
    else:
        print(f"Warning: Unexpected device ID: {device_id:06X} (expected 0xEF4018)")

def read_device_id():
    """Read W25Q128 manufacturer and device ID"""
    cs.value(0)
    spi.write(bytes([CMD_READ_ID]))
    id_data = spi.read(3)
    cs.value(1)
    return (id_data[0] << 16) | (id_data[1] << 8) | id_data[2]

def flash_wake():
    """Release from power-down (safe to call even if not asleep)"""
    cs.value(0)
    spi.write(bytes([CMD_RELEASE_POWER_DOWN]))
    cs.value(1)
    time.sleep_ms(1)

def flash_reset():
    """Reset the flash (W25Q series supports 0x66/0x99)"""
    cs.value(0)
    spi.write(bytes([CMD_RESET_ENABLE]))
    cs.value(1)
    time.sleep_us(50)
    cs.value(0)
    spi.write(bytes([CMD_RESET_MEMORY]))
    cs.value(1)
    time.sleep_ms(1)

def read_status():
    """Read status register"""
    cs.value(0)
    spi.write(bytes([CMD_READ_STATUS]))
    status = spi.read(1)[0]
    cs.value(1)
    return status

def read_status2():
    """Read status register-2"""
    cs.value(0)
    spi.write(bytes([CMD_READ_STATUS2]))
    status = spi.read(1)[0]
    cs.value(1)
    return status

def read_status3():
    """Read status register-3"""
    cs.value(0)
    spi.write(bytes([CMD_READ_STATUS3]))
    status = spi.read(1)[0]
    cs.value(1)
    return status

def write_status(sr1, sr2):
    """Write status register-1 and -2"""
    wait_busy()
    write_enable()
    cs.value(0)
    spi.write(bytes([CMD_WRITE_STATUS, sr1 & 0xFF, sr2 & 0xFF]))
    cs.value(1)
    wait_busy()

def disable_protection():
    """Clear block protection bits and SRP"""
    sr1 = read_status()
    sr2 = read_status2()
    sr3 = read_status3()
    if (sr1 & 0x1C) or (sr1 & 0x80):
        print(f"Status before: SR1={sr1:02X} SR2={sr2:02X} SR3={sr3:02X}")
        write_status(sr1 & ~0x9C, sr2 & ~0x40)
        sr1 = read_status()
        sr2 = read_status2()
        sr3 = read_status3()
        print(f"Status after:  SR1={sr1:02X} SR2={sr2:02X} SR3={sr3:02X}")

def wait_busy():
    """Wait until write operation completes"""
    while read_status() & 0x01:
        time.sleep_us(10)

def write_enable():
    """Enable write operations"""
    cs.value(0)
    spi.write(bytes([CMD_WRITE_ENABLE]))
    cs.value(1)

def write_disable():
    """Disable write operations"""
    cs.value(0)
    spi.write(bytes([CMD_WRITE_DISABLE]))
    cs.value(1)

def read_byte(addr):
    """Read a single byte from address"""
    cs.value(0)
    spi.write(bytes([CMD_READ_DATA, (addr >> 16) & 0xFF, (addr >> 8) & 0xFF, addr & 0xFF]))
    data = spi.read(1)[0]
    cs.value(1)
    return data

def read_bytes(addr, length):
    """Read multiple bytes from address"""
    cs.value(0)
    spi.write(bytes([CMD_READ_DATA, (addr >> 16) & 0xFF, (addr >> 8) & 0xFF, addr & 0xFF]))
    data = spi.read(length)
    cs.value(1)
    return data

def write_page(addr, data):
    """Write up to 256 bytes (one page). Address must be page-aligned."""
    if len(data) > 256:
        raise ValueError("Page write data must be <= 256 bytes")

    wait_busy()
    write_enable()

    # Ensure write-enable latch is set (bit 1)
    if (read_status() & 0x02) == 0:
        write_enable()
        if (read_status() & 0x02) == 0:
            raise RuntimeError("Write enable latch not set. Check /WP pin.")

    cs.value(0)
    spi.write(bytes([CMD_PAGE_PROGRAM, (addr >> 16) & 0xFF, (addr >> 8) & 0xFF, addr & 0xFF]))
    spi.write(data)
    cs.value(1)

    wait_busy()

def write_byte(addr, value):
    """Write a single byte to address"""
    write_page(addr, bytes([value & 0xFF]))

def sector_erase(addr):
    """Erase a 4KB sector (sector address must be sector-aligned)"""
    wait_busy()
    write_enable()

    if (read_status() & 0x02) == 0:
        write_enable()
        if (read_status() & 0x02) == 0:
            raise RuntimeError("Write enable latch not set. Check /WP pin.")

    cs.value(0)
    spi.write(bytes([CMD_SECTOR_ERASE, (addr >> 16) & 0xFF, (addr >> 8) & 0xFF, addr & 0xFF]))
    cs.value(1)

    wait_busy()

def block_erase_64k(addr):
    """Erase a 64KB block (address must be block-aligned)"""
    wait_busy()
    write_enable()

    cs.value(0)
    spi.write(bytes([CMD_BLOCK_ERASE_64K, (addr >> 16) & 0xFF, (addr >> 8) & 0xFF, addr & 0xFF]))
    cs.value(1)

    wait_busy()

def chip_erase():
    """Erase entire chip (takes several seconds)"""
    wait_busy()
    write_enable()

    cs.value(0)
    spi.write(bytes([CMD_CHIP_ERASE]))
    cs.value(1)

    print("Chip erase started (this may take 10-30 seconds)...")
    wait_busy()
    print("Chip erase complete")

def write_00_to_ff():
    init_spi()

    # i2c_display = machine.I2C(1)
    # display = ssd1306.SSD1306_I2C(128, 64, i2c_display)
    # display.fill(0)
    # display.text("W25Q128 Writer", 5, 5, 1)
    # display.show()

    # Erase first 64KB (16 sectors) before writing
    # for sector in range(0, 16):
    #     sector_addr = sector * 0x1000
    #     print(f"E {sector_addr:06X}")
    #     sector_erase(sector_addr)

    # Write first 64KB for testing, page-by-page
    for page_addr in range(0, 65536, 256):
        if page_addr % 1000 == 0:
            print(f"W {page_addr:06X}")
            # display.fill(0)
            # display.text("W25Q128 Writer", 5, 5, 1)
            # display.text(f"W {page_addr:06X}", 5, 30, 1)
            # display.show()

        page = bytes([(page_addr + i) & 0xFF for i in range(256)])
        write_page(page_addr, page)

    # display.fill(0)
    # display.text("W25Q128 Writer", 5, 5, 1)
    # display.text(f"Write Complete", 5, 30, 1)
    # display.show()


def write(str):
    init_spi()

    # Parse the input string into address-value pairs and write each value
    str = str[2:]  # Remove "w " prefix
    tokens = str.strip().split()
    if len(tokens) % 2 != 0:
        raise ValueError("Input string must contain pairs of <addr> <value>")

    # i2c_display = machine.I2C(1)
    # display = ssd1306.SSD1306_I2C(128, 64, i2c_display)
    # display.fill(0)
    # display.text("W25Q128 Writer", 5, 5, 1)
    # display.show()

    for i in range(0, len(tokens), 2):
        addr = int(tokens[i], 0)  # Support hex (0x...), decimal, etc.
        value = int(tokens[i+1], 0)
        write_byte(addr, value)

        if addr > 0 and addr % 1000 == 0:
            print(f"Wrote {value:02X} to {addr:06X}")
            # display.fill(0)
            # display.text("W25Q128 Writer", 5, 5, 1)
            # display.text(f"W {value:02X} to {addr:06X}", 5, 30, 1)
            # display.show()

    # display.fill(0)
    # display.text("W25Q128 Writer", 5, 5, 1)
    # display.text(f"W {value:02X} to {addr:06X}", 5, 30, 1)
    # display.show()


def erase():
    init_spi()

    print("Erasing entire W25Q128 chip...")
    chip_erase()
    print("Erase complete")


def erase_sector(sector_addr):
    """Erase a specific 4KB sector"""
    init_spi()

    # Align to sector boundary (4KB = 0x1000)
    sector_addr = sector_addr & 0xFFFFF000
    print(f"Erasing sector at {sector_addr:06X}...")
    sector_erase(sector_addr)
    print(f"Sector at {sector_addr:06X} erased")


if __name__ == "__main__":
    write_00_to_ff()
READ:
import machine
import time
import ssd1306
from machine import SPI, Pin

# W25Q128 SPI Flash Configuration
# W25Q128 has 16MB (16777216 bytes) = 128 Mbit

# W25Q128 Commands
CMD_READ_DATA = 0x03
CMD_READ_STATUS = 0x05
CMD_READ_ID = 0x9F
CMD_FAST_READ = 0x0B
CMD_POWER_DOWN = 0xB9
CMD_RELEASE_POWER_DOWN = 0xAB
CMD_RESET_ENABLE = 0x66
CMD_RESET_MEMORY = 0x99

# SPI Configuration
spi = None
cs = None

def init_spi():
    global spi, cs
    # Initialize SPI bus (SPI1) for WeAct BlackPill
    # SCK=PA5, MISO=PA6, MOSI=PA7
    try:
        spi = machine.SPI(
            1,
            baudrate=1000000,
            polarity=0,
            phase=0,
            bits=8,
            firstbit=machine.SPI.MSB,
            sck=machine.Pin('A5'),
            mosi=machine.Pin('A7'),
            miso=machine.Pin('A6'),
        )
    except (ValueError, TypeError):
        try:
            spi = machine.SPI(1, baudrate=1000000, polarity=0, phase=0)
        except Exception:
            spi = machine.SoftSPI(
                baudrate=500000,
                polarity=0,
                phase=0,
                sck=machine.Pin('A5'),
                mosi=machine.Pin('A7'),
                miso=machine.Pin('A6'),
            )

    # CS pin (adjust based on your wiring)
    cs = machine.Pin('A4', machine.Pin.OUT, value=1)
    time.sleep_ms(1)

    flash_wake()
    flash_reset()

    # Check device ID
    device_id = read_device_id()
    if device_id == 0x000000:
        time.sleep_ms(5)
        device_id = read_device_id()
    print(f"W25Q128 Device ID: {device_id:06X}")
    if device_id == 0xEF4018:
        print("W25Q128 detected successfully")
    else:
        print(f"Warning: Unexpected device ID: {device_id:06X} (expected 0xEF4018)")

def read_device_id():
    """Read W25Q128 manufacturer and device ID"""
    cs.value(0)
    spi.write(bytes([CMD_READ_ID]))
    id_data = spi.read(3)
    cs.value(1)
    return (id_data[0] << 16) | (id_data[1] << 8) | id_data[2]

def flash_wake():
    """Release from power-down (safe to call even if not asleep)"""
    cs.value(0)
    spi.write(bytes([CMD_RELEASE_POWER_DOWN]))
    cs.value(1)
    time.sleep_ms(1)

def flash_reset():
    """Reset the flash (W25Q series supports 0x66/0x99)"""
    cs.value(0)
    spi.write(bytes([CMD_RESET_ENABLE]))
    cs.value(1)
    time.sleep_us(50)
    cs.value(0)
    spi.write(bytes([CMD_RESET_MEMORY]))
    cs.value(1)
    time.sleep_ms(1)

def read_status():
    """Read status register"""
    cs.value(0)
    spi.write(bytes([CMD_READ_STATUS]))
    status = spi.read(1)[0]
    cs.value(1)
    return status

def read_byte(addr):
    """Read a single byte from address"""
    cs.value(0)
    spi.write(bytes([CMD_READ_DATA, (addr >> 16) & 0xFF, (addr >> 8) & 0xFF, addr & 0xFF]))
    data = spi.read(1)[0]
    cs.value(1)
    return data

def read_bytes(addr, length):
    """Read multiple bytes from address"""
    cs.value(0)
    spi.write(bytes([CMD_READ_DATA, (addr >> 16) & 0xFF, (addr >> 8) & 0xFF, addr & 0xFF]))
    data = spi.read(length)
    cs.value(1)
    return data

def dump_flash(start, length):
    """Dump W25Q128 flash contents"""
    init_spi()

    # Initialize display (optional)
    # i2c_display = machine.I2C(1)
    # display = ssd1306.SSD1306_I2C(128, 64, i2c_display)
    # display.fill(0)
    # display.text("W25Q128 Reader", 5, 5, 1)
    # display.show()

    for base in range(start, start + length, 16):
        row = [f"{base:06X}:"]

        # if base % 1000 == 0:
        #     display.fill(0)
        #     display.text("W25Q128 Reader", 5, 5, 1)
        #     display.text(f"R {base:06X}", 5, 30, 1)
        #     display.show()

        chunk_len = min(16, (start + length) - base)
        data = read_bytes(base, chunk_len)
        for b in data:
            row.append(f"{b:02X}")
        print(' '.join(row))

if __name__ == "__main__":
    # W25Q128 has 16MB (16777216 bytes)
    # Read first 64KB for testing
    dump_flash(0, 65536)
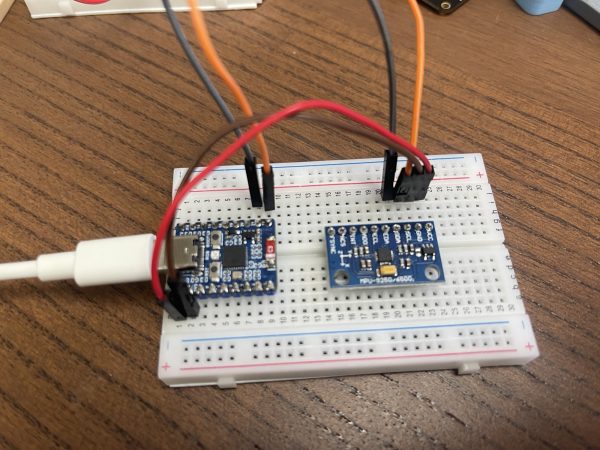
"""
MPU9250 MicroPython Example
9-axis IMU (Accelerometer, Gyroscope, Magnetometer)
"""

from machine import I2C, Pin
from time import sleep_ms, ticks_ms, ticks_diff
import math

class MPU9250:
    """MPU9250 9-axis IMU driver"""

    # MPU9250 I2C address
    MPU9250_ADDRESS = 0x68
    AK8963_ADDRESS = 0x0C

    # Register addresses
    PWR_MGMT_1 = 0x6B
    ACCEL_XOUT_H = 0x3B
    GYRO_XOUT_H = 0x43
    TEMP_OUT_H = 0x41
    WHO_AM_I = 0x75

    # Magnetometer registers
    MAG_CNTL = 0x0A
    MAG_XOUT_L = 0x03
    MAG_ST1 = 0x02
    MAG_CNTL2 = 0x0B
    MAG_ASAX = 0x10

    # Configuration registers
    CONFIG = 0x1A
    GYRO_CONFIG = 0x1B
    ACCEL_CONFIG = 0x1C
    ACCEL_CONFIG2 = 0x1D
    INT_PIN_CFG = 0x37
    USER_CTRL = 0x6A

    def __init__(self, i2c, address=MPU9250_ADDRESS):
        self.i2c = i2c
        self.address = address

        # Wake up the MPU9250
        self.i2c.writeto_mem(self.address, self.PWR_MGMT_1, b'\x00')
        sleep_ms(100)

        # Check WHO_AM_I register
        who_am_i = self.i2c.readfrom_mem(self.address, self.WHO_AM_I, 1)[0]
        if who_am_i != 0x71:
            raise RuntimeError(f"MPU9250 not found. WHO_AM_I: 0x{who_am_i:02X}")

        # Configure gyroscope (±250°/s)
        self.i2c.writeto_mem(self.address, self.GYRO_CONFIG, b'\x00')

        # Configure accelerometer (±2g)
        self.i2c.writeto_mem(self.address, self.ACCEL_CONFIG, b'\x00')

        # Set accelerometer data rate (1kHz) and bandwidth (184Hz)
        self.i2c.writeto_mem(self.address, self.ACCEL_CONFIG2, b'\x01')

        # Set gyroscope data rate (1kHz) and bandwidth (184Hz)
        self.i2c.writeto_mem(self.address, self.CONFIG, b'\x01')

        # Initialize magnetometer
        self._init_magnetometer()

        print("MPU9250 initialized successfully")

    def read_accel(self):
        """Read accelerometer data (m/s²)"""
        data = self.i2c.readfrom_mem(self.address, self.ACCEL_XOUT_H, 6)

        # Convert to signed 16-bit integers
        ax = self._combine_bytes(data[0], data[1])
        ay = self._combine_bytes(data[2], data[3])
        az = self._combine_bytes(data[4], data[5])

        # Scale to g (±2g range, 16384 LSB/g)
        scale = 16384.0
        ax = (ax / scale) * 9.81  # Convert to m/s²
        ay = (ay / scale) * 9.81
        az = (az / scale) * 9.81

        return (ax, ay, az)

    def read_gyro(self):
        """Read gyroscope data (°/s)"""
        data = self.i2c.readfrom_mem(self.address, self.GYRO_XOUT_H, 6)

        # Convert to signed 16-bit integers
        gx = self._combine_bytes(data[0], data[1])
        gy = self._combine_bytes(data[2], data[3])
        gz = self._combine_bytes(data[4], data[5])

        # Scale to °/s (±250°/s range, 131 LSB/°/s)
        scale = 131.0
        gx = gx / scale
        gy = gy / scale
        gz = gz / scale

        return (gx, gy, gz)

    def read_temp(self):
        """Read temperature (°C)"""
        data = self.i2c.readfrom_mem(self.address, self.TEMP_OUT_H, 2)
        temp_raw = self._combine_bytes(data[0], data[1])

        # Convert to °C
        temp = (temp_raw / 333.87) + 21.0
        return temp

    def _init_magnetometer(self):
        """Initialize AK8963 magnetometer"""
        # Enable I2C master mode and set I2C bypass
        self.i2c.writeto_mem(self.address, self.INT_PIN_CFG, b'\x02')
        sleep_ms(10)

        # Power down magnetometer
        self.i2c.writeto_mem(self.AK8963_ADDRESS, self.MAG_CNTL, b'\x00')
        sleep_ms(10)

        # Enter fuse ROM access mode
        self.i2c.writeto_mem(self.AK8963_ADDRESS, self.MAG_CNTL, b'\x0F')
        sleep_ms(10)

        # Read sensitivity adjustment values
        asa_data = self.i2c.readfrom_mem(self.AK8963_ADDRESS, self.MAG_ASAX, 3)
        self.mag_sensitivity = [(((d - 128) * 0.5) / 128 + 1) for d in asa_data]

        # Power down magnetometer
        self.i2c.writeto_mem(self.AK8963_ADDRESS, self.MAG_CNTL, b'\x00')
        sleep_ms(10)

        # Set to continuous measurement mode (16-bit, 100Hz)
        self.i2c.writeto_mem(self.AK8963_ADDRESS, self.MAG_CNTL, b'\x16')
        sleep_ms(10)

        print("Magnetometer initialized")

    def read_mag(self):
        """Read magnetometer data (µT - microtesla)"""
        try:
            # Check if data is ready
            status = self.i2c.readfrom_mem(self.AK8963_ADDRESS, self.MAG_ST1, 1)[0]
            if not (status & 0x01):
                return (0, 0, 0)

            # Read magnetometer data (7 bytes: ST1, XL, XH, YL, YH, ZL, ZH)
            data = self.i2c.readfrom_mem(self.AK8963_ADDRESS, self.MAG_XOUT_L, 7)

            # Check overflow
            if data[6] & 0x08:
                return (0, 0, 0)

            # Convert to signed 16-bit integers (little-endian)
            mx = self._combine_bytes(data[2], data[1])
            my = self._combine_bytes(data[4], data[3])
            mz = self._combine_bytes(data[6], data[5])

            # Apply sensitivity adjustment
            mx = mx * self.mag_sensitivity[0] * 0.6  # Convert to µT (4912/32760 * 4)
            my = my * self.mag_sensitivity[1] * 0.6
            mz = mz * self.mag_sensitivity[2] * 0.6

            return (mx, my, mz)
        except:
            return (0, 0, 0)

    def _combine_bytes(self, msb, lsb):
        """Combine two bytes into signed 16-bit integer"""
        value = (msb << 8) | lsb
        if value >= 0x8000:
            value = -((65535 - value) + 1)
        return value


def main():
    """Example usage of MPU9250"""

    # Initialize I2C
    # For ESP32-C6: Adjust pins according to your wiring
    i2c = I2C(0, scl=Pin(22), sda=Pin(21), freq=400000)

    # Scan I2C bus
    print("Scanning I2C bus...")
    devices = i2c.scan()
    print(f"Found devices: {[hex(d) for d in devices]}")

    # Initialize MPU9250
    try:
        mpu = MPU9250(i2c)
    except Exception as e:
        print(f"Error initializing MPU9250: {e}")
        return

    print("\nReading MPU9250 data...")
    print("Press Ctrl+C to stop\n")

    # Initialize angle tracking
    angle_x = 0.0
    angle_y = 0.0
    angle_z = 0.0
    last_time = ticks_ms()

    try:
        while True:
            # Calculate time difference
            current_time = ticks_ms()
            dt = ticks_diff(current_time, last_time) / 1000.0  # Convert to seconds
            last_time = current_time

            # Read accelerometer
            ax, ay, az = mpu.read_accel()

            # Read gyroscope
            gx, gy, gz = mpu.read_gyro()

            # Integrate gyroscope to get angles
            angle_x += gx * dt
            angle_y += gy * dt
            angle_z += gz * dt

            # Read magnetometer
            mx, my, mz = mpu.read_mag()

            # Calculate heading (0-360°)
            heading = math.atan2(my, mx) * 180 / math.pi
            if heading < 0:
                heading += 360

            # Read temperature
            temp = mpu.read_temp()

            # clear console
            print("\033[2J\033[H", end="")  # ANSI escape codes to clear screen

            # Display data
            print("=" * 50)
            print(f"Accelerometer (m/s²):")
            print(f"  X: {ax:7.3f}  Y: {ay:7.3f}  Z: {az:7.3f}")
            print(f"Gyroscope Angles (°):")
            print(f"  Roll:  {angle_x:7.2f}°  (X-axis)")
            print(f"  Pitch: {angle_y:7.2f}°  (Y-axis)")
            print(f"  Yaw:   {angle_z:7.2f}°  (Z-axis)")
            print(f"Gyroscope Speed (°/s):")
            print(f"  X: {gx:7.2f}  Y: {gy:7.2f}  Z: {gz:7.2f}")
            print(f"Magnetometer (µT):")
            print(f"  X: {mx:7.2f}  Y: {my:7.2f}  Z: {mz:7.2f}")
            print(f"Heading: {heading:6.2f}° (0°=North, 90°=East)")
            print(f"Temperature: {temp:.2f}°C")

            sleep_ms(100)

    except KeyboardInterrupt:
        print("\n\nStopped by user")


if __name__ == "__main__":
    main()
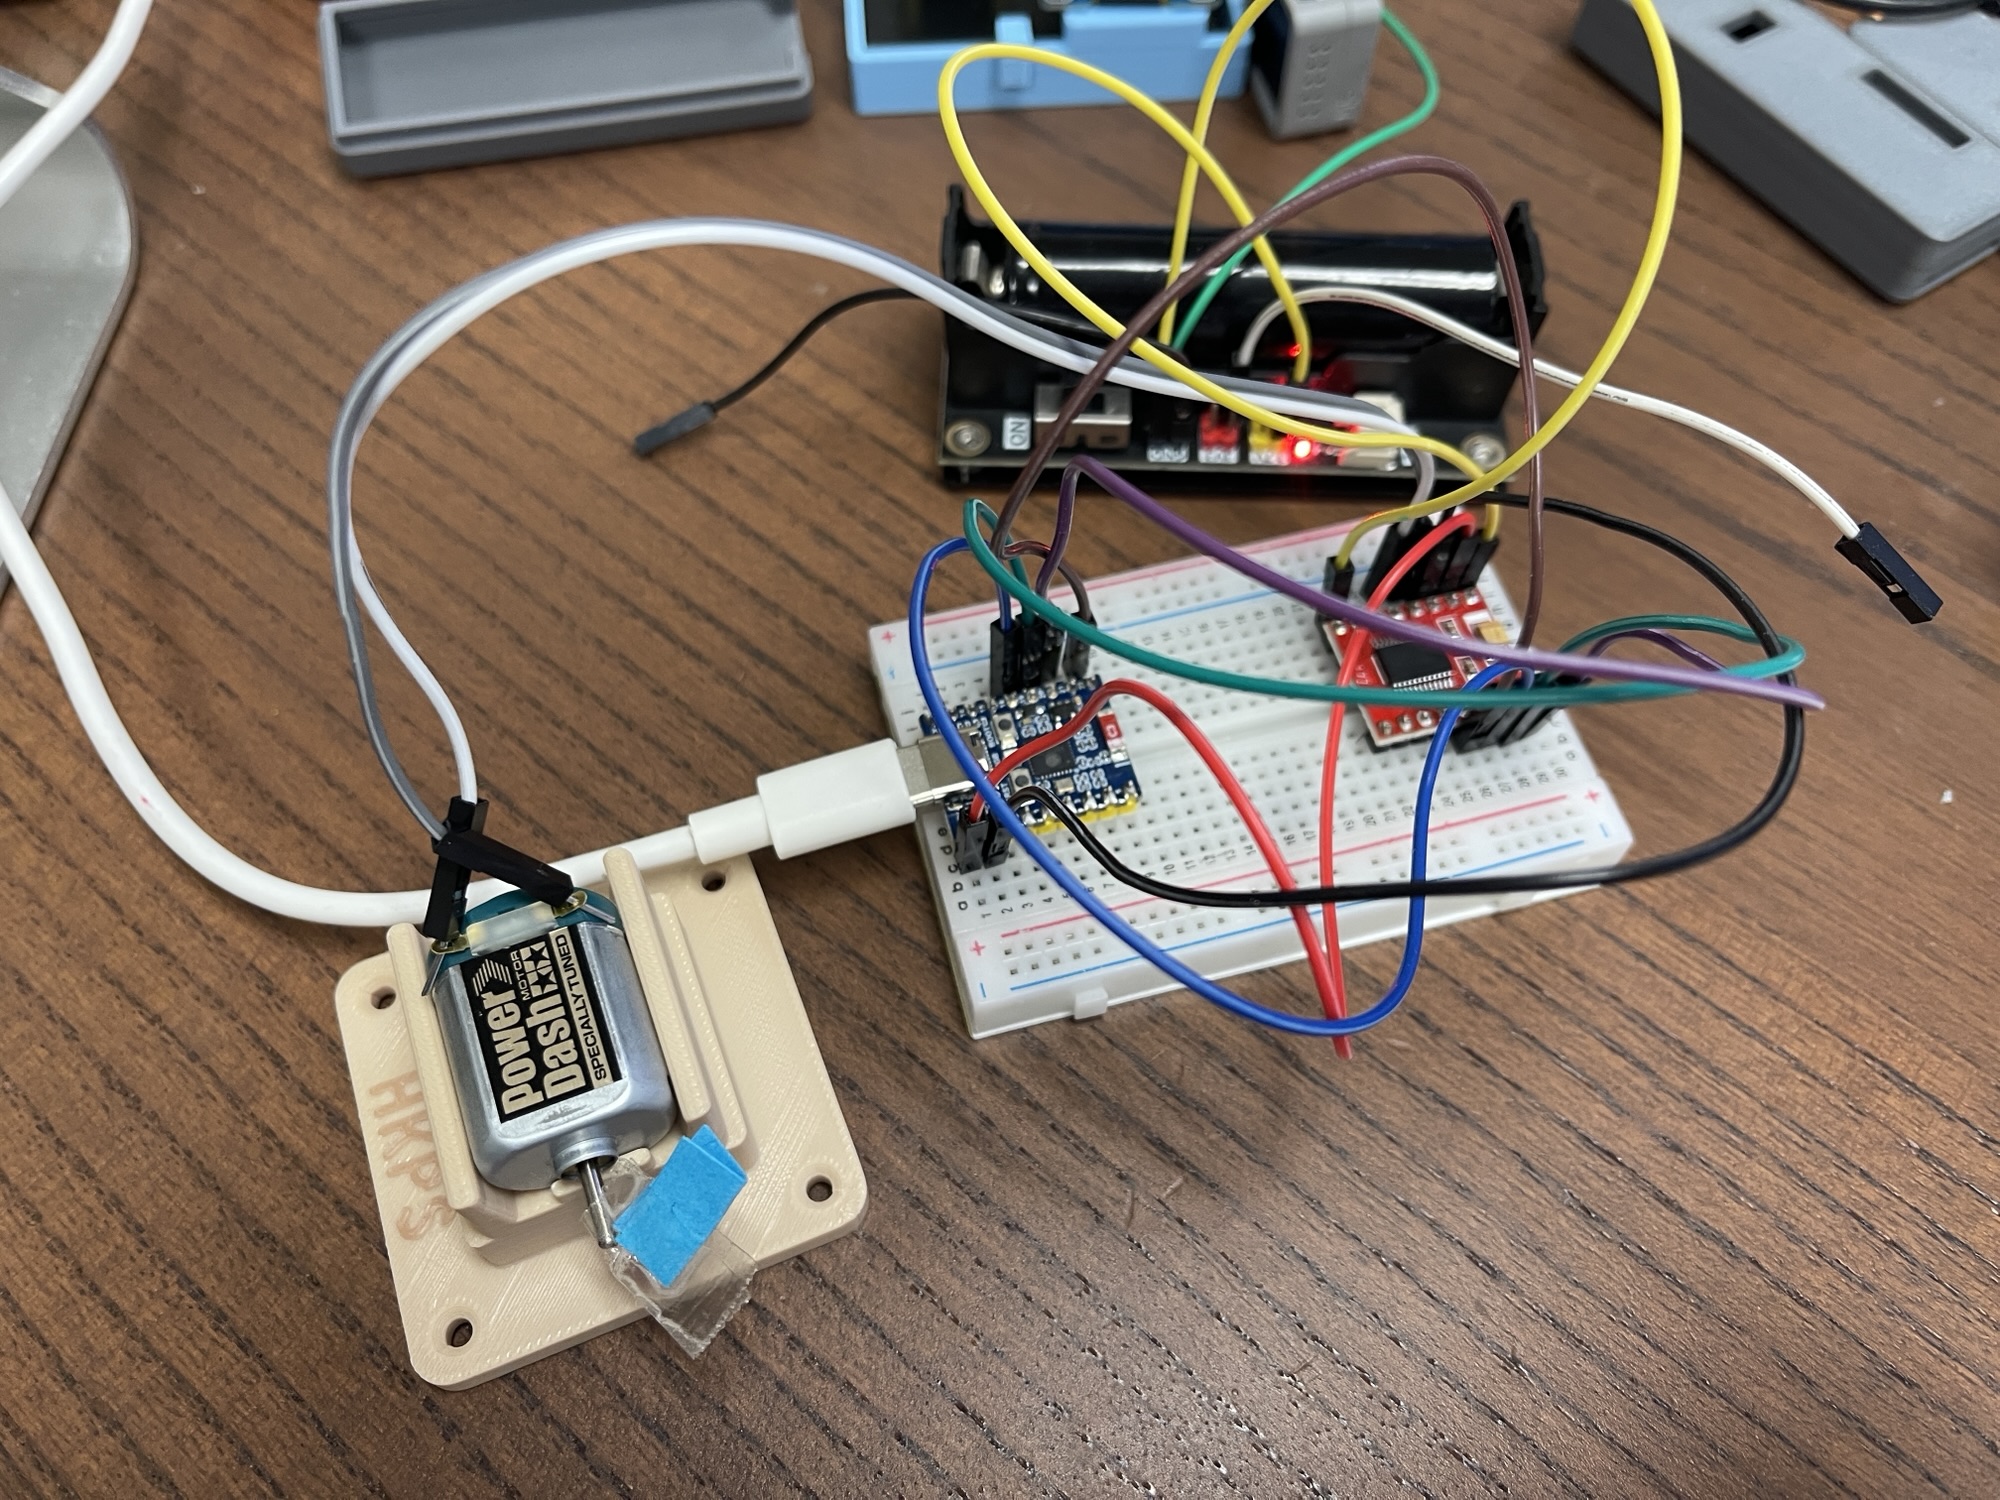
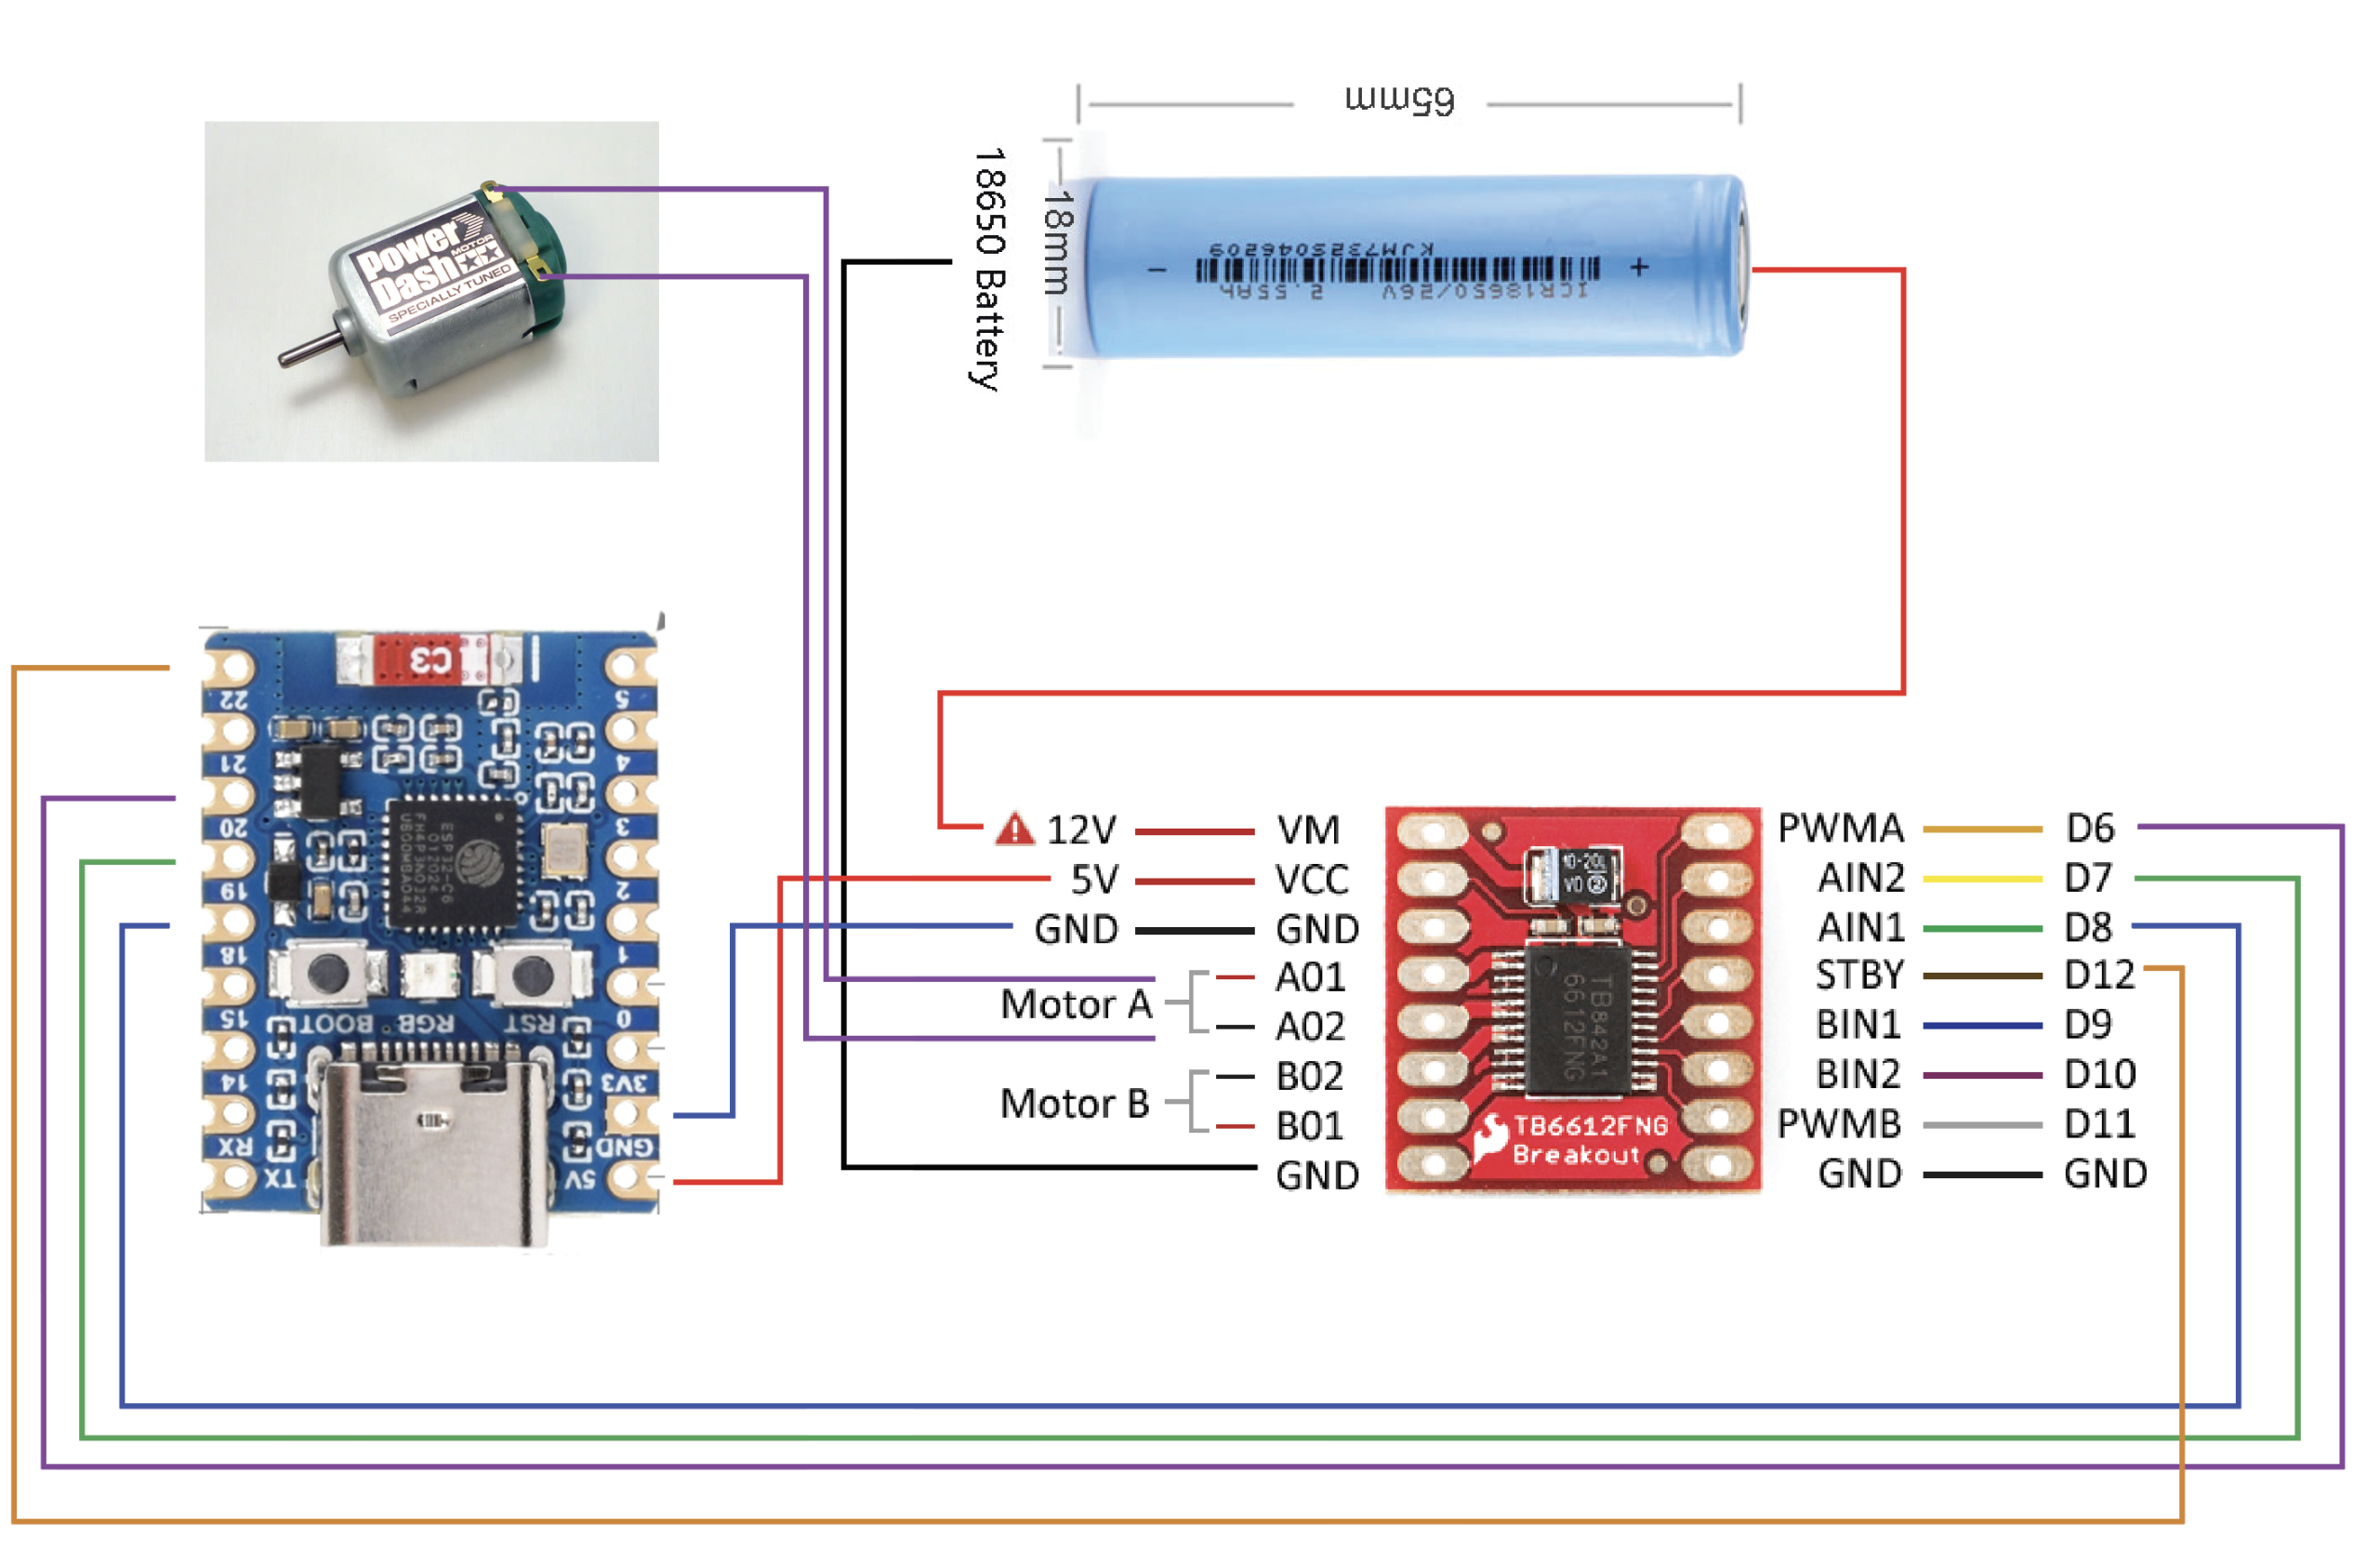
# tb6612fng_simple.py
# MicroPython example for TB6612FNG + two DC motors (e.g. Tamiya 4WD)
# Works on Pico, ESP32, etc.

from machine import Pin, PWM
from time import sleep

# ────────────────────────────────────────────────
# Pin definitions (change to match YOUR wiring!)
# ────────────────────────────────────────────────

STBY = Pin(22, Pin.OUT)          # Standby pin – must be HIGH to enable driver

# Motor A (usually left motors on Tamiya 4WD)
AIN1 = Pin(18, Pin.OUT)
AIN2 = Pin(19, Pin.OUT)
PWMA = PWM(Pin(20), freq=1000, duty_u16=0)   # PWM freq 1kHz is fine

# ────────────────────────────────────────────────
# Helper functions
# ────────────────────────────────────────────────

def motor_a(speed):
    """
    speed: -1000 to +1000
      positive = forward
      negative = reverse
      0 = stop (coast)
    """
    if speed > 0:
        AIN1.value(1)
        AIN2.value(0)
        PWMA.duty_u16(speed * 65)          # 0→65535 range
    elif speed < 0:
        AIN1.value(0)
        AIN2.value(1)
        PWMA.duty_u16((-speed) * 65)
    else:
        AIN1.value(0)                       # coast stop
        AIN2.value(0)
        PWMA.duty_u16(0)


def drive(left_speed):
    """ left_speed: -1000 to 1000 """
    motor_a(left_speed)


# ────────────────────────────────────────────────
# Main demo
# ────────────────────────────────────────────────

STBY.value(1)  # Enable the driver (important!)
print("TB6612FNG enabled")

try:
    print("Forward slow...")
    drive(700)
    sleep(5)

    print("Forward full...")
    drive(1000)
    sleep(5)

    print("Stop (coast)...")
    drive(0)
    sleep(3)

    print("Backward slow...")
    drive(-700)
    sleep(5)

    print("Backward full...")
    drive(-1000)
    sleep(5)

    print("Brake demo (short brake)...")
    AIN1.value(1);
    AIN2.value(1)    # short brake on A
    PWMA.duty_u16(0)
    sleep(3)

    print("Stop everything")
    drive(0)

finally:
    STBY.value(0)               # Optional: go to low-power standby
    print("Done.")
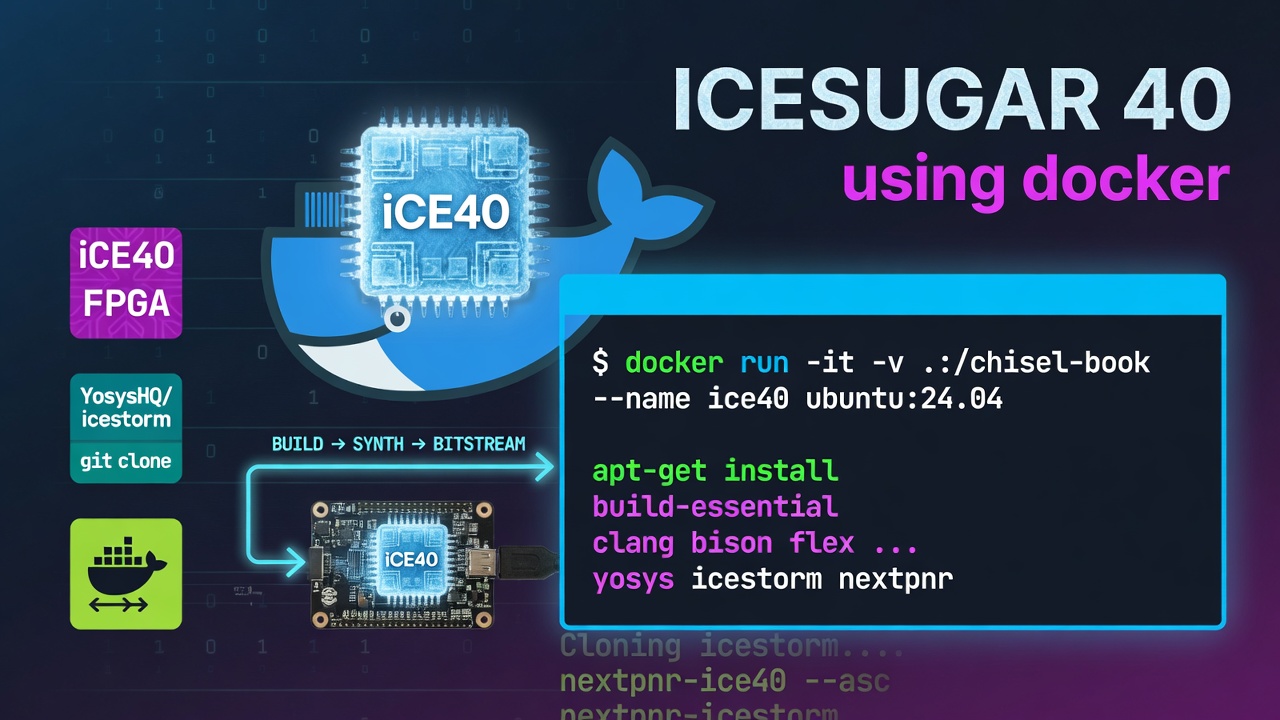
Setting up the ICESugar FPGA toolchain is trouble in mac, so i built the docker image. This toolchain is for icesugar 40 only, my board is muselab.
Dockerfile is in https://gitlab.quantr.hk/example/chisel/chisel-book/-/blob/master/Dockerfile?ref_type=heads . See this project makefile then you know how to use it https://gitlab.quantr.hk/example/chisel/chisel-book/-/blob/master/example13_icesugar40_rgb_led/Makefile?ref_type=heads
因為想知道Pulseview背後運作原理來,又想為cpu開發加入一啲特別嘅功能,所以決定用STM32自己搞一隻logic analyzer,雖然STM32用來搞不會很高速,但足了之解其原理,之後再用FPGA搞會非常容易
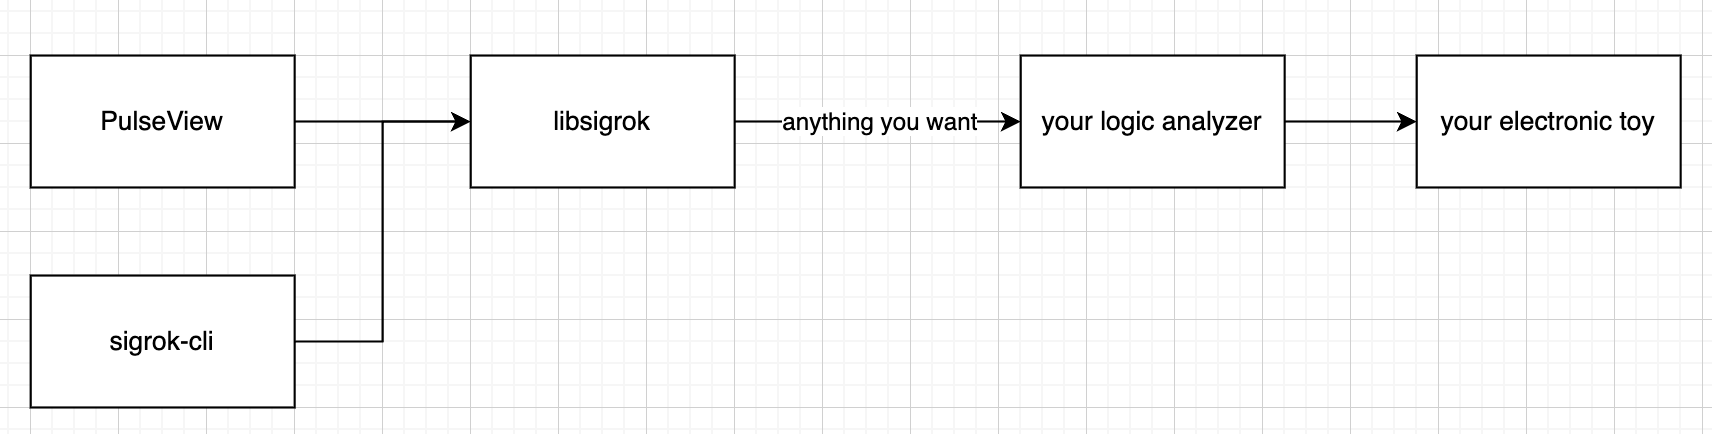
Pulseview是logic analyzer的GUI界面,sigrok-cli是命令行模式,兩者是呼叫一個名為libsigrok的庫去和你的logic analyzer溝通。至於libsigrok用什麼去和你的logic analyzer溝運,這個是你個人意願,因為stm32可以自己變成uart device所以就當它是uart去溝通最容易。你的logic analyzer可以有兩個mode,stream vs buffer。stream就是收幾多signal就立即傳回給libsigrok,buffer就是先儲起直至你認為儲夠再傳回至libsigrok。
我用stm32的F411和H750完成,可以看代碼,主要是main.c。因為libsigrok無可能認得你個device,所以要跟這個tutorial去改。最終效果如下

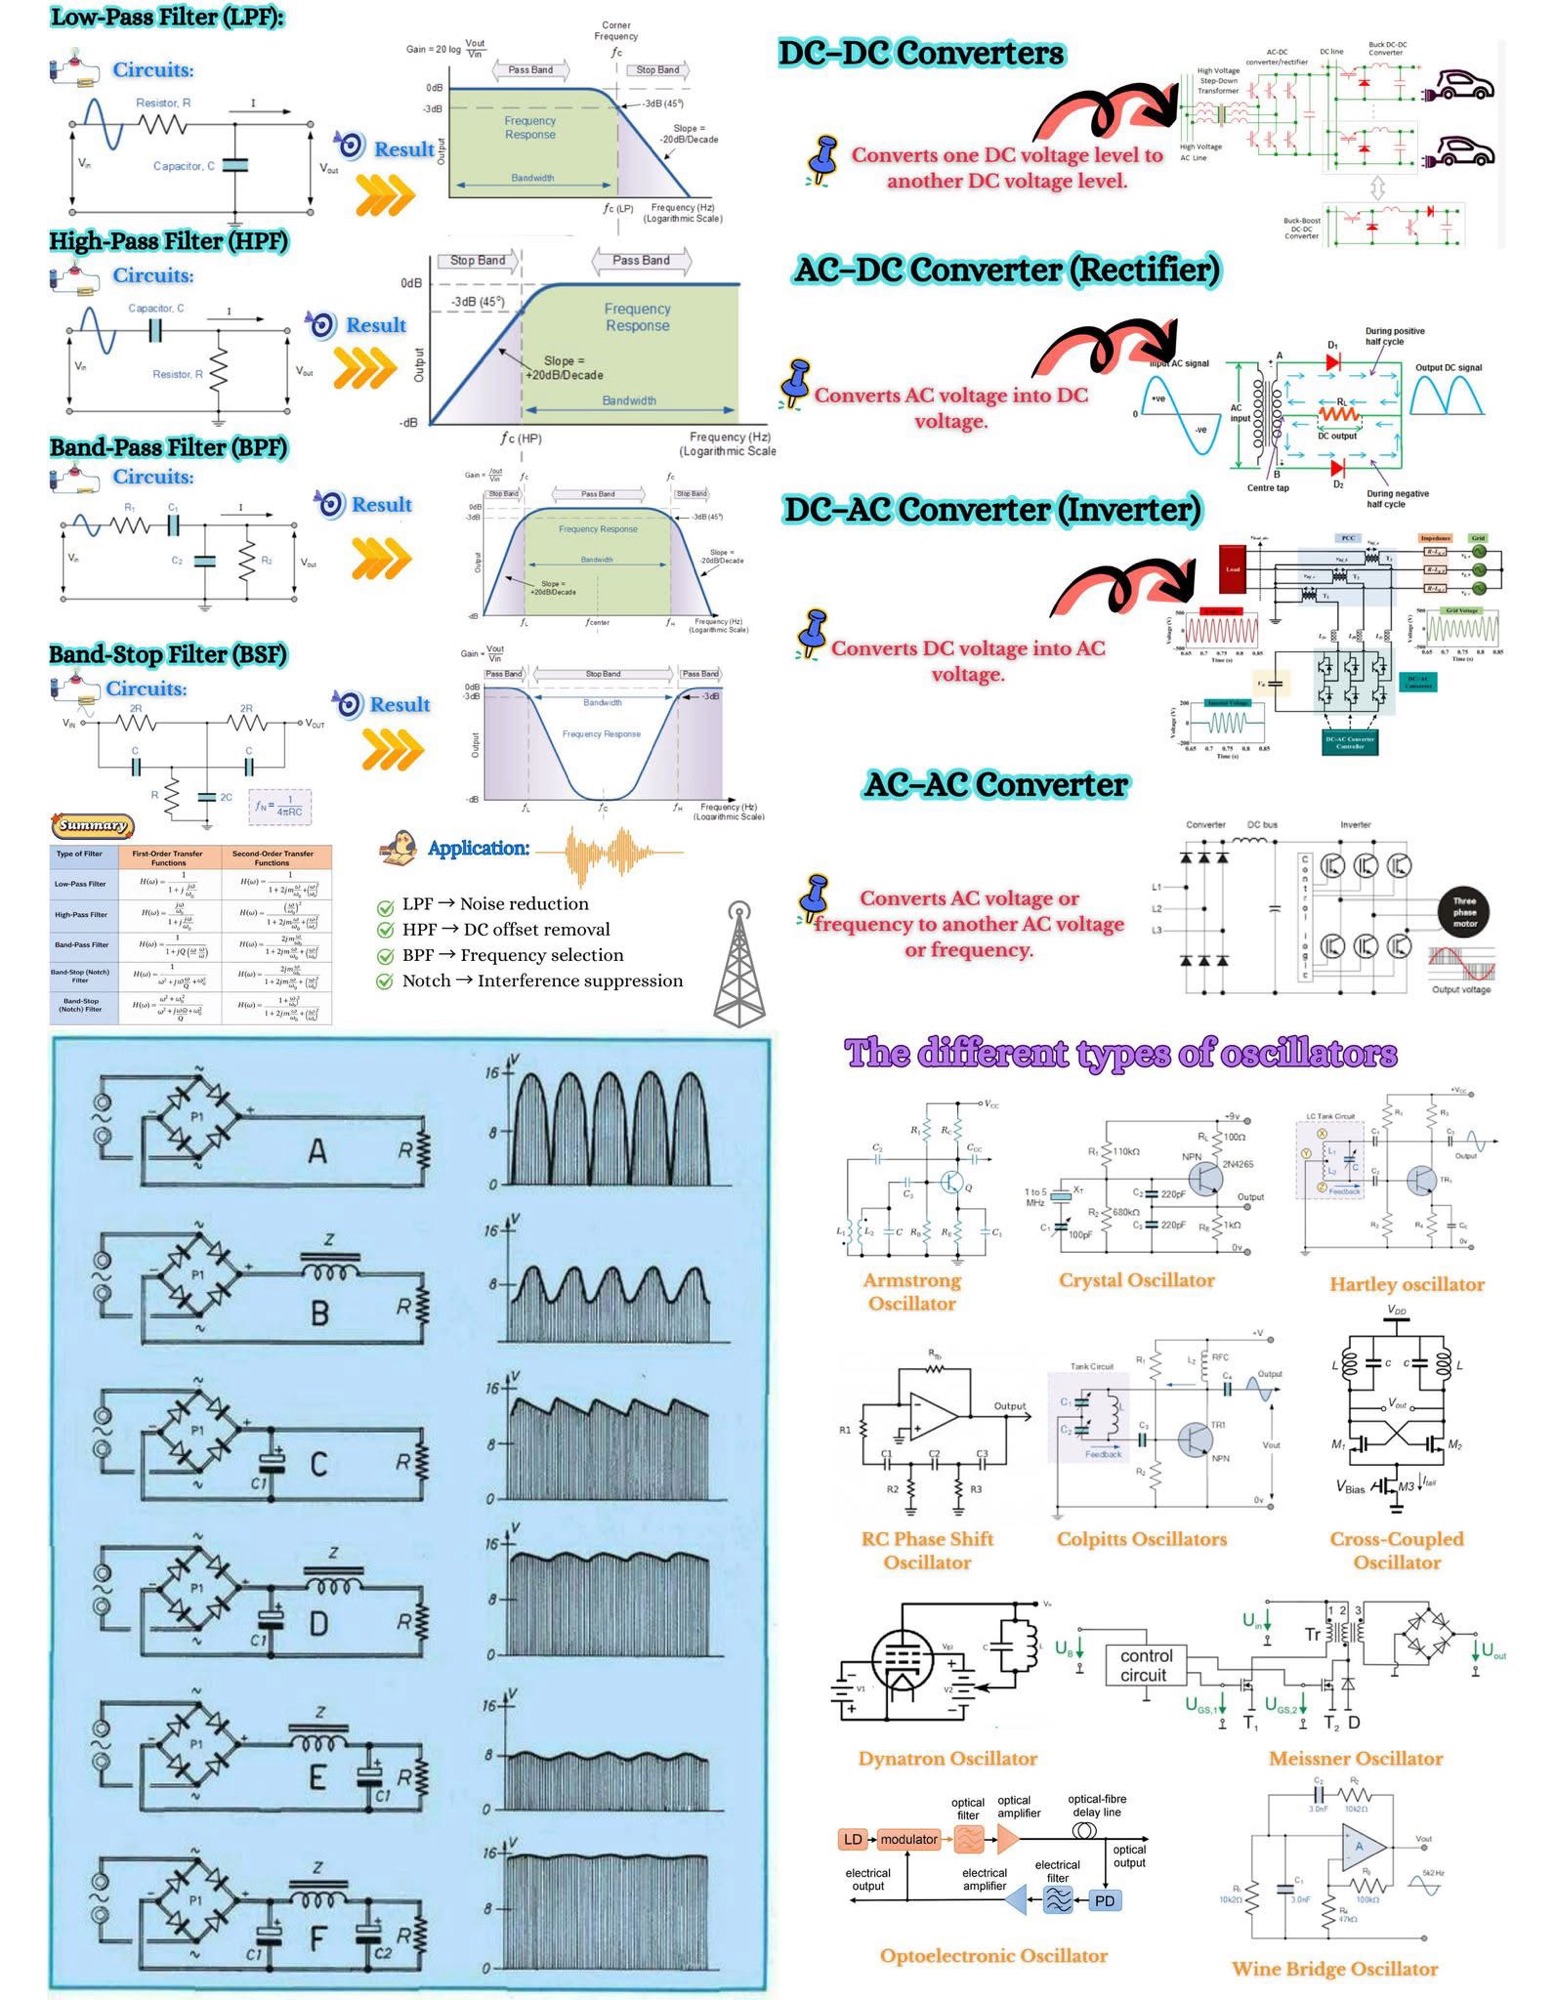
Filters and Power Converters in Electronics – A Brief Overview
In analog electronics, frequency-selective filters are essential building blocks for signal processing. The low-pass filter (LPF) allows low frequencies to pass while attenuating higher ones, making it ideal for noise reduction. Conversely, the high-pass filter (HPF) blocks low frequencies (including DC offset) and passes higher ones. Band-pass filters (BPF) permit only a specific range of frequencies to pass, useful for frequency selection in communication systems, while band-stop/notch filters (BSF) suppress a narrow unwanted frequency band (e.g. 50/60 Hz hum interference). These first- and second-order RC/RL/RLC circuits exhibit characteristic -20 dB/decade or -40 dB/decade roll-off beyond their corner/cutoff frequencies.
On the power electronics side, static converters enable efficient transformation between different voltage types and levels. AC-DC converters (rectifiers) transform alternating current into direct current, forming the front-end of most power supplies. DC-DC converters (such as buck, boost, buck-boost, etc.) step up or step down DC voltage levels and are ubiquitous in battery-powered devices, electric vehicles, and renewable energy systems. DC-AC converters (inverters) convert DC (from batteries, solar panels, or DC links) into AC, powering AC motors, grid-tied solar systems, and uninterruptible power supplies. Finally, AC-AC converters (direct or indirect via DC link) allow voltage magnitude and/or frequency transformation, commonly used in motor drives and power transmission.
Together, these two domains — precise signal filtering and high-efficiency power conversion — form the foundation of modern electronics, spanning audio processing, RF communication, renewable energy systems, electric transportation, and industrial automation.
#include <AccelStepper.h>

// STEP pin, DIR pin
AccelStepper stepper(AccelStepper::DRIVER, 4, 6);

void setup() {
  pinMode(LED_BUILTIN, OUTPUT);

}

void loop() {
  digitalWrite(LED_BUILTIN, HIGH);

  stepper.moveTo(1);
  stepper.runToPosition();
  delay(500);

  digitalWrite(LED_BUILTIN, LOW);

  stepper.moveTo(-1);
  stepper.runToPosition();
  delay(500);
}
docker run -it -v .:/chisel-book --name ice40 ubuntu:24.04
apt-get update
export DEBIAN_FRONTEND=noninteractive
apt-get install build-essential clang bison flex libreadline-dev \
                     gawk tcl-dev libffi-dev git mercurial graphviz   \
                     xdot pkg-config python3 libftdi-dev vim \
                     curl openjdk-25-jdk python3-dev libboost-all-dev cmake libeigen3-dev -y
cd /chisel-book
mkdir ice40
cd ice40

git clone https://github.com/YosysHQ/icestorm.git icestorm
cd icestorm
make -j
make install
cd ..

git clone https://github.com/cseed/arachne-pnr.git arachne-pnr
cd arachne-pnr
make -j
make install
cd ..

git clone https://github.com/YosysHQ/nextpnr nextpnr
cd nextpnr
cmake -DARCH=ice40 -DCMAKE_INSTALL_PREFIX=/usr/local . -B build
cd build
make # -j won't work
make install
cd ../..

git clone https://github.com/YosysHQ/yosys.git yosys
cd yosys
git submodule update --init
make -j4
make install
cd ..
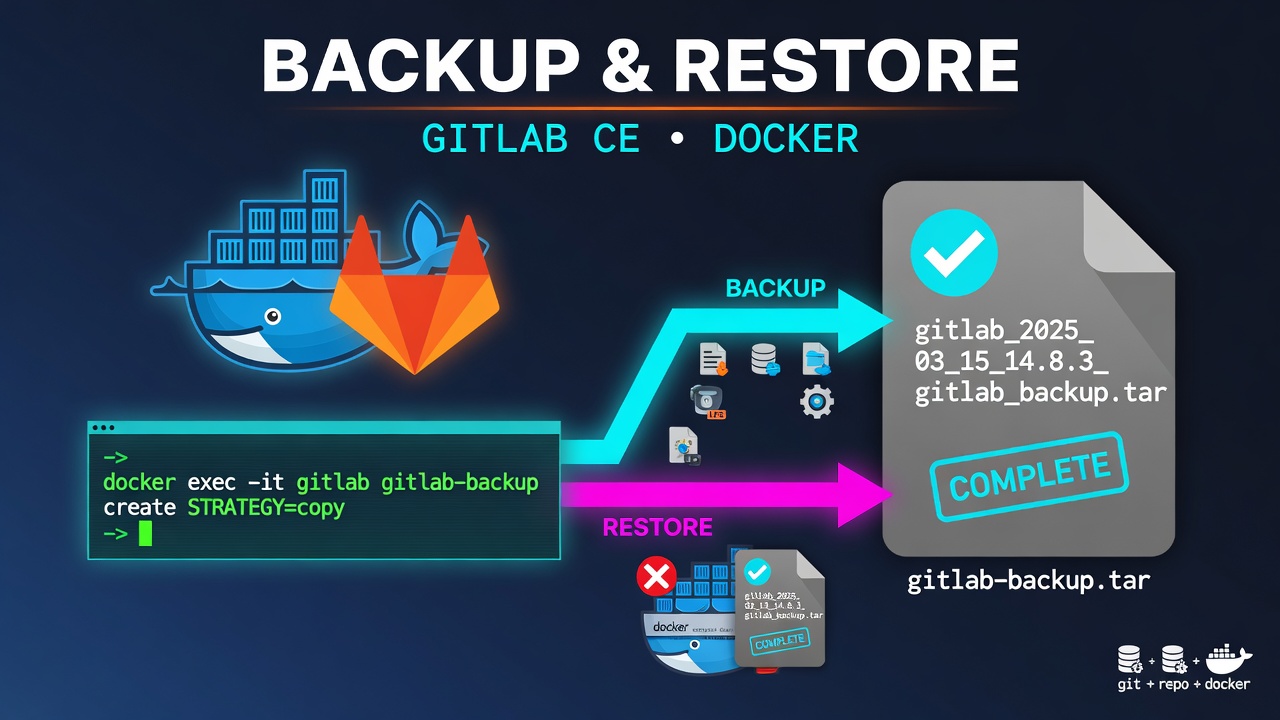
Backup
docker exec -it gitlab gitlab-backup create STRATEGY=copy
This creates a single .tar file that contains everything: repositories, database, uploads, builds, artifacts, LFS, registry, pages, etc. The backup file is saved inside the container at $GITLAB_HOME/data/backups
Restore
# 1. Stop GitLab
docker compose down

# 2. Put the .tar file into $GITLAB_HOME/data/backups/

# 3. Restore
docker exec -it gitlab gitlab-backup restore BACKUP=1732301234_2025_11_22_18.6.0

# 4. Start again
docker compose up -d
https://github.com/quantrpeter/ec11-waveshare-esp32c6
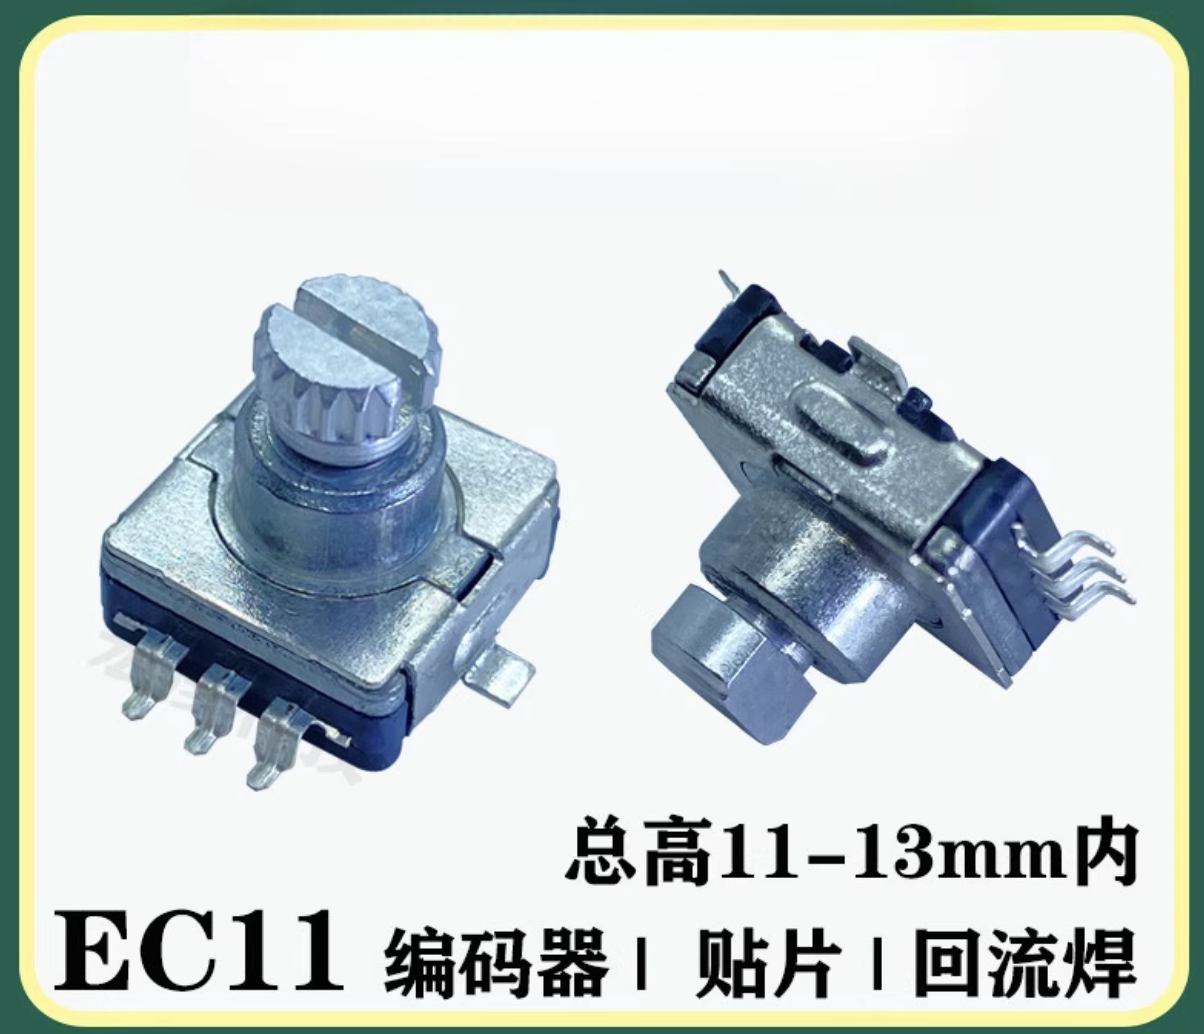
from machine import Pin
import time

class EC11:
    def __init__(self, pin_a, pin_b, pin_c):
        """
        Initialize EC11 rotary encoder for TaoBao version with external pull-ups
        pin_a, pin_b: rotation pins (Terminal A and B)
        pin_c: push button pin (Terminal C)

        IMPORTANT: This version has external 10K pull-ups to 5V
        So we use Pin.IN (no internal pull-up)
        """
        # No internal pull-ups since external 10K pull-ups exist
        self.pin_a = Pin(pin_a, Pin.IN)
        self.pin_b = Pin(pin_b, Pin.IN)
        # Use pull-down for button to make logic clearer: pressed=1, unpressed=0
        self.pin_c = Pin(pin_c, Pin.IN, Pin.PULL_DOWN)

        # Quadrature state tracking
        self.last_state = (self.pin_a.value() << 1) | self.pin_b.value()

        # Lookup table for quadrature decoding
        # Based on state transitions: 00->01->11->10->00 (CW) or reverse (CCW)
        self.state_table = [0, -1, 1, 0, 1, 0, 0, -1, -1, 0, 0, 1, 0, 1, -1, 0]

        # Counter for rotation
        self.counter = 0

        # Accumulator for detent detection (4 steps = 1 detent)
        self.step_accumulator = 0

        # Button state tracking
        self.last_button = self.pin_c.value()
        self.button_debounce_time = 0

    def read_rotation(self):
        """
        Read rotation direction using quadrature decoding
        Returns: 1 for clockwise, -1 for counter-clockwise, 0 for no change
        """
        # Read current state
        current_state = (self.pin_a.value() << 1) | self.pin_b.value()

        # Calculate index for lookup table
        index = (self.last_state << 2) | current_state

        # Get direction from lookup table
        direction = self.state_table[index]

        # Accumulate steps - only return value after 4 steps (1 detent)
        if direction != 0:
            self.step_accumulator += direction
            self.counter += direction

            # Check if we've completed a detent (4 steps in one direction)
            if abs(self.step_accumulator) >= 4:
                result = 1 if self.step_accumulator > 0 else -1
                self.step_accumulator = 0
                self.last_state = current_state
                return result

        # Update last state
        self.last_state = current_state

        return 0

    def read_button(self):
        """
        Read button press with software debouncing
        Returns: True if button was just pressed, False otherwise
        """
        current_time = time.ticks_ms()
        current_button = self.pin_c.value()
        # print('current_button', current_button)

        # Button is pressed when pin goes HIGH (from LOW to HIGH)
        # With internal pull-down: unpressed=0, pressed=1
        # Add debouncing: ignore changes within 50ms
        if self.last_button == 0 and current_button == 1:
            if time.ticks_diff(current_time, self.button_debounce_time) > 50:
                self.button_debounce_time = current_time
                self.last_button = current_button
                return True

        self.last_button = current_button
        return False

    def get_counter(self):
        """Get current counter value"""
        return self.counter

    def reset_counter(self):
        """Reset counter to zero"""
        self.counter = 0

# Initialize EC11 with pins 3, 4, 5
encoder = EC11(pin_a=5, pin_b=3, pin_c=4)

print("EC11 Rotary Encoder Test (TaoBao Version)")
print("Pin A: 3, Pin B: 4, Pin C: 5")
print("External 10K pull-ups to 5V with 0.01uF caps")
print("Rotate encoder or press button...")
print("Press Ctrl+C to exit")
print()

try:
    while True:
        # Check rotation
        rotation = encoder.read_rotation()
        if rotation == 1:
            print(f"↻ Clockwise      - Counter: {encoder.get_counter()}")
        elif rotation == -1:
            print(f"↺ Anti-clockwise - Counter: {encoder.get_counter()}")

        # Check button press
        if encoder.read_button():
            print(f"🔘 Button pressed! Counter: {encoder.get_counter()} → 0")
            encoder.reset_counter()

        time.sleep_ms(1)  # Small delay to prevent excessive polling

except KeyboardInterrupt:
    print("\nProgram stopped")
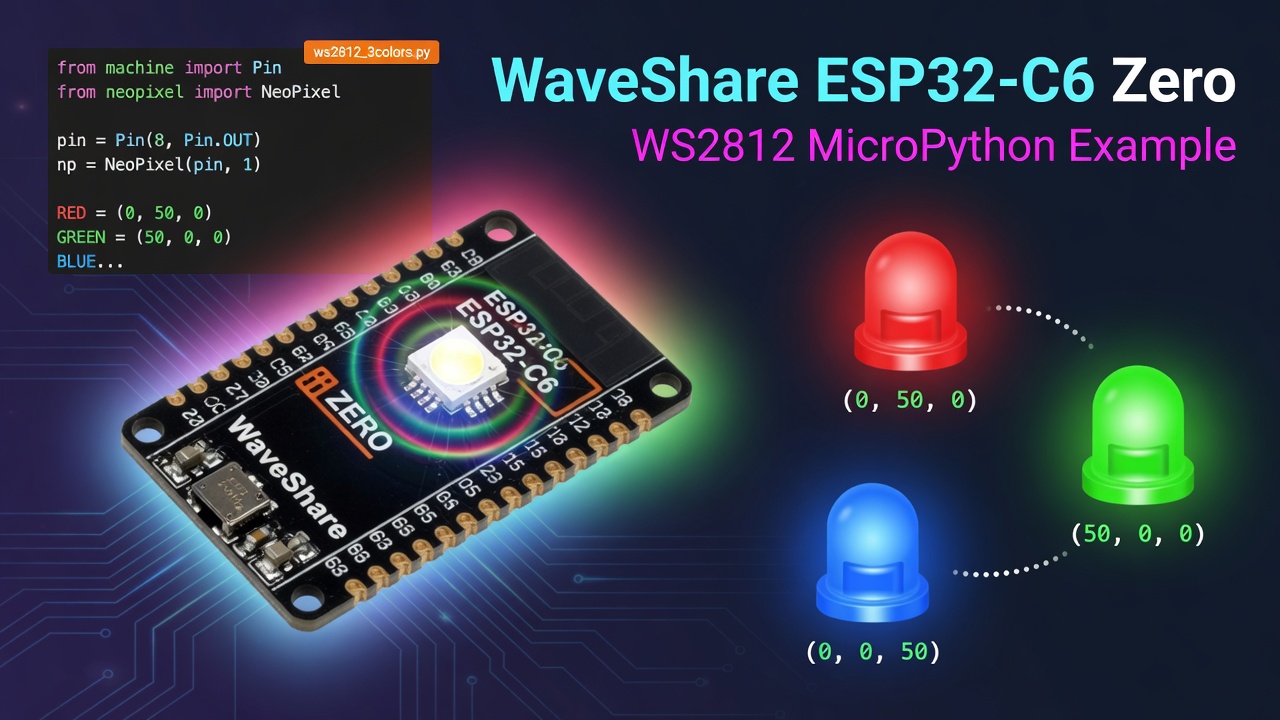
# ws2812_3colors.py
from machine import Pin
from neopixel import NeoPixel
from time import sleep

# WS2812 LED on GPIO 8, 1 pixel
pin = Pin(8, Pin.OUT)
np = NeoPixel(pin, 1)

# Color values in GRB order: (Green, Red, Blue)
RED    = (0, 50, 0)   # Full red
GREEN  = (50, 0, 0)   # Full green
BLUE   = (0, 0, 50)   # Full blue
OFF    = (0, 0, 0)    # LED off

colors = [RED, GREEN, BLUE]

print("Blinking WS2812: Red → Green → Blue")

while True:
    for color in colors:
        np[0] = color
        np.write()
        sleep(0.7)      # Hold each color
        np[0] = OFF
        np.write()
        sleep(0.3)      # Short pause between colors
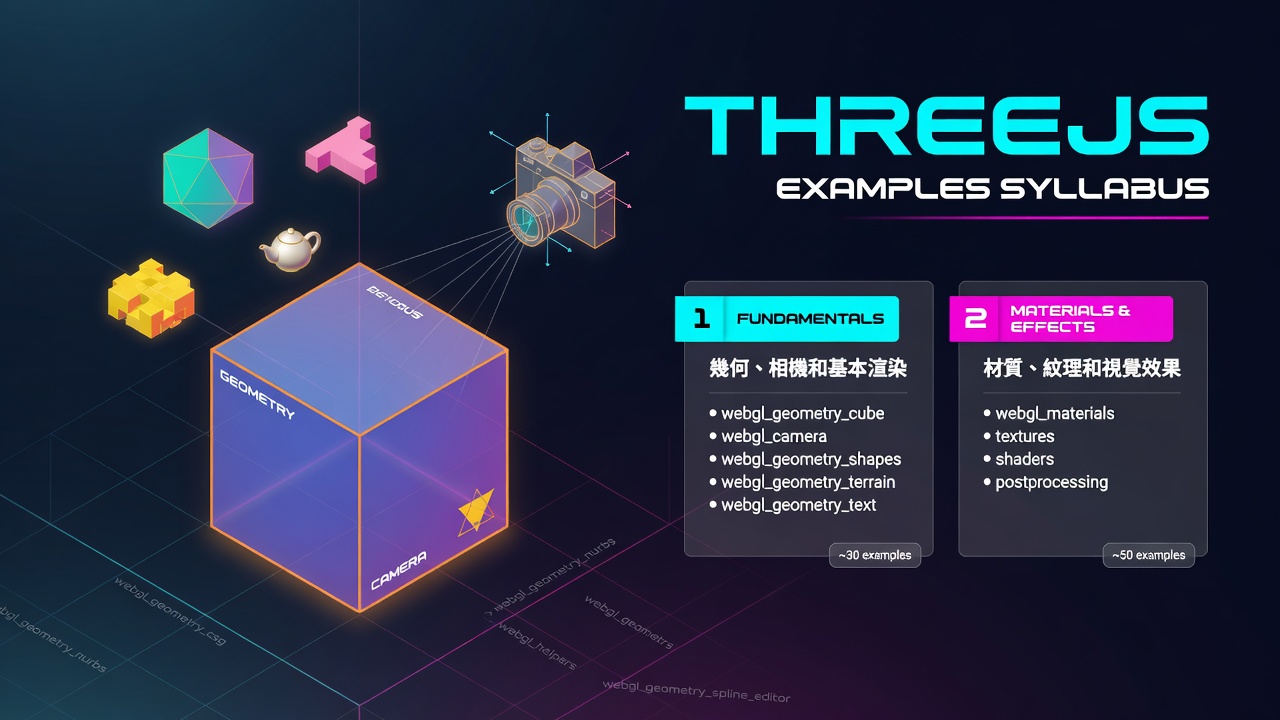
Category 1: Fundamentals - Geometry, Camera, and Basic Rendering (幾何、相機和基本渲染)
Focus: Core concepts and basic 3D scene setup
Examples to cover (~30):
- Basics: webgl_geometries, webgl_camera, webgl_camera_array, webgl_camera_logarithmicdepthbuffer
- Basic Geometry: webgl_geometry_cube, webgl_geometry_shapes, webgl_geometry_colors, webgl_geometry_dynamic
- Parametric & Advanced: webgl_geometries_parametric, webgl_geometry_convex, webgl_geometry_terrain
- Text: webgl_geometry_text, webgl_geometry_text_shapes, webgl_geometry_text_stroke
- Special: webgl_geometry_minecraft, webgl_geometry_teapot, webgl_geometry_nurbs
- Extrusion: webgl_geometry_extrude_shapes, webgl_geometry_extrude_splines
- Tools: webgl_helpers, webgl_geometry_spline_editor, webgl_geometry_terrain_raycast
- CSG: webgl_geometry_csg
- Lookup: webgl_geometry_colors_lookuptable
Category 2: Materials, Textures & Visual Effects (材質、紋理和視覺效果)
Focus: Materials system, texture mapping, and visual enhancements
Examples to cover (~50):
- Basic Materials: webgl_materials_blending, webgl_materials_blending_custom, webgl_materials_channels, webgl_materials_wireframe, webgl_materials_toon, webgl_materials_alphahash
- Texture Mapping: webgl_materials_texture_anisotropy, webgl_materials_texture_canvas, webgl_materials_texture_filters, webgl_materials_texture_manualmipmap, webgl_materials_texture_partialupdate, webgl_materials_texture_rotation
- Advanced Materials: webgl_materials_bumpmap, webgl_materials_normalmap, webgl_materials_normalmap_object_space, webgl_materials_displacementmap
- PBR Materials: webgl_materials_physical_clearcoat, webgl_materials_physical_transmission, webgl_materials_physical_transmission_alpha, webgl_materials_subsurface_scattering
- Environment Maps: webgl_materials_cubemap, webgl_materials_cubemap_dynamic, webgl_materials_cubemap_refraction, webgl_materials_cubemap_mipmaps, webgl_materials_cubemap_render_to_mipmaps, webgl_materials_envmaps, webgl_materials_envmaps_exr, webgl_materials_envmaps_groundprojected, webgl_materials_envmaps_hdr, webgl_materials_matcap
- Video/Webcam: webgl_materials_video, webgl_materials_video_webcam
- Special: webgl_materials_car, webgl_materials_modified
- Effects: webgl_effects_anaglyph, webgl_effects_ascii, webgl_effects_parallaxbarrier, webgl_effects_peppersghost, webgl_effects_stereo
- Special Rendering: webgl_mirror, webgl_refraction, webgl_portal
Category 3: Lighting & Shadows (光線與陰影)
Focus: Different light types, shadow mapping techniques
Examples to cover (~25):
- Light Types: webgl_lights_hemisphere, webgl_lights_physical, webgl_lights_pointlights, webgl_lights_spotlight, webgl_lights_spotlights, webgl_lights_rectarealight
- Light Probes: webgl_lightprobe, webgl_lightprobe_cubecamera
- Shadows: webgl_shadowmap, webgl_shadowmap_performance, webgl_shadowmap_pointlight, webgl_shadowmap_viewer, webgl_shadowmap_vsm, webgl_shadowmesh, webgl_shadow_contact
- Advanced Shadows: webgl_shadowmap_csm, webgl_shadowmap_pcss, webgl_shadowmap_progressive
- Lens Effects: webgl_lensflares
- Global Illumination: webgl_simple_gi
- Tone Mapping: webgl_tonemapping
- Color Space: webgl_test_wide_gamut, webgl_furnace_test, webgl_pmrem_test
Category 4: Animation & Character Control (動畫和角色控制)
Focus: Keyframe animation, skeletal animation, morphing
Examples to cover (~25):
- Basic Animation: webgl_animation_keyframes, webgl_animation_multiple
- Skinning: webgl_animation_skinning_blending, webgl_animation_skinning_additive_blending, webgl_animation_skinning_ik, webgl_animation_skinning_morph
- Morph Targets: webgl_morphtargets, webgl_morphtargets_face, webgl_morphtargets_horse, webgl_morphtargets_sphere, webgl_morphtargets_webcam
- Animation Groups: misc_animation_groups, misc_animation_keys
- Instanced Animation: webgl_instancing_morph
- Modifiers: webgl_modifier_curve, webgl_modifier_curve_instanced, webgl_modifier_edgesplit, webgl_modifier_simplifier, webgl_modifier_subdivision, webgl_modifier_tessellation
Category 5: Interaction & Controls (交互與控制)
Focus: User interaction, raycasting, controls
Examples to cover (~35):
- Interactive: webgl_interactive_cubes, webgl_interactive_cubes_gpu, webgl_interactive_cubes_ortho, webgl_interactive_buffergeometry, webgl_interactive_lines, webgl_interactive_points, webgl_interactive_raycasting_points, webgl_interactive_voxelpainter
- Raycasting: webgl_raycaster_bvh, webgl_raycaster_sprite, webgl_raycaster_texture, misc_raycaster_helper
- Camera Controls: misc_controls_orbit, misc_controls_arcball, misc_controls_fly, misc_controls_map, misc_controls_pointerlock, misc_controls_trackball, misc_controls_transform, misc_controls_drag
- Selection: misc_boxselection
- Look At: misc_lookat
- Layers: webgl_layers
- Math: webgl_math_obb, webgl_math_orientation_transform
Category 6: Instancing, Performance & Advanced Geometry
Focus: Performance optimization, instancing, buffer geometry
Examples to cover (~50):
- Instancing: webgl_instancing_dynamic, webgl_instancing_performance, webgl_instancing_raycast, webgl_instancing_scatter
- Buffer Geometry: webgl_buffergeometry, webgl_buffergeometry_attributes_integer, webgl_buffergeometry_attributes_none, webgl_buffergeometry_custom_attributes_particles, webgl_buffergeometry_drawrange, webgl_buffergeometry_glbufferattribute, webgl_buffergeometry_indexed, webgl_buffergeometry_instancing, webgl_buffergeometry_instancing_billboards, webgl_buffergeometry_instancing_interleaved, webgl_buffergeometry_lines, webgl_buffergeometry_lines_indexed, webgl_buffergeometry_points, webgl_buffergeometry_points_interleaved, webgl_buffergeometry_rawshader, webgl_buffergeometry_selective_draw, webgl_buffergeometry_uint
- Custom Attributes: webgl_custom_attributes, webgl_custom_attributes_lines, webgl_custom_attributes_points, webgl_custom_attributes_points2, webgl_custom_attributes_points3
- Points & Particles: webgl_points_billboards, webgl_points_dynamic, webgl_points_sprites, webgl_points_waves
- Lines: webgl_lines_colors, webgl_lines_dashed, webgl_lines_fat, webgl_lines_fat_raycasting, webgl_lines_fat_wireframe
- LOD: webgl_lod
- Batch: webgl_mesh_batch
- Performance: webgl_performance, webgl_test_memory, webgl_test_memory2
- Sprites: webgl_sprites
Category 7: File Loaders & Import/Export
Focus: Loading external 3D models and assets
Examples to cover (~70):
- GLTF (Most Important): webgl_loader_gltf, webgl_loader_gltf_avif, webgl_loader_gltf_compressed, webgl_loader_gltf_dispersion, webgl_loader_gltf_instancing, webgl_loader_gltf_iridescence, webgl_loader_gltf_sheen, webgl_loader_gltf_transmission, webgl_loader_gltf_variants, webgl_loader_gltf_anisotropy
- Common Formats: webgl_loader_fbx, webgl_loader_fbx_nurbs, webgl_loader_obj, webgl_loader_obj_mtl, webgl_loader_collada, webgl_loader_collada_kinematics, webgl_loader_collada_skinning, webgl_loader_draco, webgl_loader_stl, webgl_loader_ply
- CAD Formats: webgl_loader_3dm, webgl_loader_3ds, webgl_loader_3mf, webgl_loader_3mf_materials, webgl_loader_amf, webgl_loader_ifc, webgl_loader_usdz, webgl_loader_kmz
- Animation Formats: webgl_loader_bvh, webgl_loader_md2, webgl_loader_md2_control, webgl_loader_mdd
- Point Cloud: webgl_loader_pcd, webgl_loader_xyz
- Scientific: webgl_loader_pdb, webgl_loader_nrrd, webgl_loader_vtk
- Other: webgl_loader_gcode, webgl_loader_ldraw, webgl_loader_lwo, webgl_loader_svg, webgl_loader_vox, webgl_loader_vrml, webgl_loader_ttf
- Texture Loaders: webgl_loader_texture_dds, webgl_loader_texture_exr, webgl_loader_texture_ultrahdr, webgl_loader_texture_hdr, webgl_loader_texture_ktx, webgl_loader_texture_ktx2, webgl_loader_texture_lottie, webgl_loader_texture_pvrtc, webgl_loader_texture_rgbm, webgl_loader_texture_tga, webgl_loader_texture_tiff, webgl_loader_imagebitmap
- Exporters: misc_exporter_draco, misc_exporter_gltf, misc_exporter_obj, misc_exporter_ply, misc_exporter_stl, misc_exporter_usdz, misc_exporter_exr, misc_exporter_ktx2
Category 8: Post-Processing & Advanced Rendering
Focus: Post-processing effects, render targets, advanced techniques
Examples to cover (~60):
- Basic Post-Processing: webgl_postprocessing, webgl_postprocessing_advanced
- Anti-Aliasing: webgl_postprocessing_fxaa, webgl_postprocessing_smaa, webgl_postprocessing_ssaa, webgl_postprocessing_taa
- Bloom & Glow: webgl_postprocessing_unreal_bloom, webgl_postprocessing_unreal_bloom_selective
- Depth Effects: webgl_postprocessing_dof, webgl_postprocessing_dof2, webgl_postprocessing_ssao, webgl_postprocessing_sao, webgl_postprocessing_gtao, webgl_postprocessing_material_ao
- Reflections: webgl_postprocessing_ssr
- Stylistic: webgl_postprocessing_outline, webgl_postprocessing_pixel, webgl_postprocessing_rgb_halftone, webgl_postprocessing_sobel, webgl_postprocessing_glitch, webgl_postprocessing_afterimage
- Color Grading: webgl_postprocessing_3dlut, webgl_postprocessing_backgrounds, webgl_postprocessing_transition
- Special Effects: webgl_postprocessing_godrays, webgl_postprocessing_masking, webgl_postprocessing_procedural
- Render Targets: webgl_rtt, webgl_multiple_rendertargets, webgl_multisampled_renderbuffers
- Clipping: webgl_clipping, webgl_clipping_advanced, webgl_clipping_intersection, webgl_clipping_stencil, webgl_clipculldistance
- Depth & Texture: webgl_depth_texture, webgl_framebuffer_texture
- Advanced Textures: webgl_texture2darray, webgl_texture2darray_compressed, webgl_texture2darray_layerupdate, webgl_texture3d, webgl_texture3d_partialupdate
- Decals: webgl_decals
- UBO: webgl_ubo, webgl_ubo_arrays
- Multiple Views: webgl_multiple_elements, webgl_multiple_elements_text, webgl_multiple_scenes_comparison, webgl_multiple_views
- Panoramas: webgl_panorama_cube, webgl_panorama_equirectangular, webgl_video_panorama_equirectangular
- Read Buffer: webgl_read_float_buffer
- Path Tracing: webgl_renderer_pathtracer
- Render Target Array: webgl_rendertarget_texture2darray
Category 9: Shaders, GPGPU, Volumes & Special Techniques
Focus: Custom shaders, GPU computing, volumetric rendering
Examples to cover (~35):
- Custom Shaders: webgl_shader, webgl_shader_lava, webgl_shaders_ocean, webgl_shaders_sky
- GPGPU: webgl_gpgpu_birds, webgl_gpgpu_birds_gltf, webgl_gpgpu_water, webgl_gpgpu_protoplanet
- Volumetric: webgl_volume_cloud, webgl_volume_instancing, webgl_volume_perlin
- Water: webgl_water, webgl_water_flowmap
- Marching Cubes: webgl_marchingcubes
- Video: webgl_video_kinect
- Workers: webgl_worker_offscreencanvas
- Audio: webaudio_orientation, webaudio_sandbox, webaudio_timing, webaudio_visualizer
- CSS Integration: css2d_label, css3d_molecules, css3d_orthographic, css3d_periodictable, css3d_sandbox, css3d_sprites, css3d_youtube
- SVG: svg_lines, svg_sandbox
- Physics: physics_ammo_break, physics_ammo_cloth, physics_ammo_instancing, physics_ammo_rope, physics_ammo_terrain, physics_ammo_volume, physics_jolt_instancing, physics_rapier_instancing
- Game: games_fps
- Tests: misc_uv_tests
Category 10: WebGPU & WebXR (Future of 3D Web)
Focus: Next-generation graphics API and VR/AR
Examples to cover (~180):
WebGPU (~157 examples):
- Basics: webgpu_camera, webgpu_camera_array, webgpu_camera_logarithmicdepthbuffer, webgpu_sandbox
- Materials: webgpu_materials, webgpu_materials_basic, webgpu_materials_alphahash, webgpu_materials_arrays, webgpu_materials_displacementmap, webgpu_materials_envmaps, webgpu_materials_envmaps_bpcem, webgpu_materials_lightmap, webgpu_materials_matcap, webgpu_materials_sss, webgpu_materials_transmission, webgpu_materials_toon, webgpu_materials_video, webgpu_clearcoat
- Lighting: webgpu_lights_custom, webgpu_lights_ies_spotlight, webgpu_lights_phong, webgpu_lights_physical, webgpu_lights_rectarealight, webgpu_lights_selective, webgpu_lights_spotlight, webgpu_lights_tiled, webgpu_lightprobe, webgpu_lightprobe_cubecamera
- Compute Shaders: webgpu_compute_audio, webgpu_compute_birds, webgpu_compute_geometry, webgpu_compute_particles, webgpu_compute_particles_rain, webgpu_compute_particles_snow, webgpu_compute_points, webgpu_compute_sort_bitonic, webgpu_compute_texture, webgpu_compute_texture_pingpong, webgpu_compute_water
- TSL (Three Shading Language): webgpu_tsl_angular_slicing, webgpu_tsl_compute_attractors_particles, webgpu_tsl_earth, webgpu_tsl_editor, webgpu_tsl_galaxy, webgpu_tsl_halftone, webgpu_tsl_interoperability, webgpu_tsl_procedural_terrain, webgpu_tsl_raging_sea, webgpu_tsl_transpiler, webgpu_tsl_vfx_flames, webgpu_tsl_vfx_linkedparticles, webgpu_tsl_vfx_tornado
- Post-Processing: All webgpu_postprocessing_* examples (~30)
- Advanced: Shadows, instancing, skinning, volumes, particles, loaders, etc.
WebXR (~24 examples):
- AR: webxr_ar_cones, webxr_ar_hittest, webxr_ar_lighting, webxr_ar_plane_detection
- VR Interaction: webxr_vr_handinput, webxr_vr_handinput_cubes, webxr_vr_handinput_profiles, webxr_vr_handinput_pointerclick, webxr_vr_handinput_pointerdrag, webxr_vr_handinput_pressbutton
- VR Experiences: webxr_vr_layers, webxr_vr_panorama, webxr_vr_panorama_depth, webxr_vr_rollercoaster, webxr_vr_sandbox, webxr_vr_teleport, webxr_vr_video
- XR General: webxr_xr_ballshooter, webxr_xr_controls_transform, webxr_xr_cubes, webxr_xr_dragging, webxr_xr_dragging_custom_depth, webxr_xr_haptics, webxr_xr_paint, webxr_xr_sculpt
- WebGPU XR: webgpu_xr_cubes
📊 Summary Statistics
| Category | Topic | # Examples |
|---|---|---|
| 1 | Fundamentals | ~30 |
| 2 | Materials & Textures | ~50 |
| 3 | Lighting & Shadows | ~25 |
| 4 | Animation | ~25 |
| 5 | Interaction & Controls | ~35 |
| 6 | Performance & Instancing | ~50 |
| 7 | Loaders & File I/O | ~70 |
| 8 | Post-Processing | ~60 |
| 9 | Shaders & Special | ~35 |
| 10 | WebGPU & WebXR | ~180 |
| Total | ~560 |
🎯 Teaching Approach Recommendations
- Lesson Structure: Each lesson should be 2-3 hours with:
- Theory introduction (20%)
- Live coding demonstration (40%)
- Student hands-on practice (40%)
- Key Examples to Demo Live: Focus on 5-8 representative examples per lesson, show others as reference
- Progressive Difficulty: Start simple in each lesson, build complexity
- Practical Projects: End each lesson with a mini-project combining concepts
- WebGPU Note: Lesson 10 is the longest - consider splitting if needed, as WebGPU is the future but may need more dedicated time
Step 1: Install and create the drive
sudo apt install zfsutils-linux
sudo dd if=/dev/zero of=zfsfile.img bs=1 count=0 seek=10G
Step 2: Create pool and view it
sudo zpool create tank /home/peter/zfsfile.img  # have to use full path
sudo zpool status tank
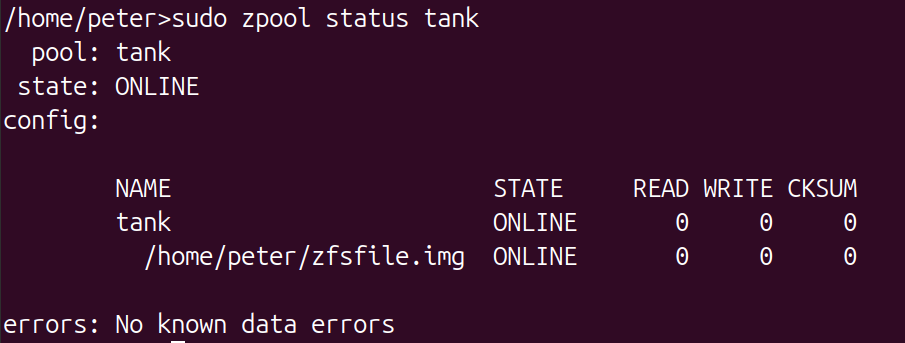
sudo zfs list

Step 3: Optional, use a custom mount point
sudo zfs set mountpoint=/mnt/myzfs tank
sudo zfs mount tank
df -h
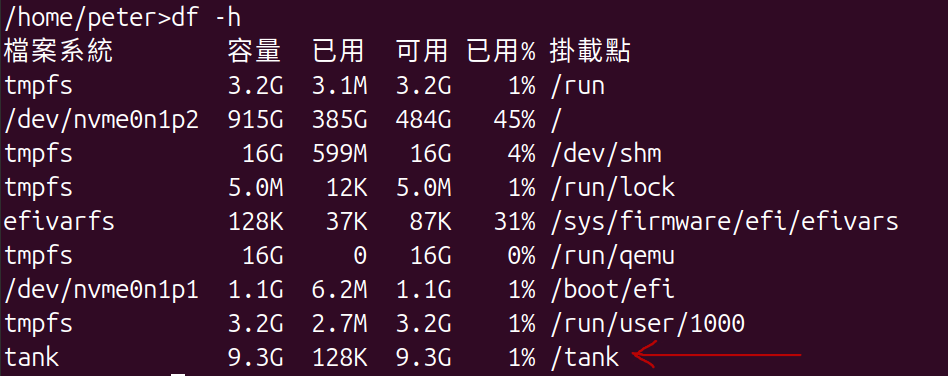
Step 4: Create file for test
sudo zfs create tank/testdata  # Creates the dataset 'tank/testdata', auto-mounted at /tank/testdata
cd /tank/testdata  # Or /mnt/myzfs/testdata if custom mount
echo "This is file1 content" | sudo tee testfile1  # No need for full
echo "This is file1 content" | sudo tee /tank/testdata/testfile1
echo "This is file2 content" | sudo tee /tank/testdata/testfile2
ls /tank/testdata
Step 5: Take snapshot of folder
sudo zfs snapshot tank/testdata@test_snapshot
sudo zfs list -t snapshot  # Verify the snapshot exists

Step 6: Export Snapshot to File
sudo zfs send tank/testdata@test_snapshot > /tmp/test_snapshot.zfs
ls -lh /tmp/test_snapshot.zfs  # Check the backup file
Step 7: Simulate Changes to Test Restore
cd /tank/testdata
sudo rm testfile1  # Delete a file
echo "Modified file2" | sudo tee testfile2  # Change content
echo "New file3 content" | sudo tee testfile3  # Add new file
ls  # Verify changes: testfile2 testfile3
Step 8: Restore folder from snapshot file
sudo zfs destroy tank/testdata@test_snapshot
sudo zfs receive -F tank/testdata < /tmp/test_snapshot.zfs
ls testdata
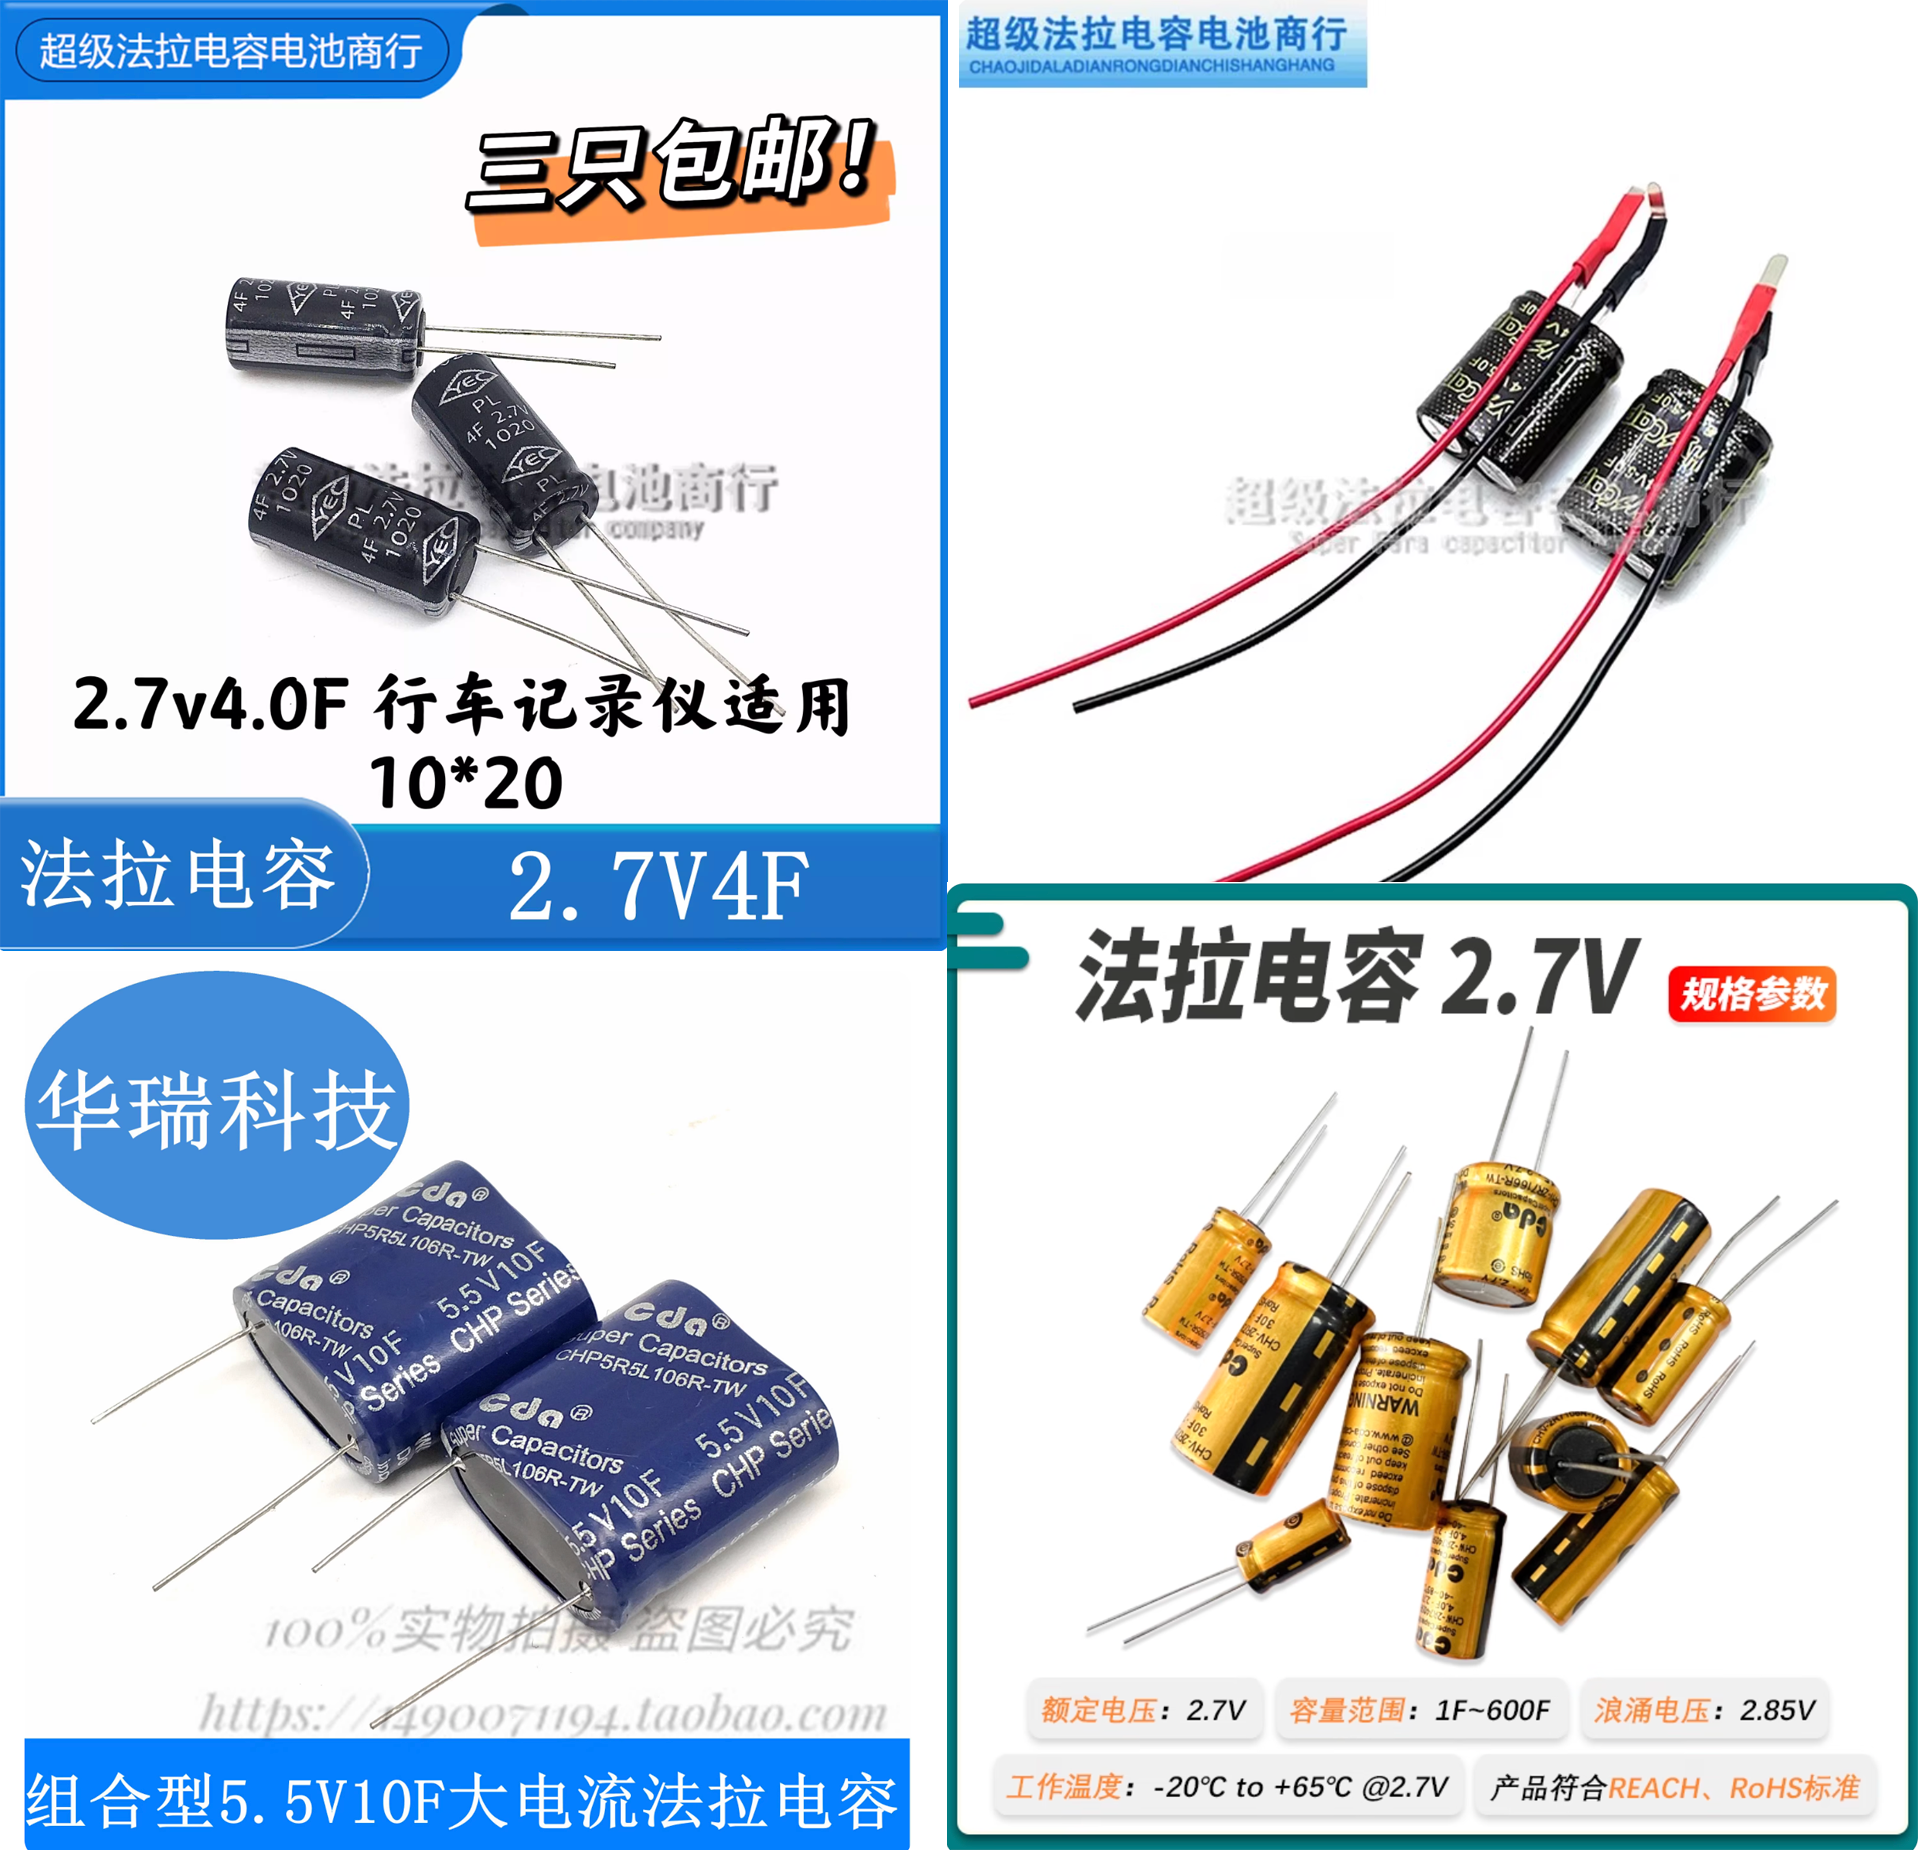
阿叔之無稽之談:
1. 電容加唔到速:我買左四種電容,全部都有加速效果。阿叔話細電容得2.7v,加唔到速。我用4.8v charge 2.7v電容,加速度好勁。阿叔話會爆炸,我用5v charge,去埋個廁所都等唔到傳說中嘅爆炸!
2. 電容唔夠力:我用5F大約有1.5秒強勁加速,用10F大約有你秒,目測個摩打快左40%以上
3. 四驅車電池不足以為電容充電:我用左個5v升壓,賣2蚊人仔,充電效果唔錯。唯一就係充得唔夠快,5F要20秒,10F要50秒
4. 阿叔話四驅車摩打頂唔到5V:實情係一啲事都無,摩打直頭唔熱,我估去到7v都唔會有問題
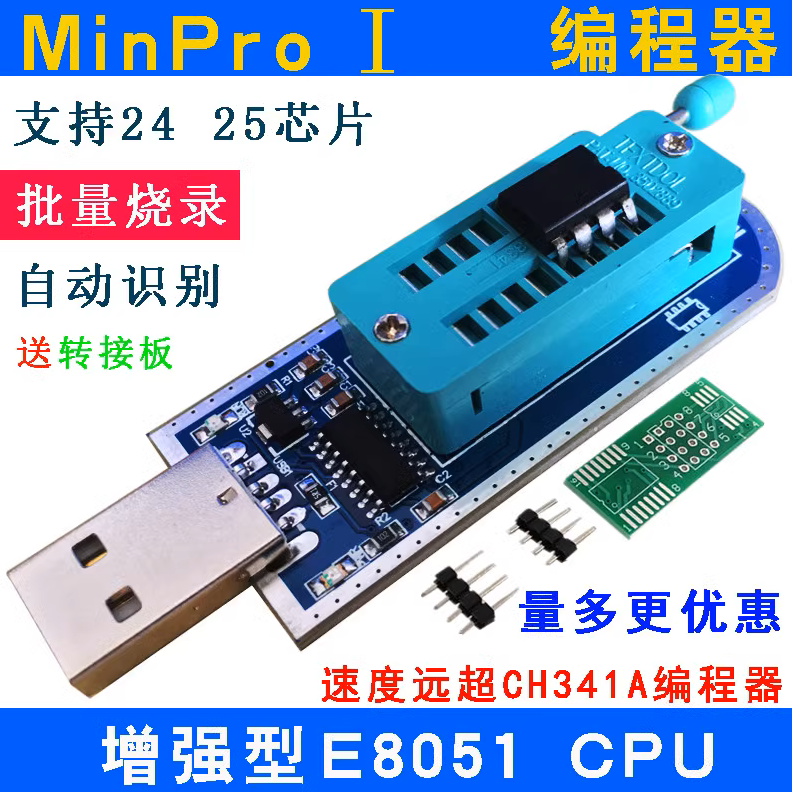
Buy : TaoBao
Software download : http://www.yaojiedianzi.com/index.php?m=Download&a=show&id=10
So download here :
Warning: Driver in the zip not work, do this
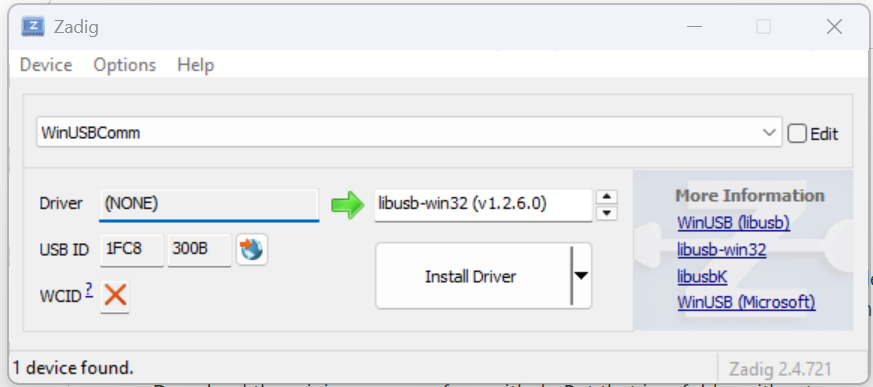
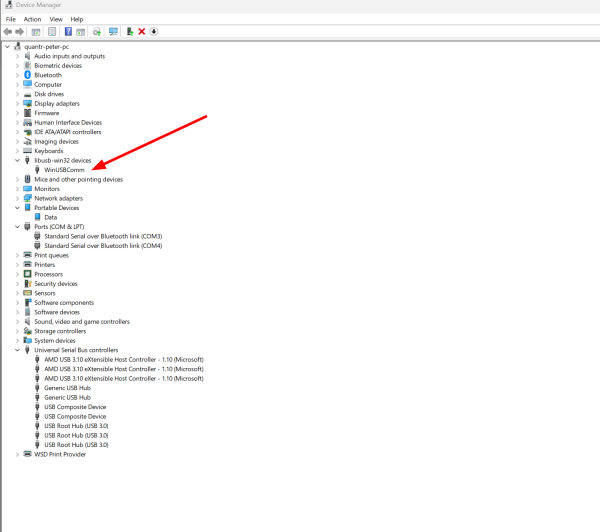
If i plugin it in pc usb port, it work. If i plugin it into usb hub, not working, i see the driver is different, so becareful. If you meet this case, use zadig to change the driver from winusbcomm to libusb-win
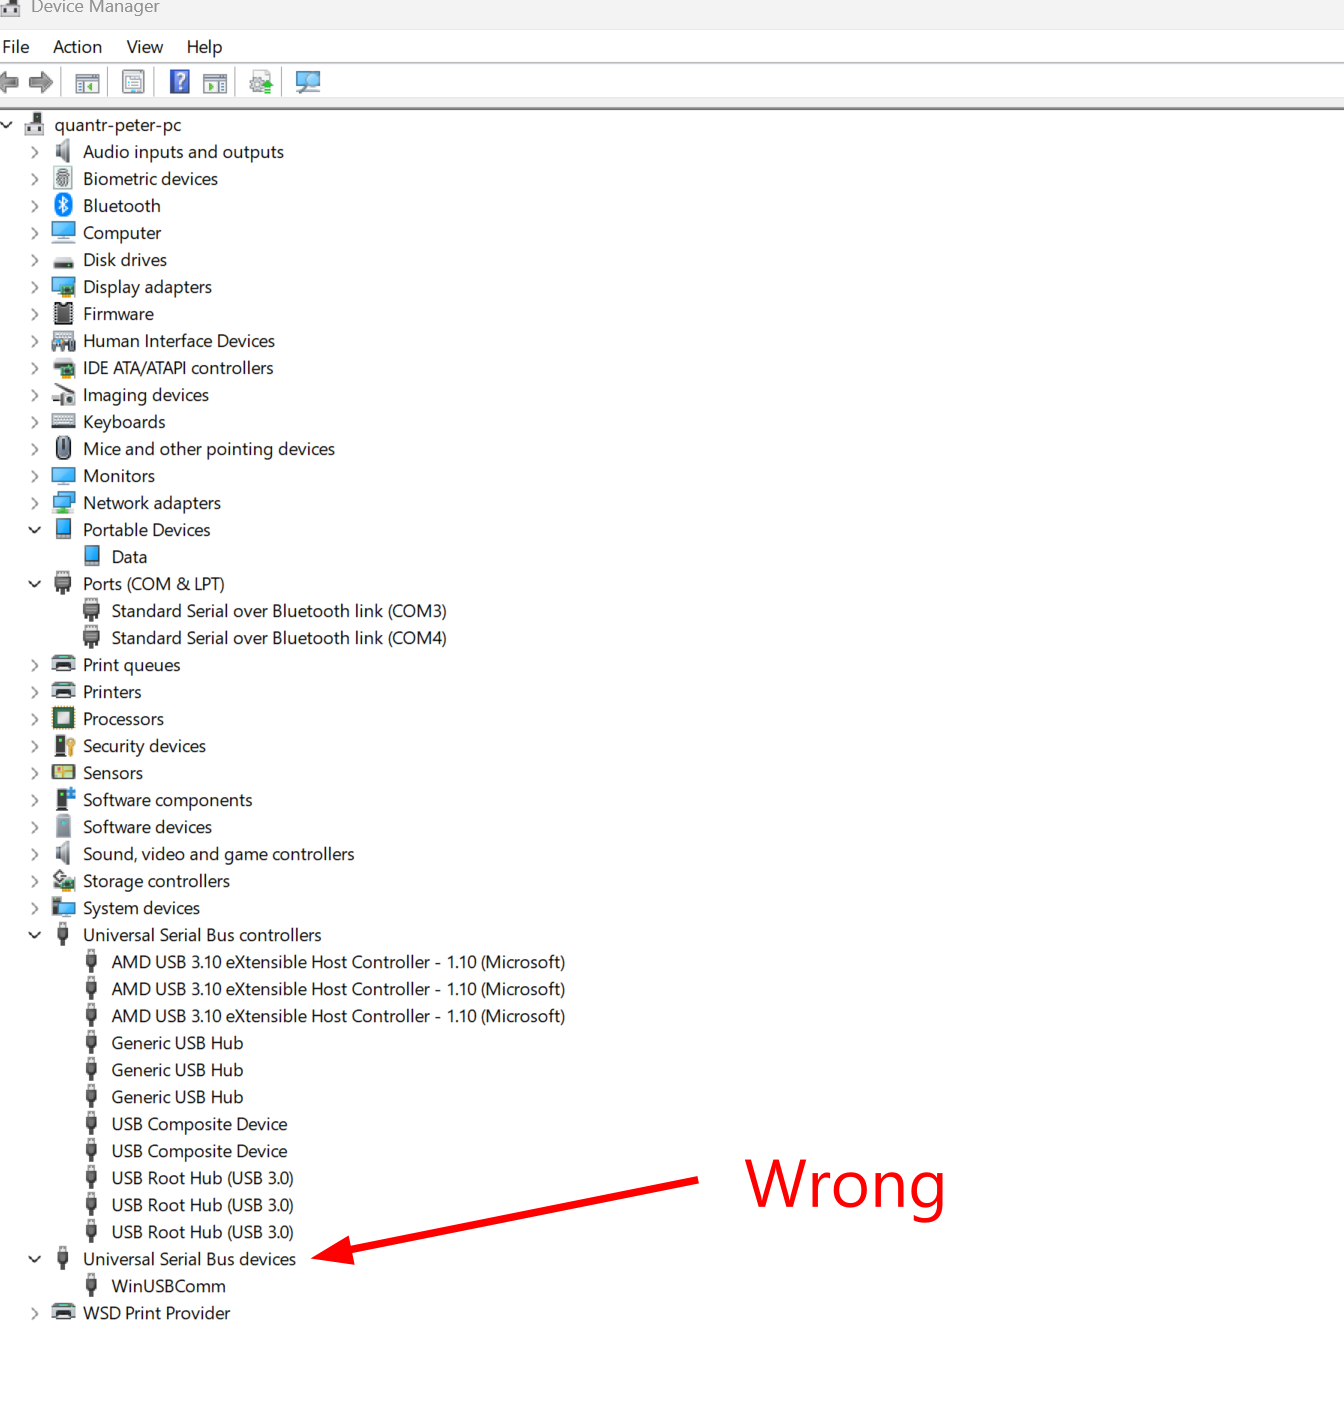
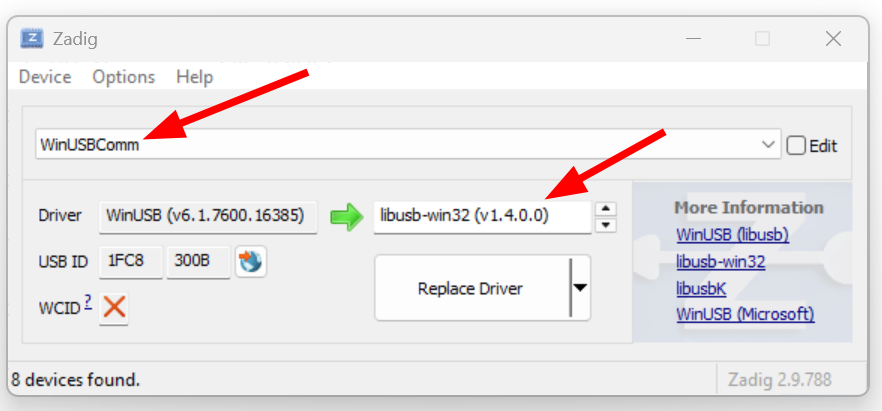
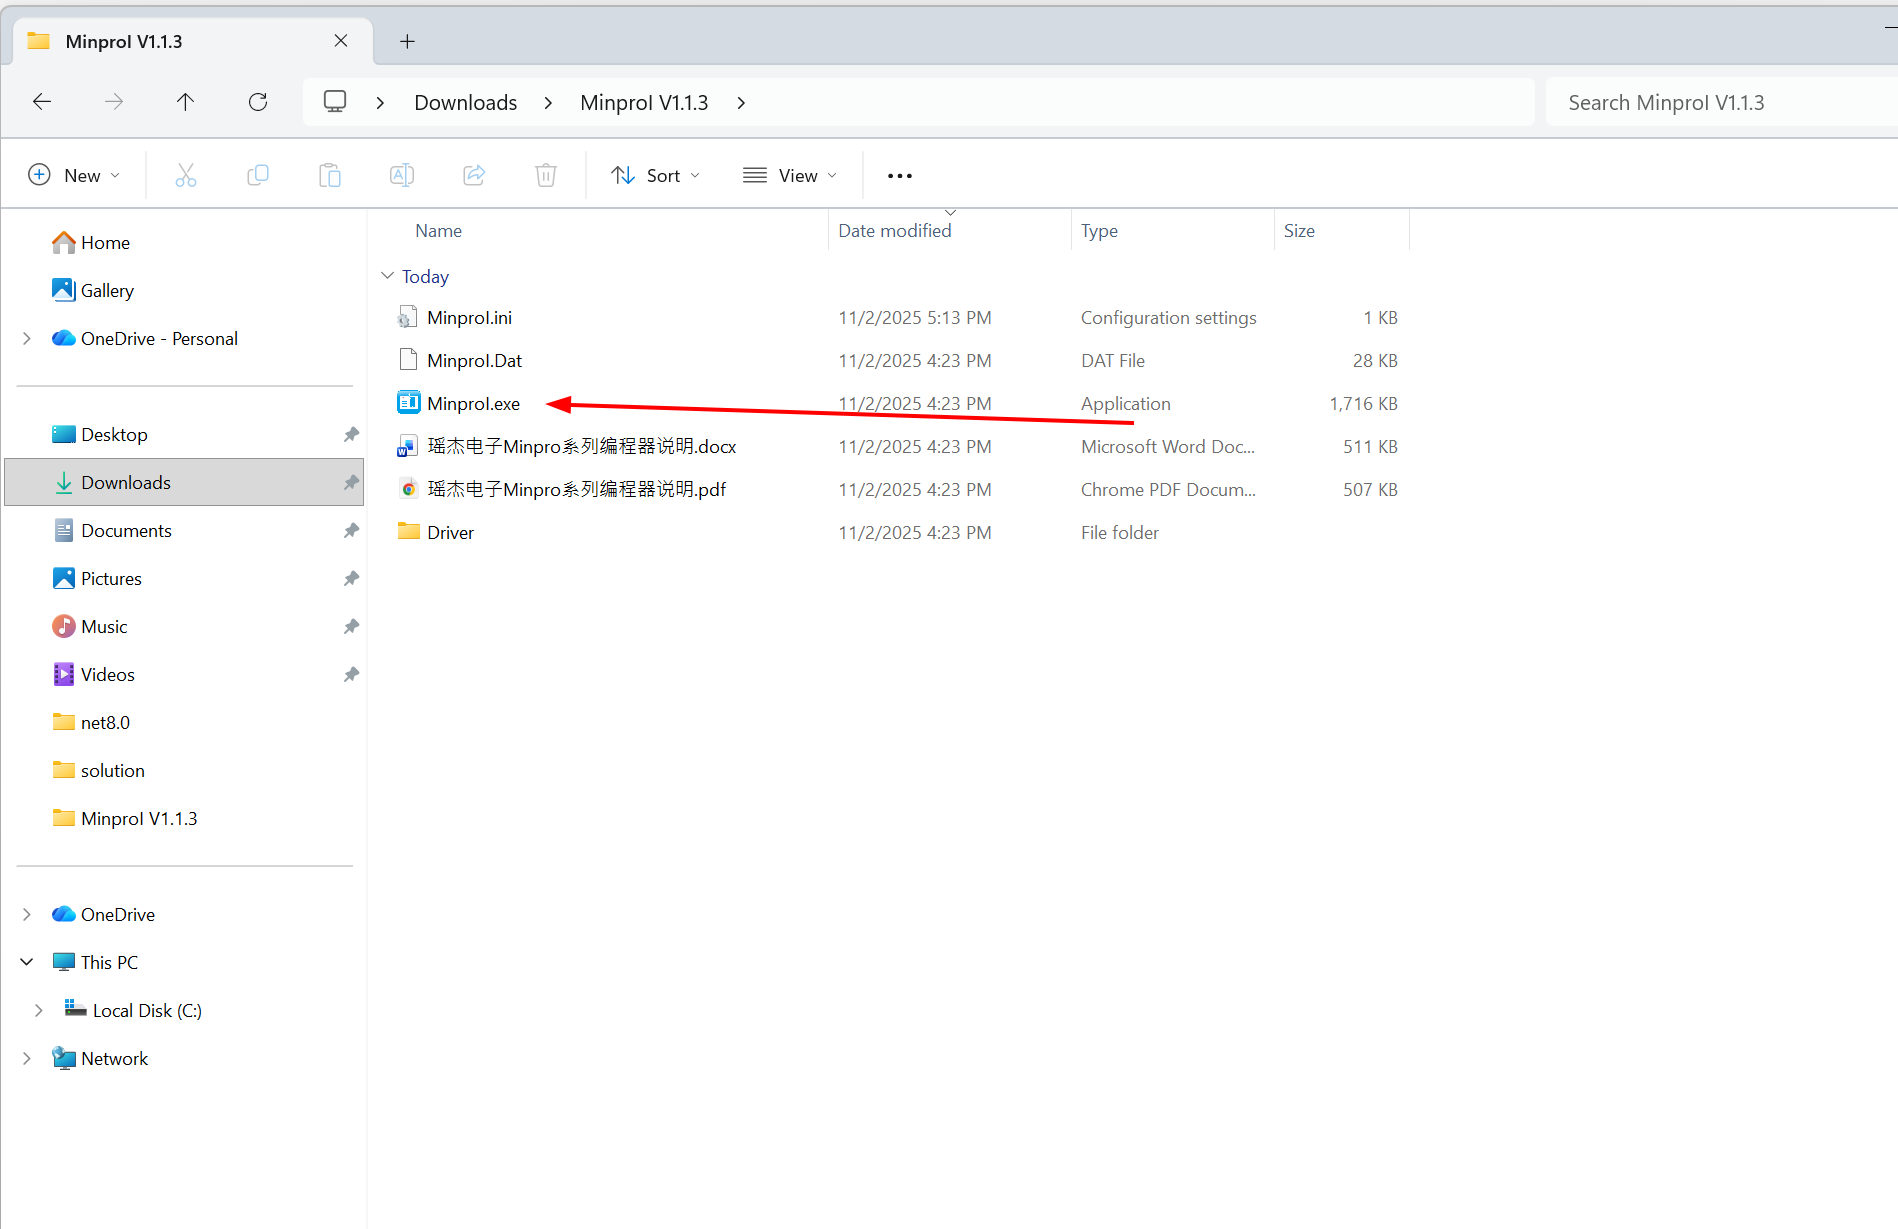
Install chinese font
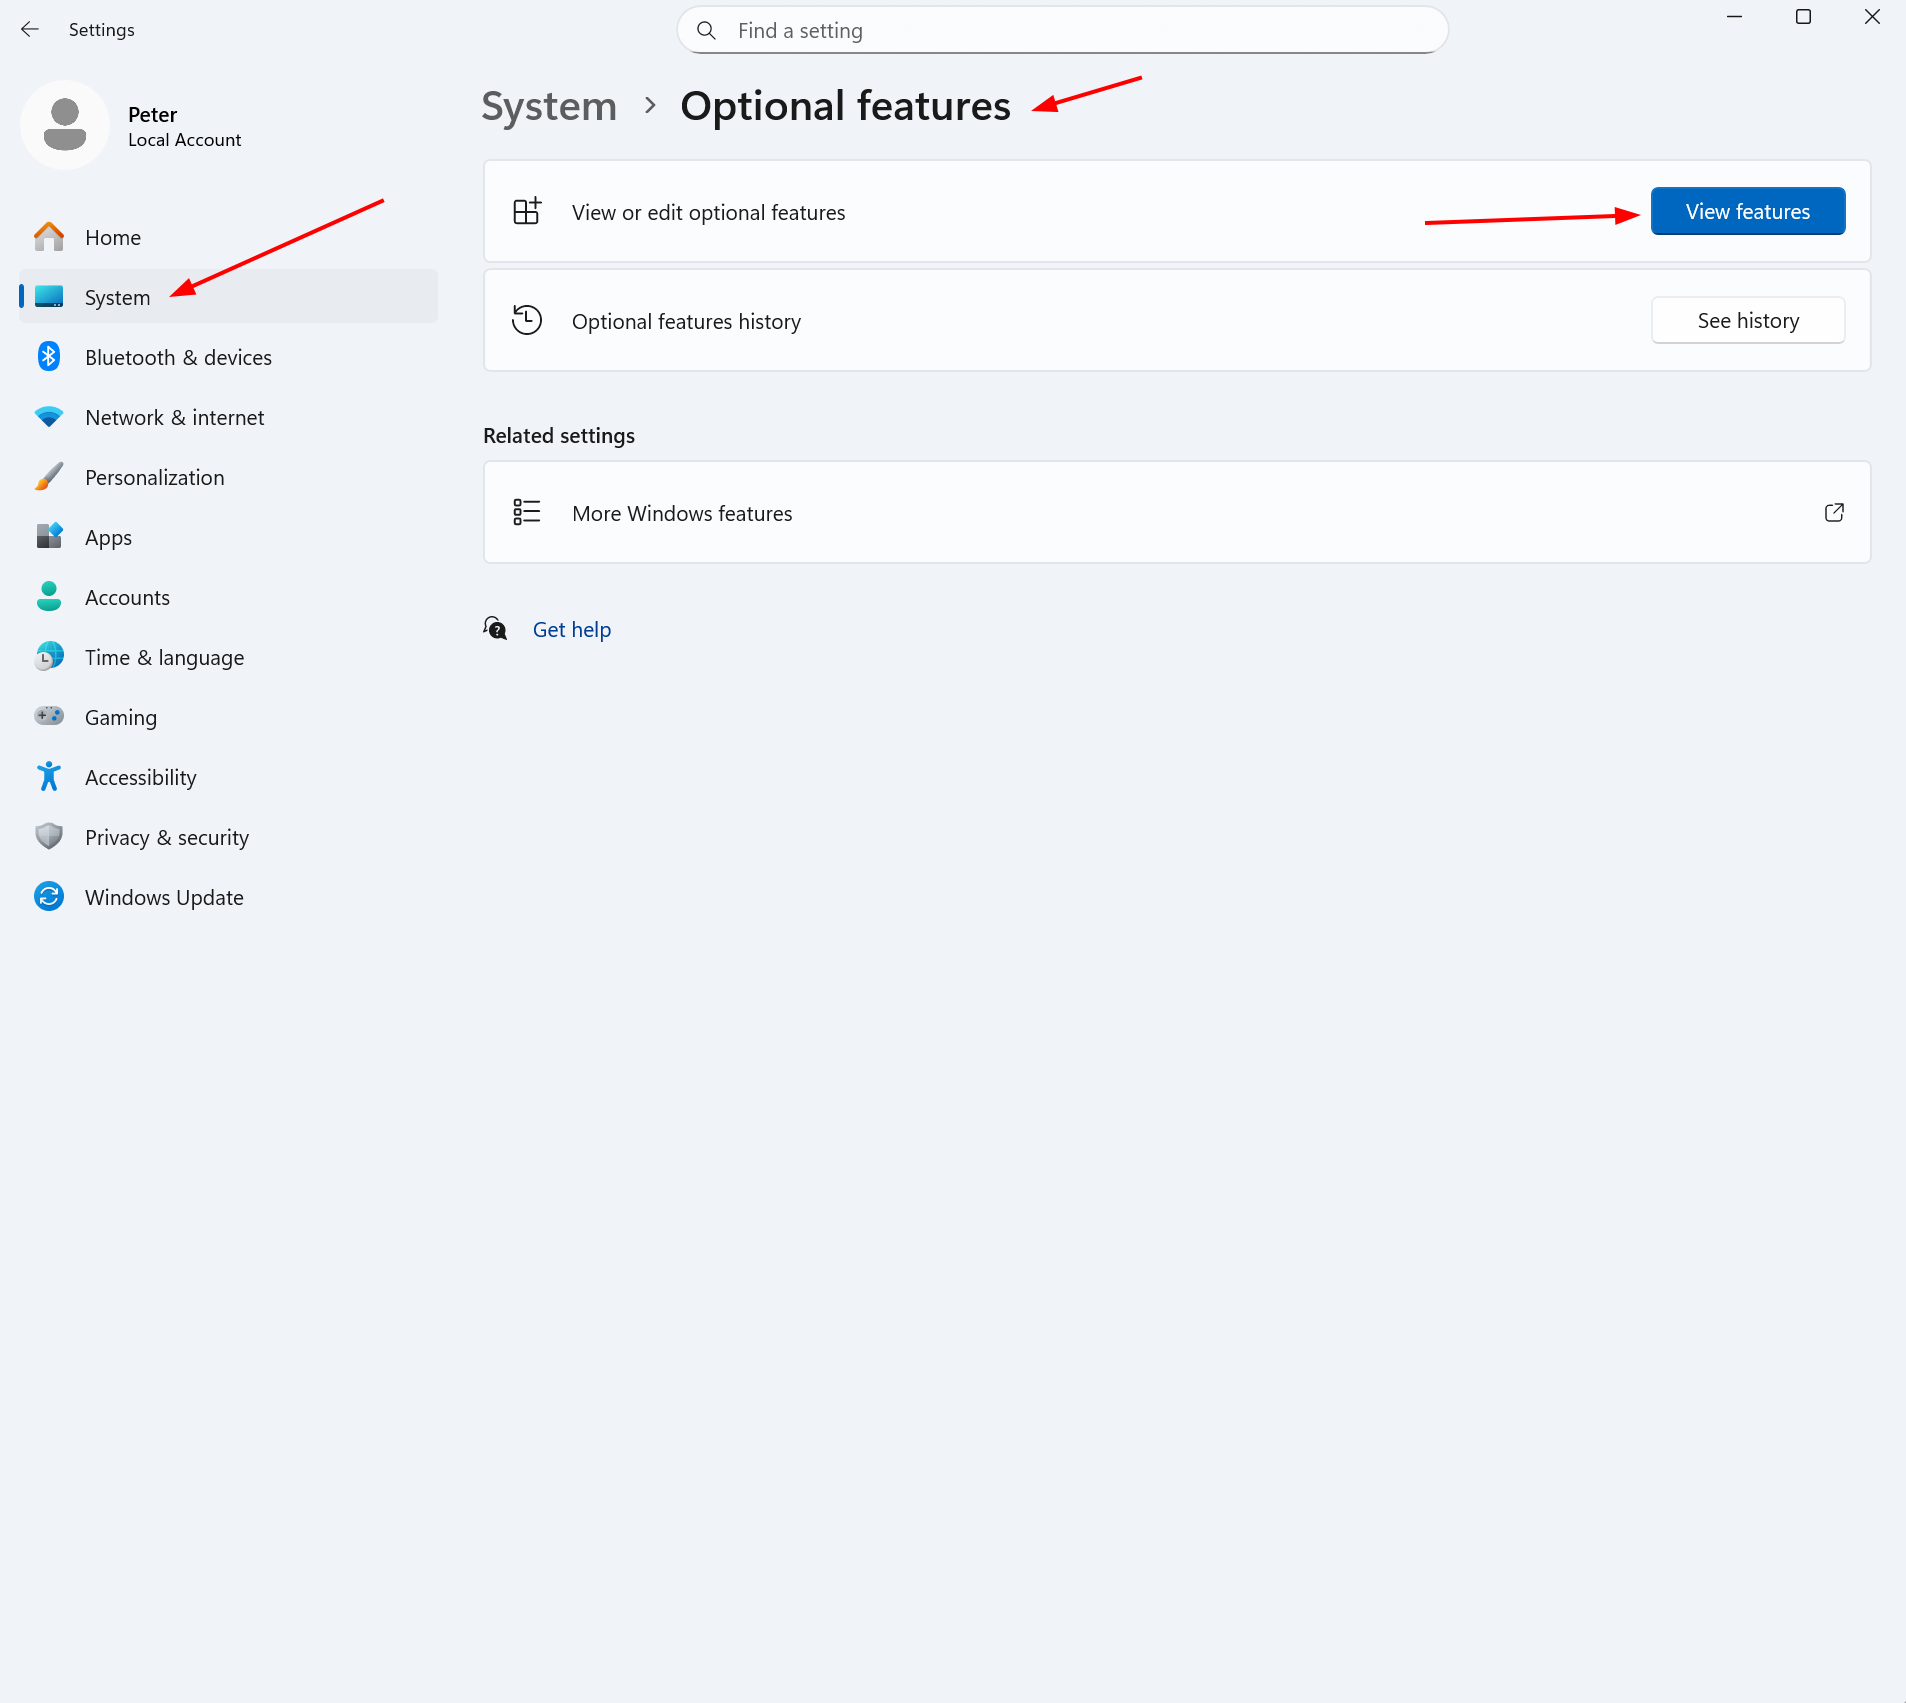
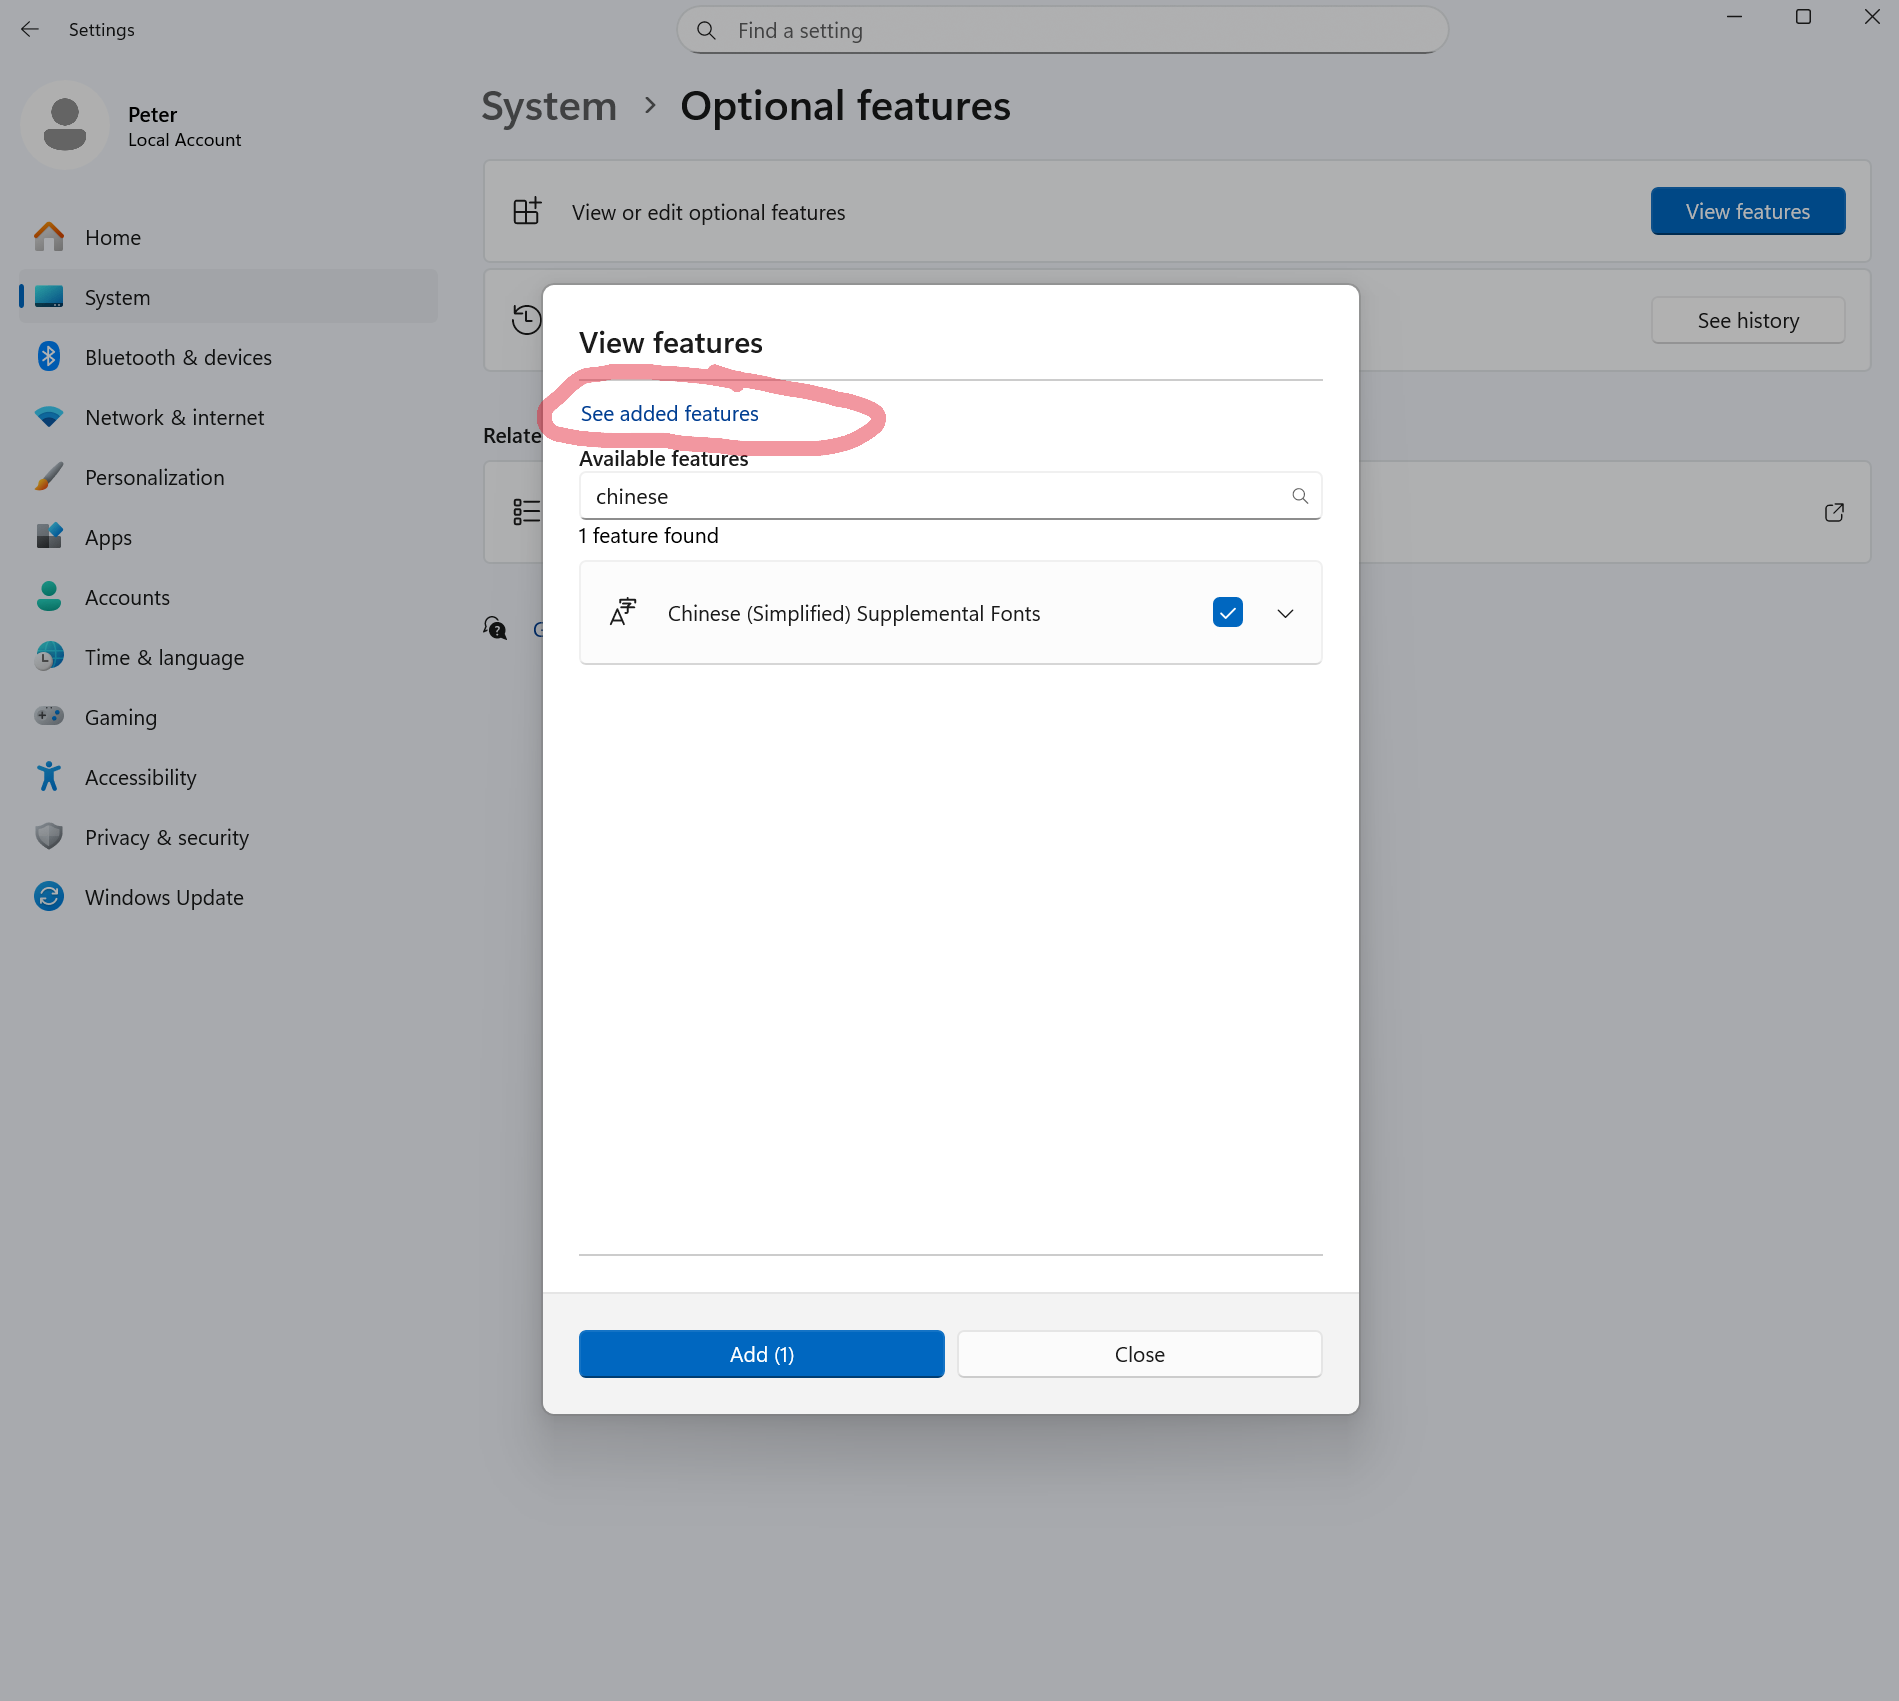
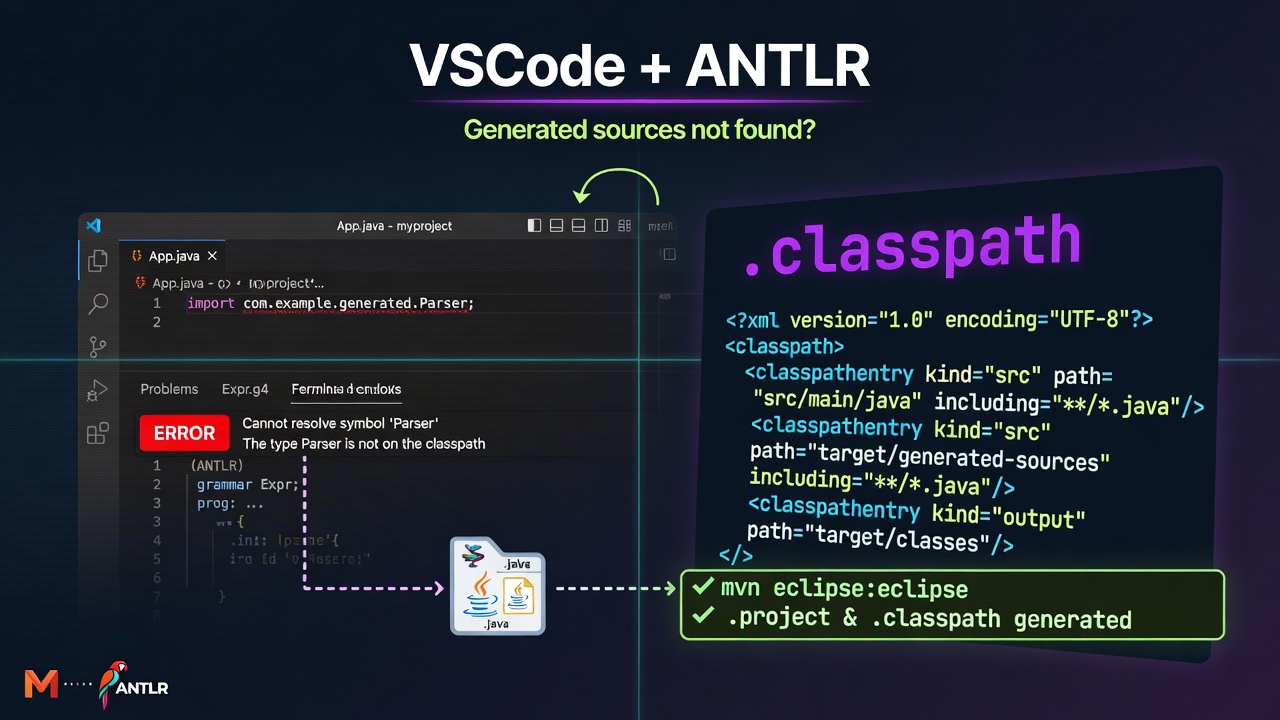
VSCode can't find the class from antlr generated sources. We need to run "mvn eclipse:eclipse" to generate .classpath and .project to resolve this problem, otherwise vscode will keep saying your antlr generate classes not found
.classpath
<?xml version="1.0" encoding="UTF-8"?>
<classpath>
  <classpathentry kind="src" path="src/main/java" including="**/*.java"/>
  <classpathentry kind="src" path="target/generated-sources" including="**/*.java"/>
  <classpathentry kind="output" path="target/classes"/>
  <classpathentry kind="con" path="org.eclipse.jdt.launching.JRE_CONTAINER"/>
  <classpathentry kind="var" path="M2_REPO/org/antlr/antlr4-runtime/4.13.1/antlr4-runtime-4.13.1.jar" sourcepath="M2_REPO/org/antlr/antlr4-runtime/4.13.1/antlr4-runtime-4.13.1-sources.jar"/>
  <classpathentry kind="var" path="M2_REPO/org/ow2/asm/asm/9.6/asm-9.6.jar"/>
  <classpathentry kind="var" path="M2_REPO/org/junit/jupiter/junit-jupiter/5.10.2/junit-jupiter-5.10.2.jar"/>
  <classpathentry kind="var" path="M2_REPO/org/junit/jupiter/junit-jupiter-api/5.10.2/junit-jupiter-api-5.10.2.jar"/>
  <classpathentry kind="var" path="M2_REPO/org/opentest4j/opentest4j/1.3.0/opentest4j-1.3.0.jar"/>
  <classpathentry kind="var" path="M2_REPO/org/junit/platform/junit-platform-commons/1.10.2/junit-platform-commons-1.10.2.jar"/>
  <classpathentry kind="var" path="M2_REPO/org/apiguardian/apiguardian-api/1.1.2/apiguardian-api-1.1.2.jar"/>
  <classpathentry kind="var" path="M2_REPO/org/junit/jupiter/junit-jupiter-params/5.10.2/junit-jupiter-params-5.10.2.jar"/>
  <classpathentry kind="var" path="M2_REPO/org/junit/jupiter/junit-jupiter-engine/5.10.2/junit-jupiter-engine-5.10.2.jar"/>
  <classpathentry kind="var" path="M2_REPO/org/junit/platform/junit-platform-engine/1.10.2/junit-platform-engine-1.10.2.jar"/>
</classpath>
.project
<?xml version="1.0" encoding="UTF-8"?>
<projectDescription>
	<name>egg-tart</name>
	<comment>A tiny DSL for stock trading. NO_M2ECLIPSE_SUPPORT: Project files created with the maven-eclipse-plugin are not supported in M2Eclipse.</comment>
	<projects>
	</projects>
	<buildSpec>
		<buildCommand>
			<name>org.eclipse.jdt.core.javabuilder</name>
			<arguments>
			</arguments>
		</buildCommand>
	</buildSpec>
	<natures>
		<nature>org.eclipse.jdt.core.javanature</nature>
	</natures>
	<filteredResources>
		<filter>
			<id>1760958095837</id>
			<name></name>
			<type>30</type>
			<matcher>
				<id>org.eclipse.core.resources.regexFilterMatcher</id>
				<arguments>node_modules|\.git|__CREATED_BY_JAVA_LANGUAGE_SERVER__</arguments>
			</matcher>
		</filter>
	</filteredResources>
</projectDescription>
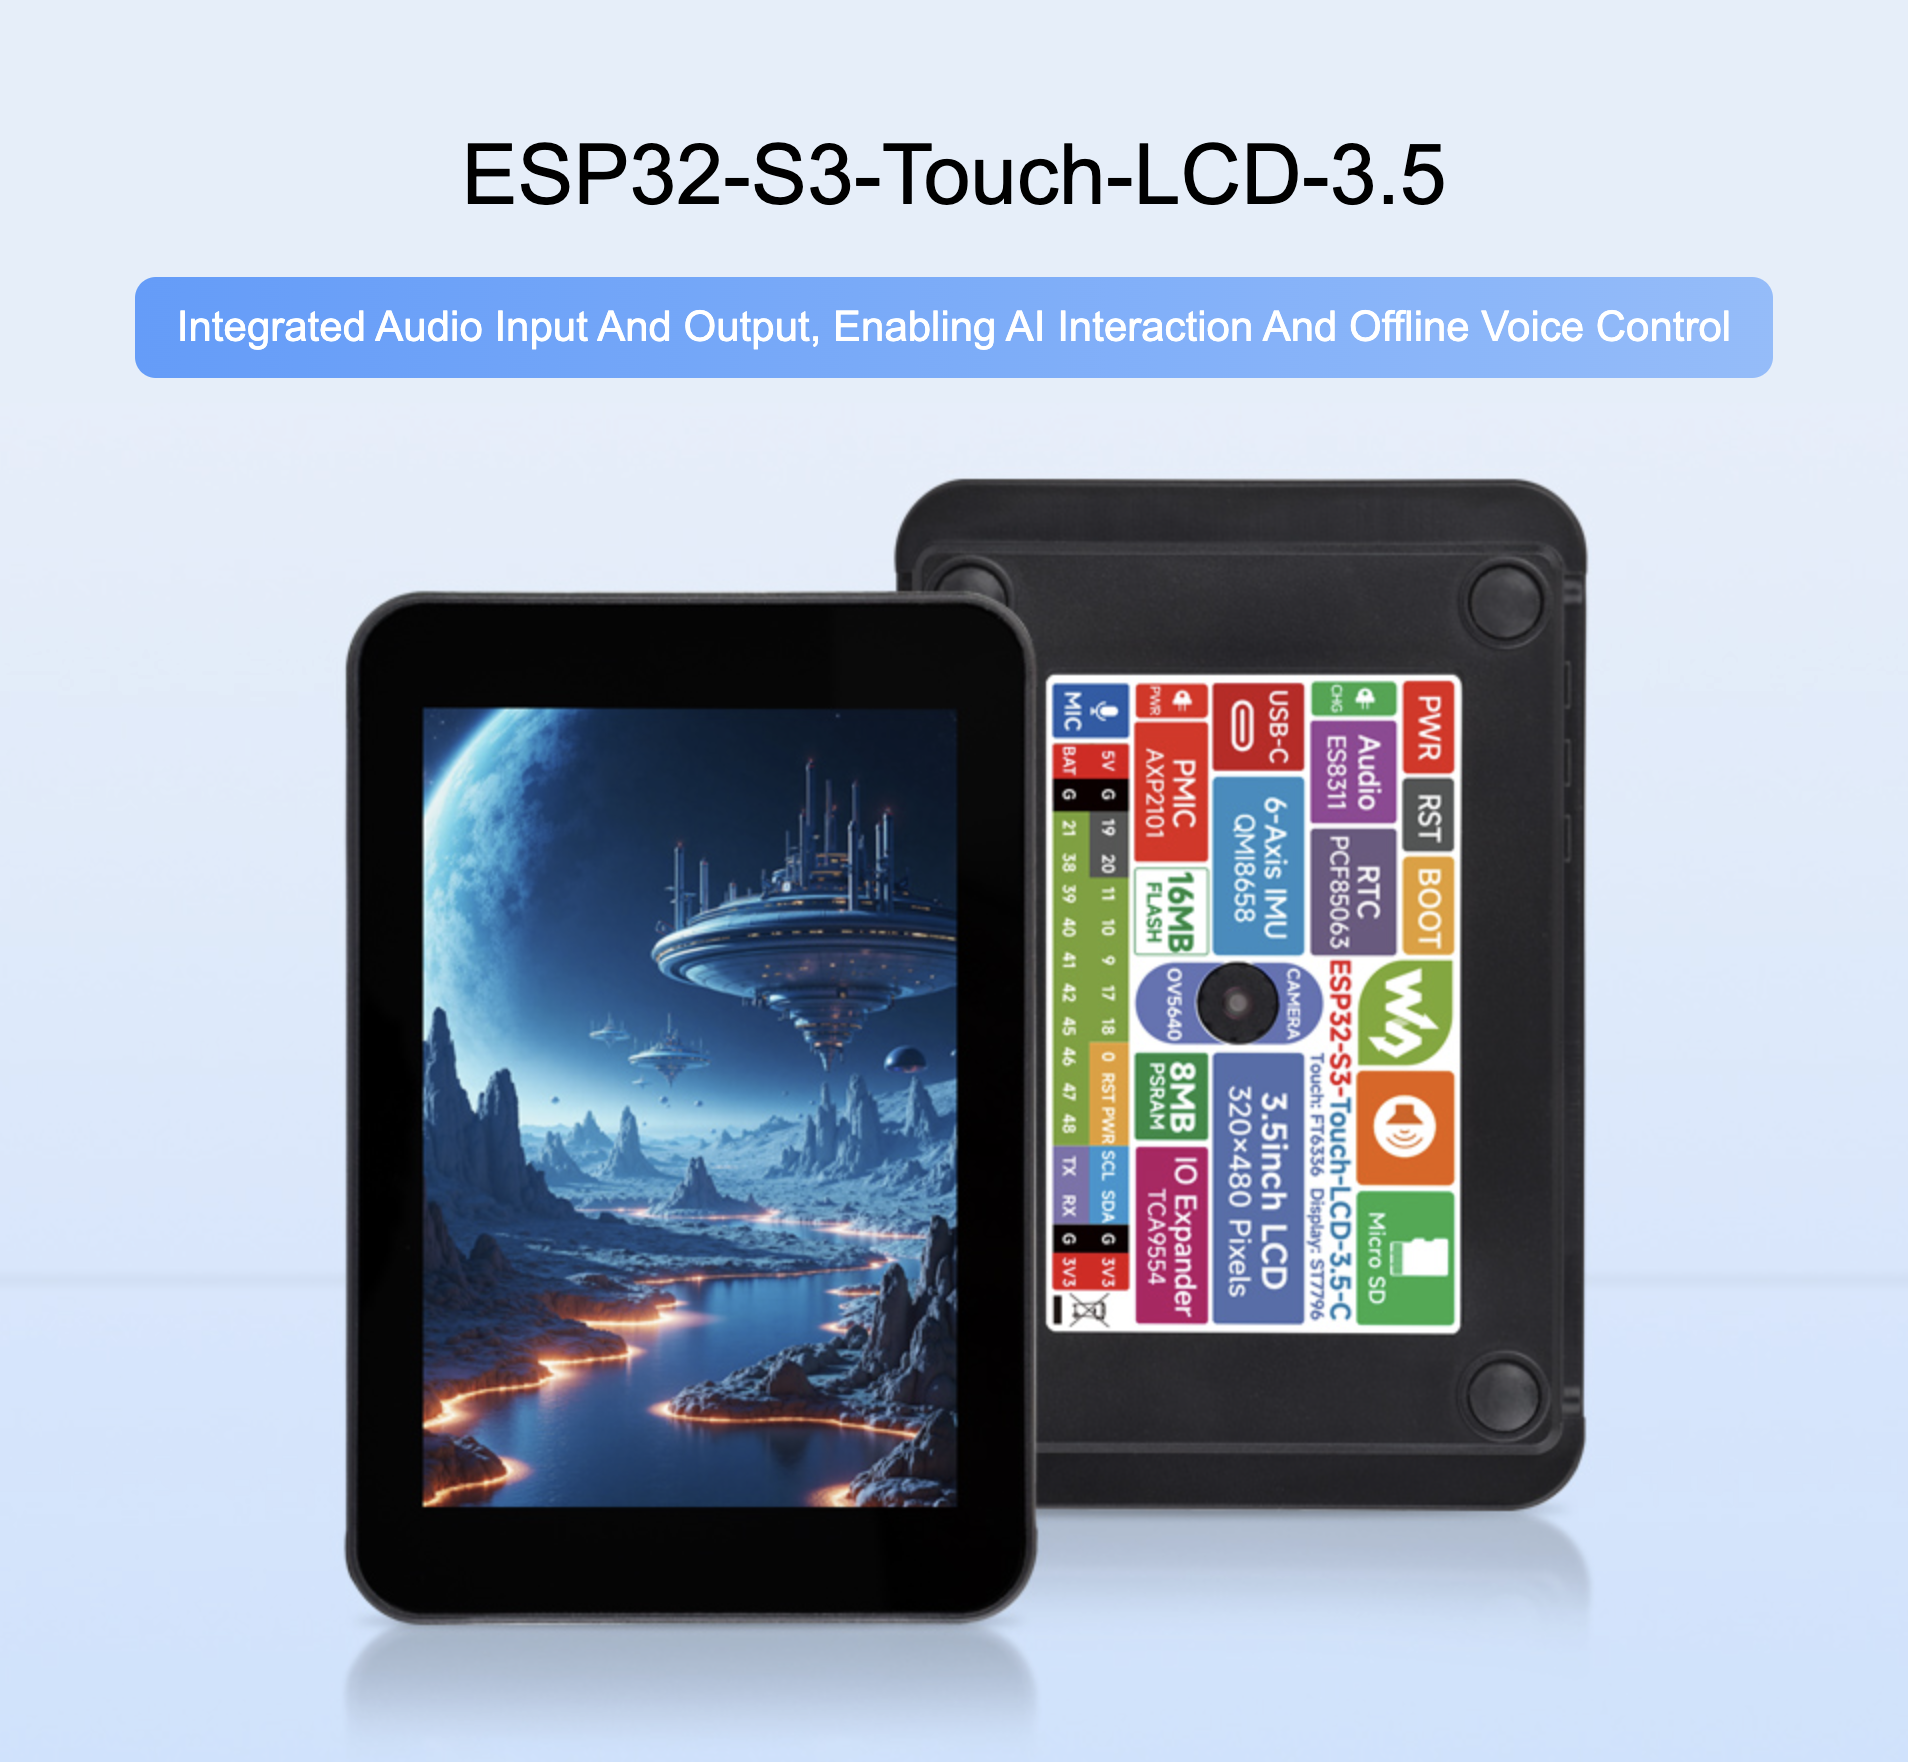
https://www.waveshare.com/wiki/ESP32-S3-Touch-LCD-3.5
There are two versions of hardware
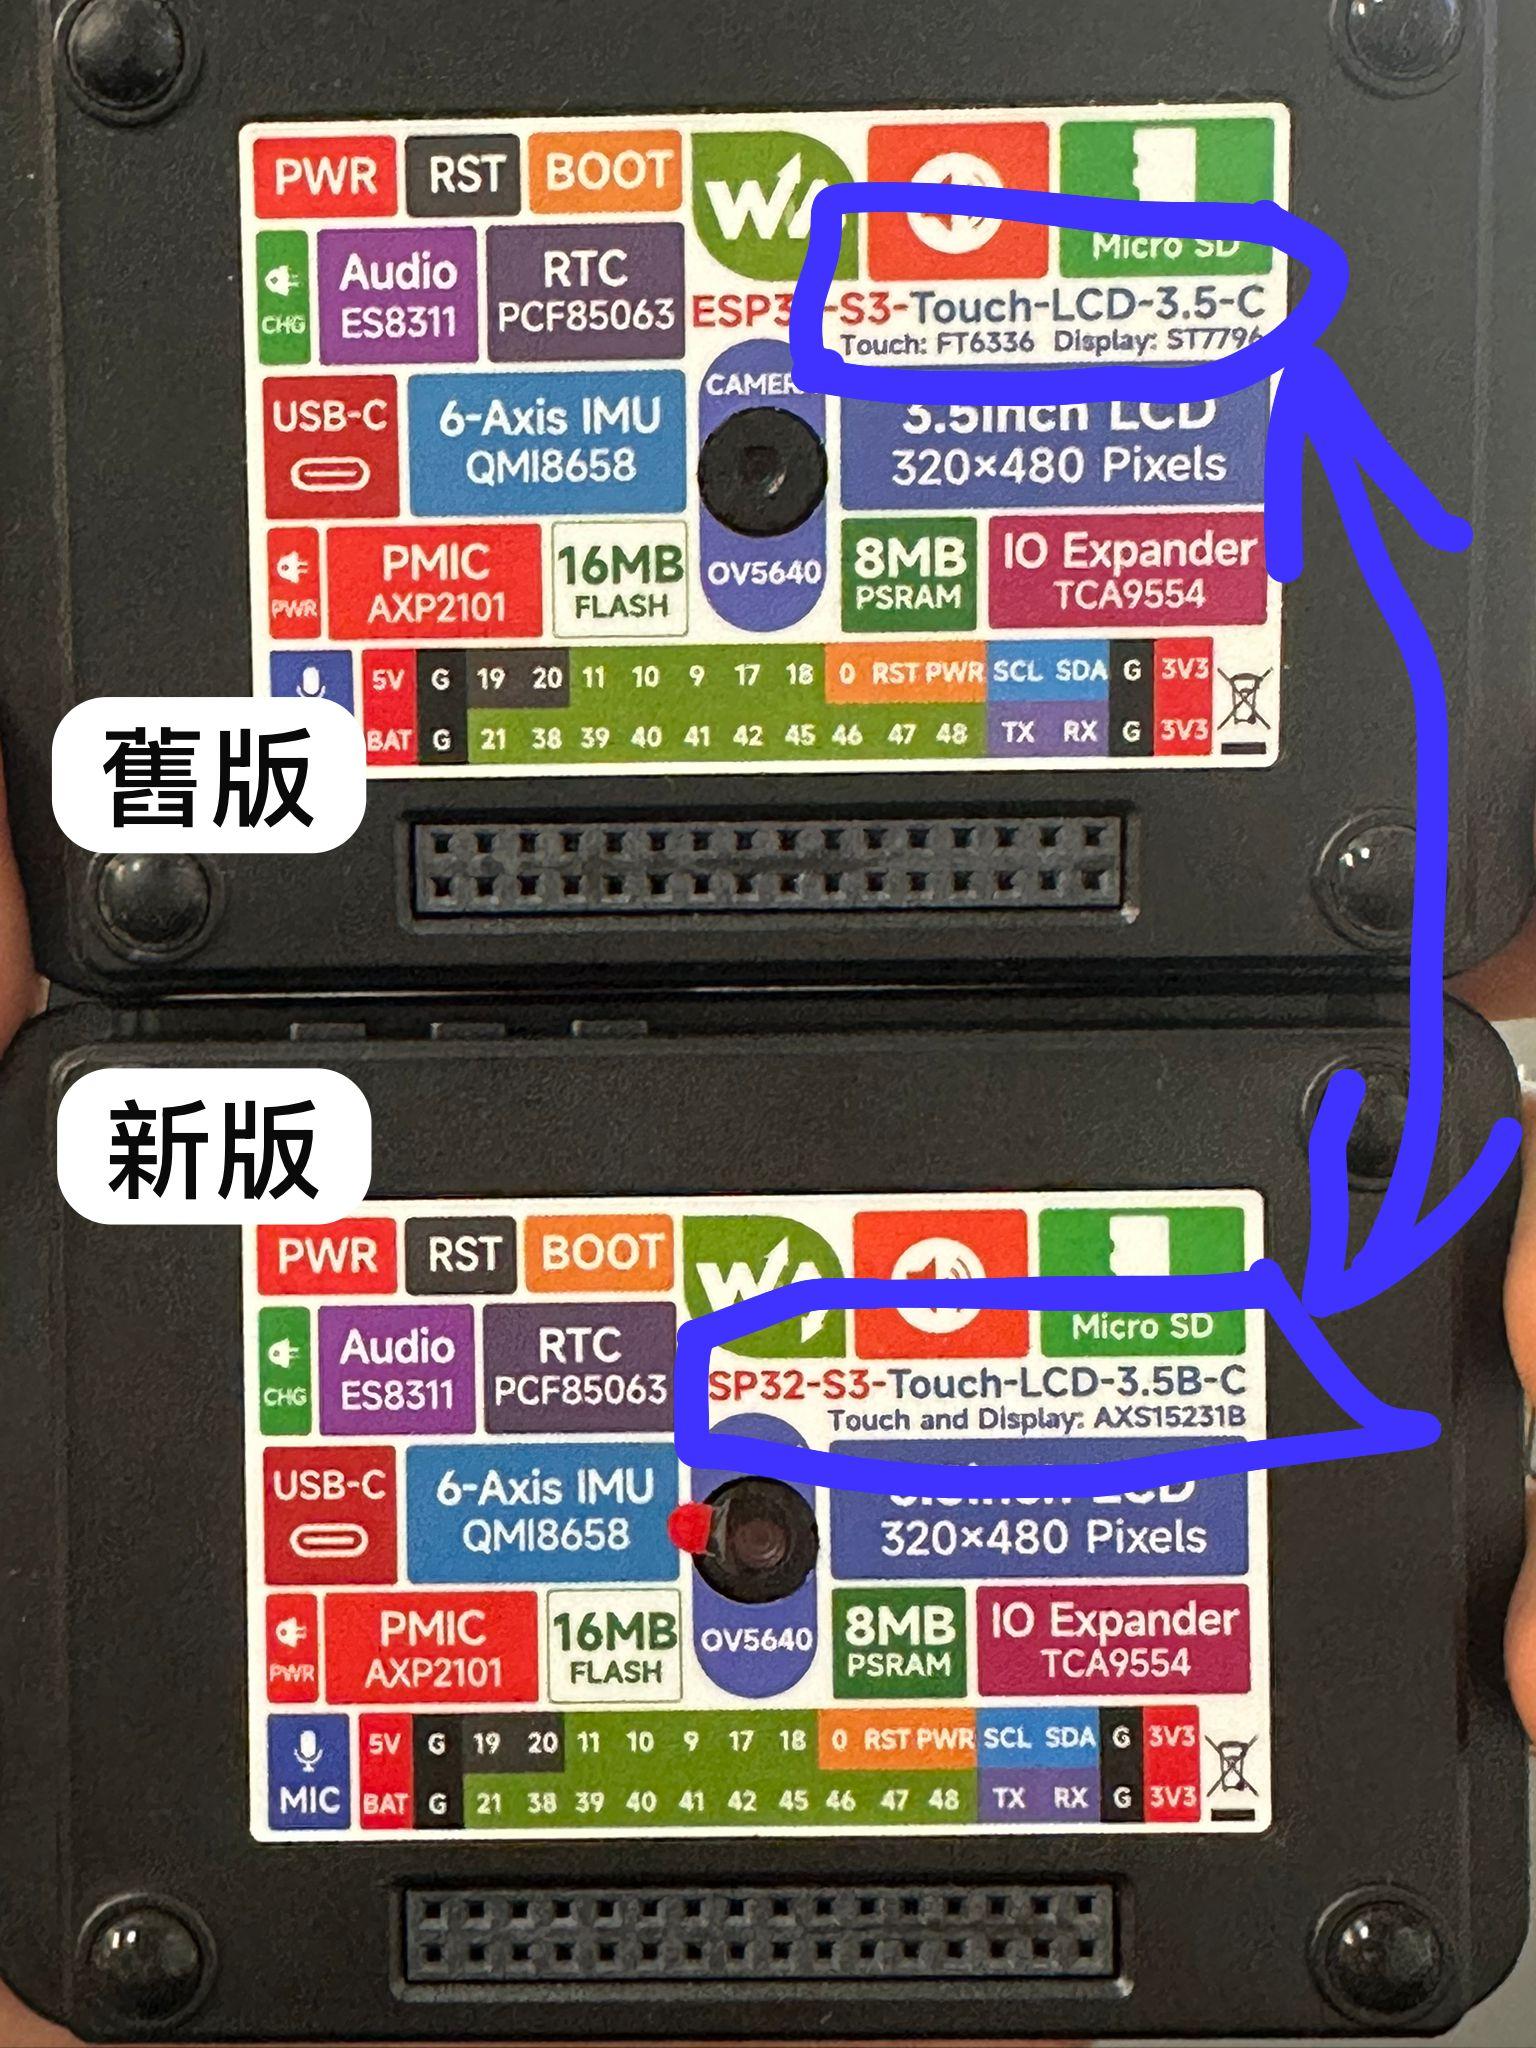
git clone https://github.com/lvgl-micropython/lvgl_micropython.git
cd lvgl_micropython
# git checkout 15a414bc03486017235234882ce7415532c6325e
docker run -it -v .:/micropython --name micropython ubuntu
apt-get update
export DEBIAN_FRONTEND=noninteractive
apt-get install -y gcc g++ make automake python3 git gcc-arm-none-eabi libusb-1.0-0 python3-venv python3-click python3-yaml cmake vim
ln -s /usr/bin/python3 /usr/bin/python
cd /micropython

# old hardware version: waveshare 3.5
python3 make.py esp32 clean \
  --flash-size=16 \
  BOARD=ESP32_GENERIC_S3 \
  BOARD_VARIANT=SPIRAM_OCT \
  DISPLAY=ST7796 \
  INDEV=ft6x36

# new hardware version: waveshare 3.5b
python3 make.py esp32 clean \
  --flash-size=16 \
  BOARD=ESP32_GENERIC_S3 \
  BOARD_VARIANT=SPIRAM_OCT \
  DISPLAY=axs15231b \
  INDEV=axs15231

exit docker

esptool.py --chip esp32s3 -b 460800 \
    --before default_reset \
    --after hard_reset write_flash \
    --flash_mode dio \
    --flash_size 16MB \
    --flash_freq 80m \
    --erase-all 0x0  \
    build/lvgl_micropy_ESP32_GENERIC_S3-SPIRAM_OCT-16.bin
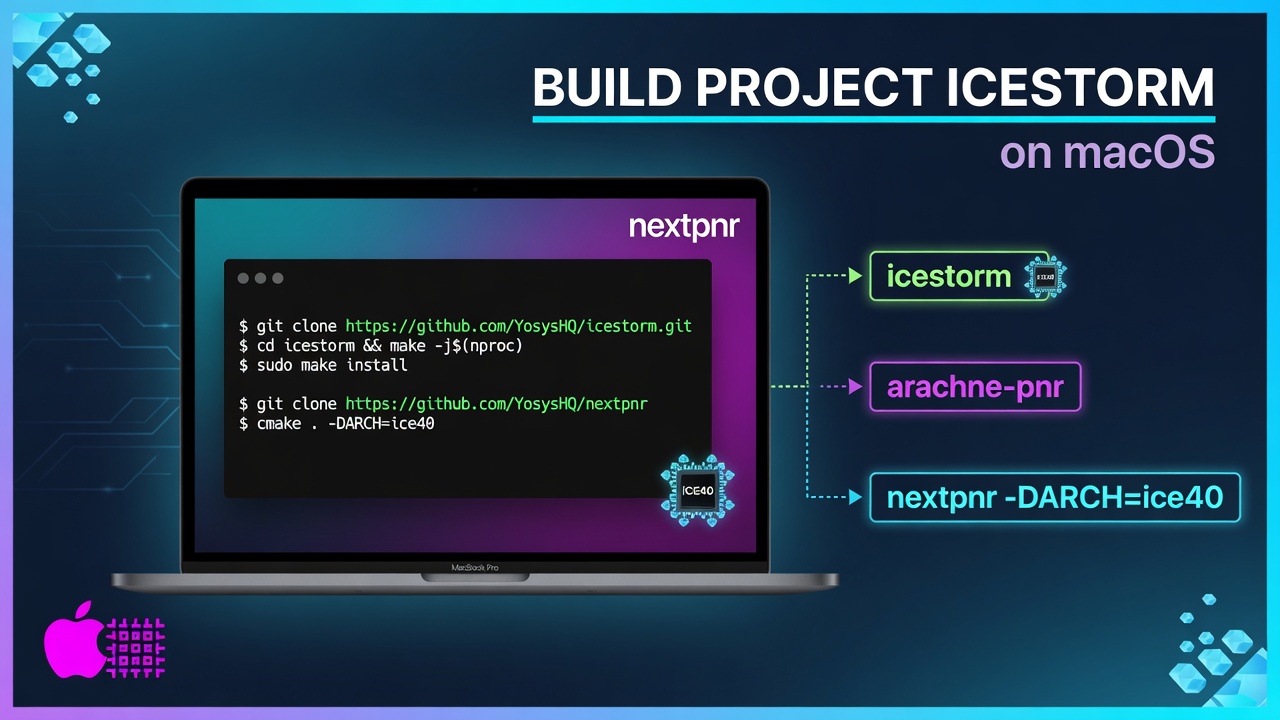
Refer to https://clifford.at/icestorm
icestorm
git clone https://github.com/YosysHQ/icestorm.git icestorm
cd icestorm
make -j$(nproc)
sudo make install
cd ..
arachne-pnr
git clone https://github.com/cseed/arachne-pnr.git arachne-pnr
cd arachne-pnr
make -j$(nproc)
sudo make install
cd ..
nextpnr
git clone https://github.com/YosysHQ/nextpnr nextpnr
cd nextpnr
cmake .  -B build -DARCH=ice40 -DCMAKE_INSTALL_PREFIX=/usr/local
cd build
make -j$(nproc)
sudo make install
cd ../..
yosys
git clone https://github.com/YosysHQ/yosys.git yosys
cd yosys
git submodule update --init
make -j$(nproc)
sudo make install
Very Fast ! ESP32 C6 keep toggling the pin can reach ~1Mhz. Waveshare C6 zero esp32 is running at 160 MHz. https://github.com/quantrpeter/ESP32-C6-Toggle-Pin-Max-Speed
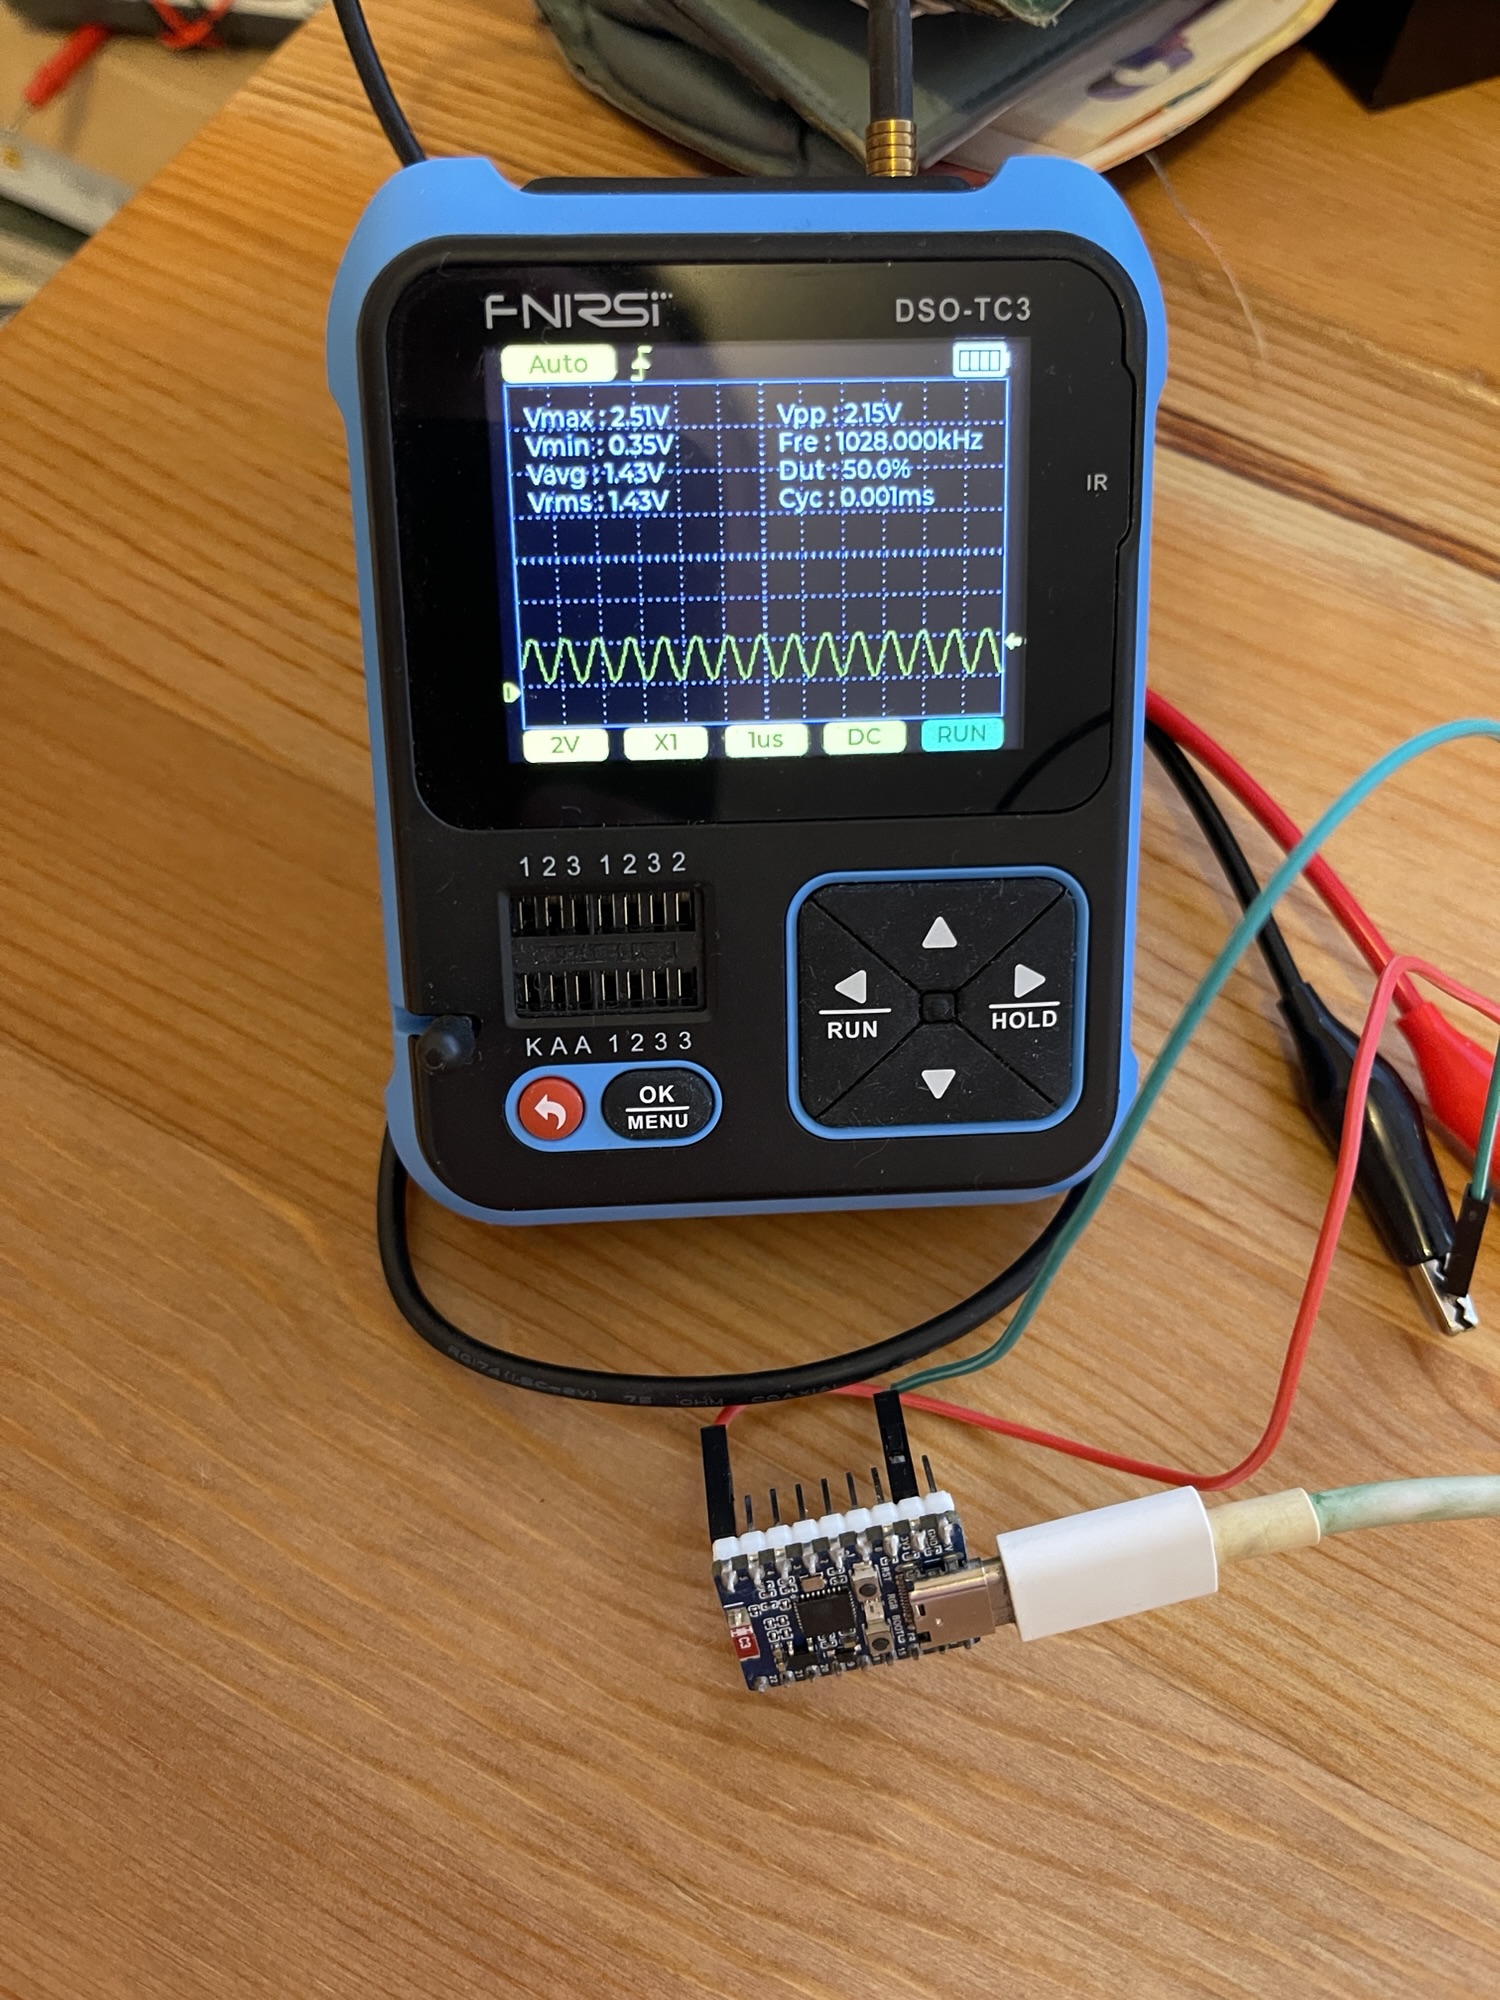
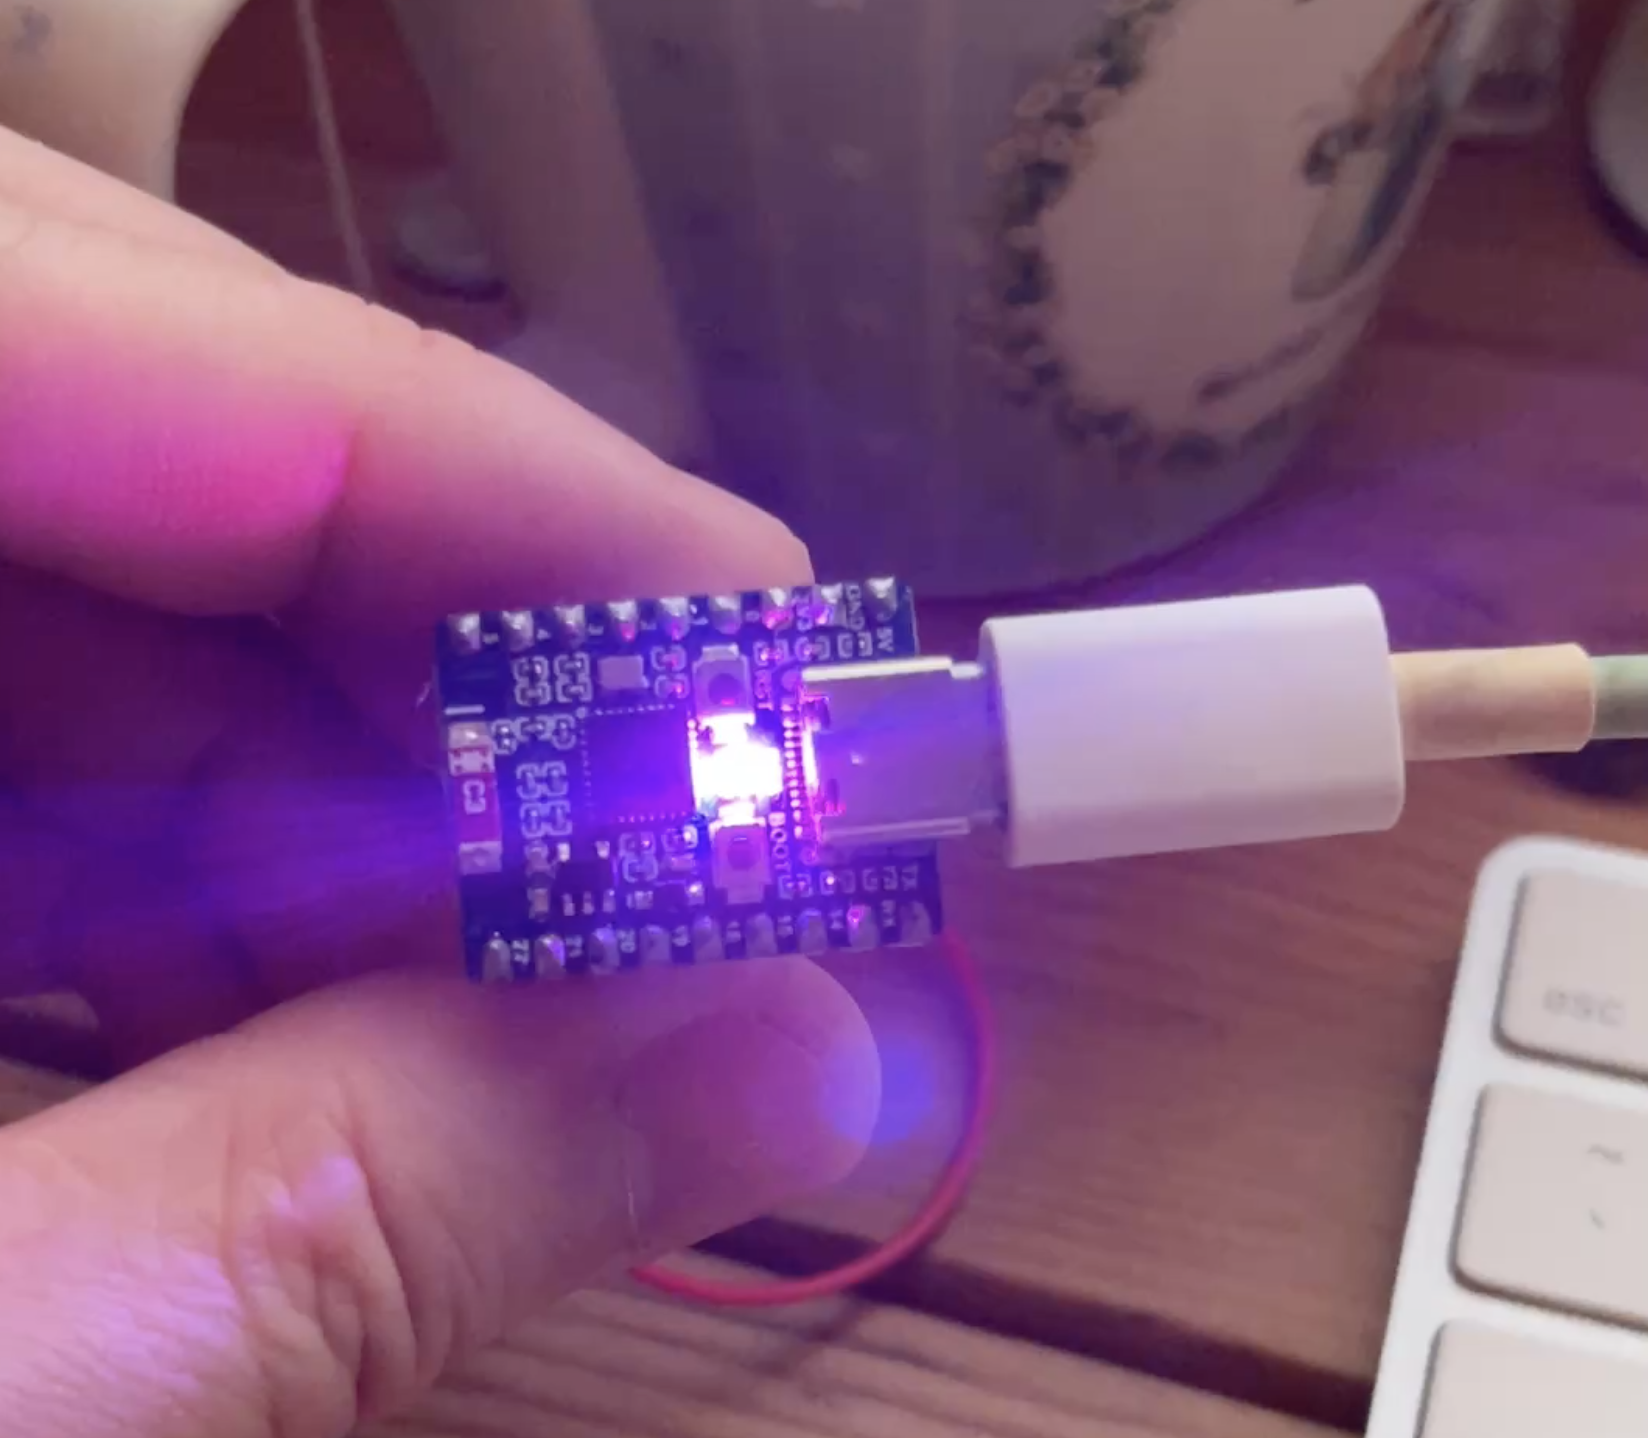
This example controls the WS2812 on Waveshare C6 Zero board, keep changing its color, done using VSCode + ESP-IDF
/* Blink Example

   This example code is in the Public Domain (or CC0 licensed, at your option.)

   Unless required by applicable law or agreed to in writing, this
   software is distributed on an "AS IS" BASIS, WITHOUT WARRANTIES OR
   CONDITIONS OF ANY KIND, either express or implied.
*/
#include <stdio.h>
#include "freertos/FreeRTOS.h"
#include "freertos/task.h"
#include "driver/gpio.h"
#include "esp_log.h"
#include "led_strip.h"
#include "sdkconfig.h"

static const char *TAG = "example";

/* Use project configuration menu (idf.py menuconfig) to choose the GPIO to blink,
   or you can edit the following line and set a number here.
*/
#define BLINK_GPIO CONFIG_BLINK_GPIO

static uint8_t s_led_state = 0;
static uint8_t color_phase = 0;  // Phase for color cycling (0-255)

#ifdef CONFIG_BLINK_LED_STRIP

static led_strip_handle_t led_strip;

// Function to create smooth color transitions using HSV to RGB conversion
static void hsv_to_rgb(uint8_t h, uint8_t s, uint8_t v, uint8_t *r, uint8_t *g, uint8_t *b) {
    uint8_t region, remainder, p, q, t;

    if (s == 0) {
        *r = *g = *b = v;
        return;
    }

    region = h / 43;
    remainder = (h - (region * 43)) * 6;

    p = (v * (255 - s)) >> 8;
    q = (v * (255 - ((s * remainder) >> 8))) >> 8;
    t = (v * (255 - ((s * (255 - remainder)) >> 8))) >> 8;

    switch (region) {
        case 0:
            *r = v; *g = t; *b = p;
            break;
        case 1:
            *r = q; *g = v; *b = p;
            break;
        case 2:
            *r = p; *g = v; *b = t;
            break;
        case 3:
            *r = p; *g = q; *b = v;
            break;
        case 4:
            *r = t; *g = p; *b = v;
            break;
        default:
            *r = v; *g = p; *b = q;
            break;
    }
}

static void blink_led(void)
{
    uint8_t r, g, b;

    // Convert HSV to RGB for smooth color transitions
    // Hue cycles through full spectrum (0-255)
    // Saturation = 255 (full saturation for vivid colors)
    // Value = 128 (medium brightness)
    hsv_to_rgb(color_phase, 255, 128, &r, &g, &b);

    /* Set the LED pixel with the calculated RGB values */
    led_strip_set_pixel(led_strip, 0, r, g, b);
    /* Refresh the strip to send data */
    led_strip_refresh(led_strip);

    // Increment color phase for smooth transition
    color_phase += 2;  // Adjust step size for faster/slower color change
}

static void configure_led(void)
{
    ESP_LOGI(TAG, "Example configured to blink addressable LED!");
    /* LED strip initialization with the GPIO and pixels number*/
    led_strip_config_t strip_config = {
        .strip_gpio_num = BLINK_GPIO,
        .max_leds = 1, // at least one LED on board
    };
#if CONFIG_BLINK_LED_STRIP_BACKEND_RMT
    led_strip_rmt_config_t rmt_config = {
        .resolution_hz = 10 * 1000 * 1000, // 10MHz
        .flags.with_dma = false,
    };
    ESP_ERROR_CHECK(led_strip_new_rmt_device(&strip_config, &rmt_config, &led_strip));
#elif CONFIG_BLINK_LED_STRIP_BACKEND_SPI
    led_strip_spi_config_t spi_config = {
        .spi_bus = SPI2_HOST,
        .flags.with_dma = true,
    };
    ESP_ERROR_CHECK(led_strip_new_spi_device(&strip_config, &spi_config, &led_strip));
#else
#error "unsupported LED strip backend"
#endif
    /* Set all LED off to clear all pixels */
    led_strip_clear(led_strip);
}

#elif CONFIG_BLINK_LED_GPIO

static void blink_led(void)
{
    /* Set the GPIO level according to the state (LOW or HIGH)*/
    gpio_set_level(BLINK_GPIO, s_led_state);
}

static void configure_led(void)
{
    ESP_LOGI(TAG, "Example configured to blink GPIO LED!");
    gpio_reset_pin(BLINK_GPIO);
    /* Set the GPIO as a push/pull output */
    gpio_set_direction(BLINK_GPIO, GPIO_MODE_OUTPUT);
}

#else
#error "unsupported LED type"
#endif

void app_main(void)
{

    /* Configure the peripheral according to the LED type */
    configure_led();

    while (1) {
        ESP_LOGI(TAG, "Color phase: %d", color_phase);
        blink_led();
        /* Small delay for smooth color transition */
        vTaskDelay(10 / portTICK_PERIOD_MS);  // 10ms delay for smooth animation
    }
}
"screen" command not work, may be the baurate too high, orange pi is using 1.5M. so use this command
picocom -b 1500000 /dev/tty.usbserial-A50285BI
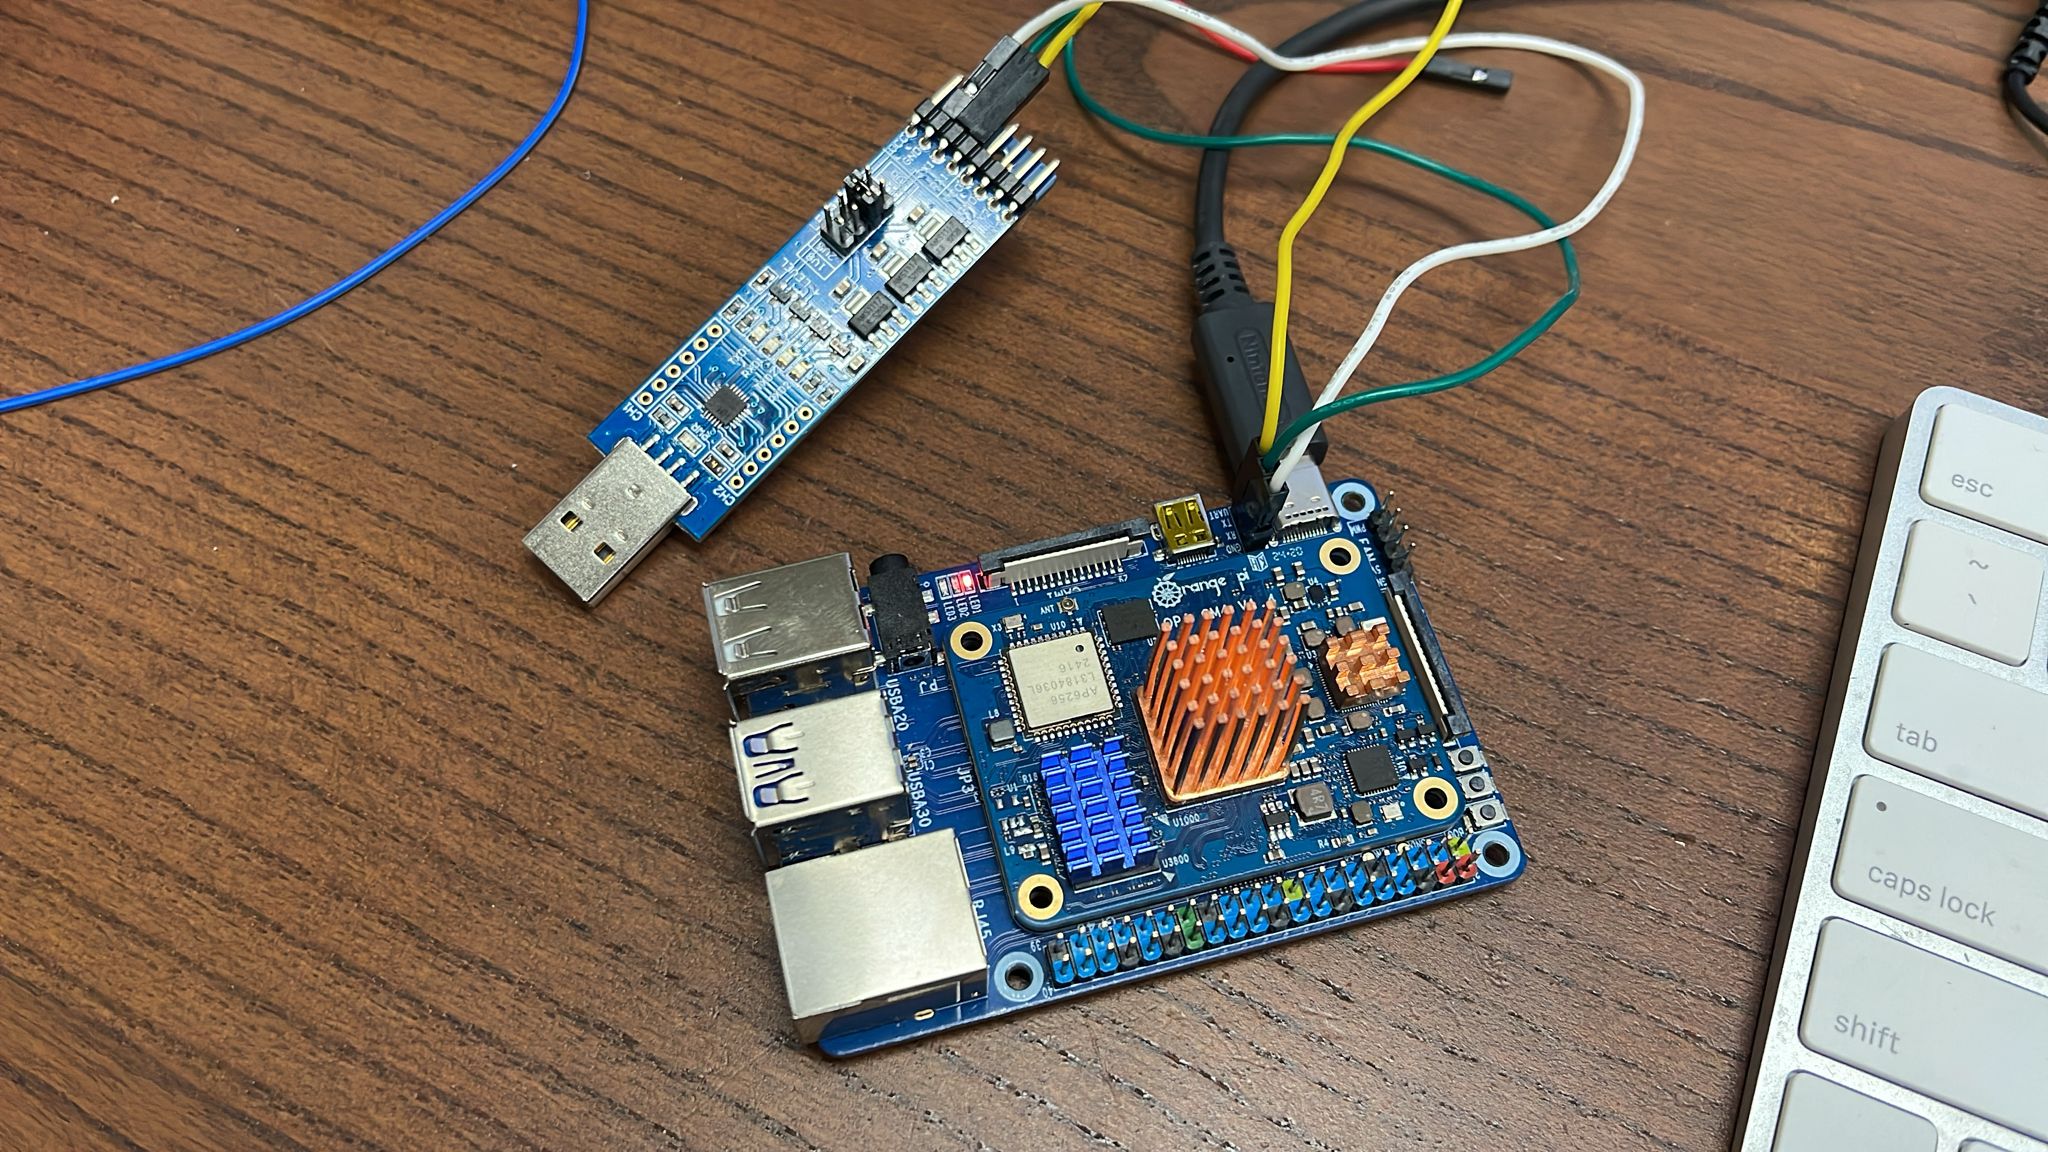
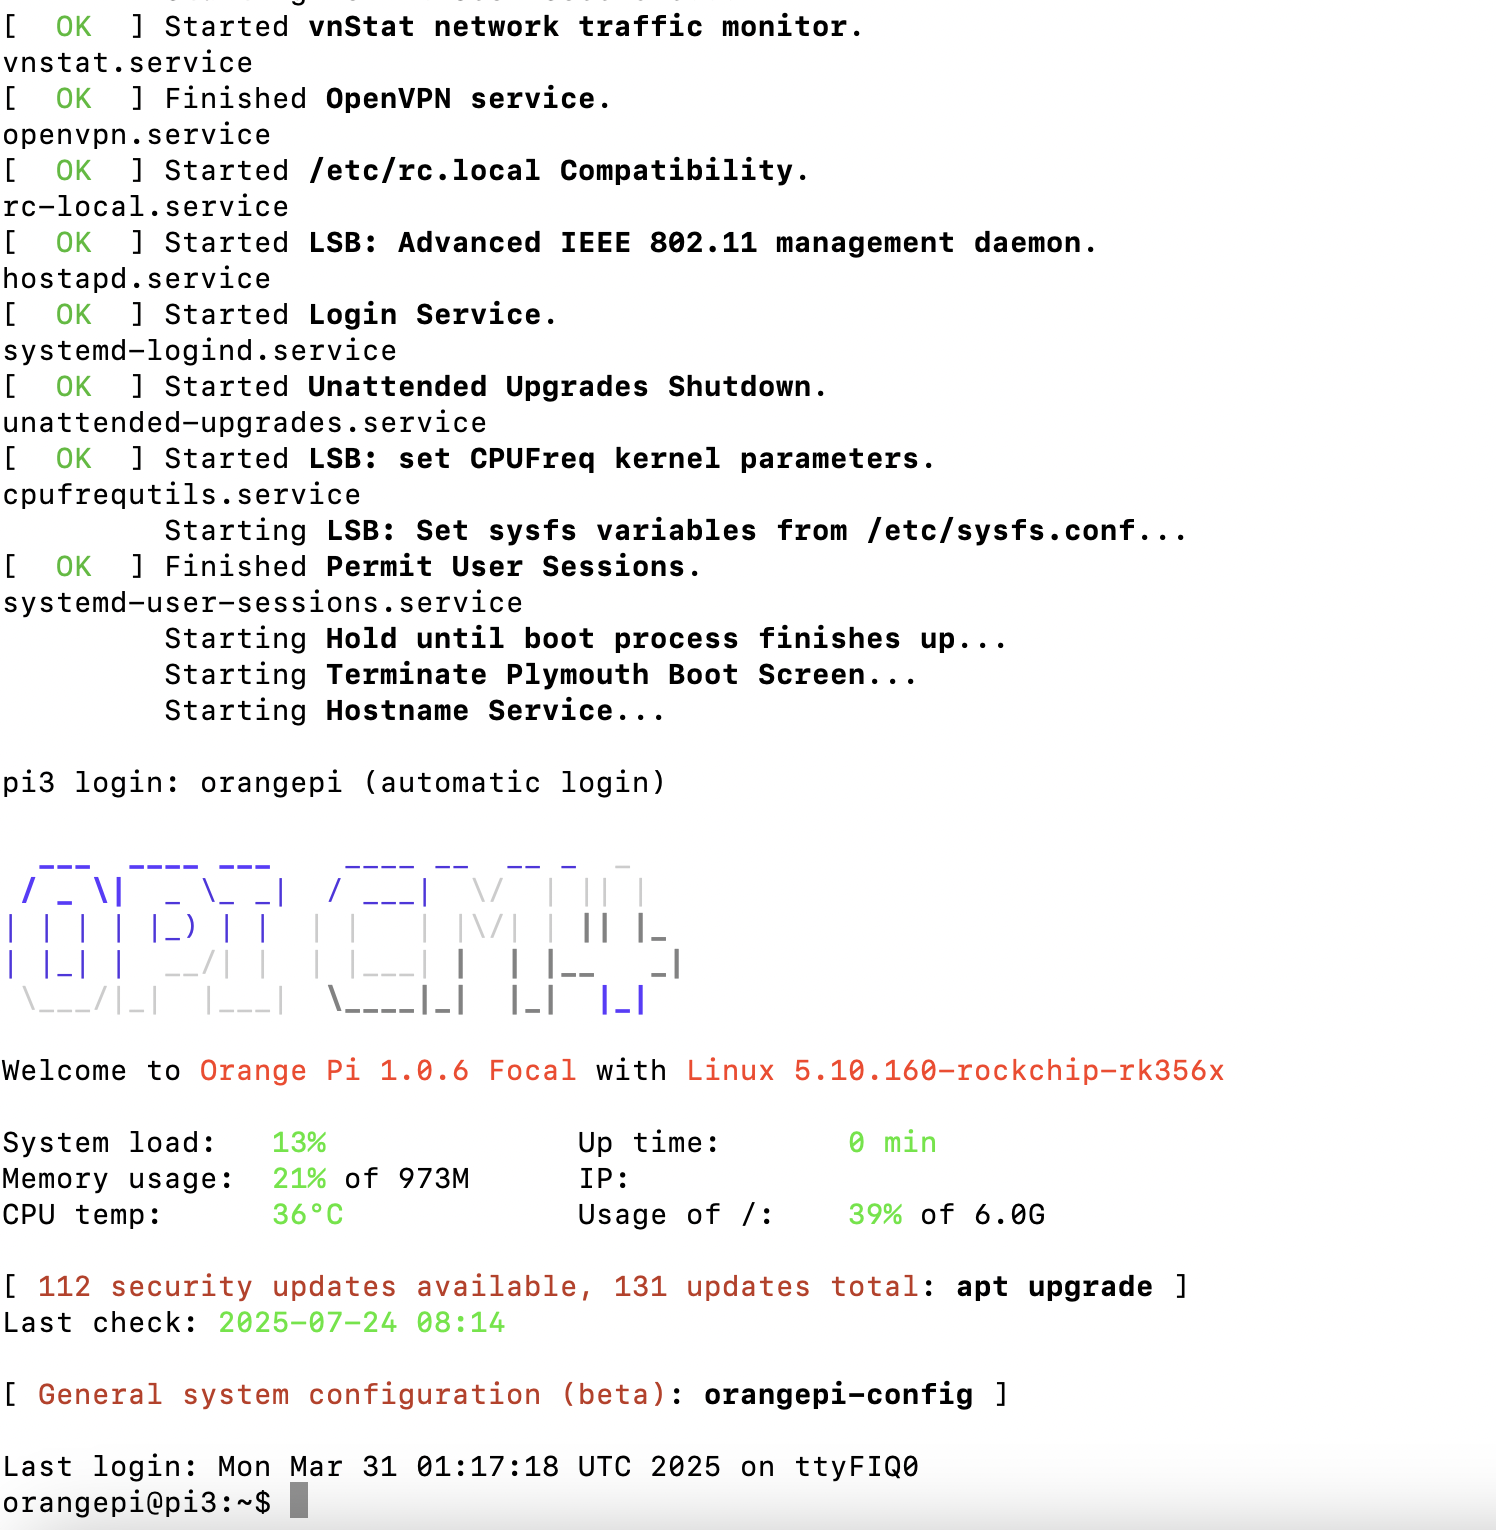
The maximum speed to toggle a pin by python running inside cm4 is just 150khz
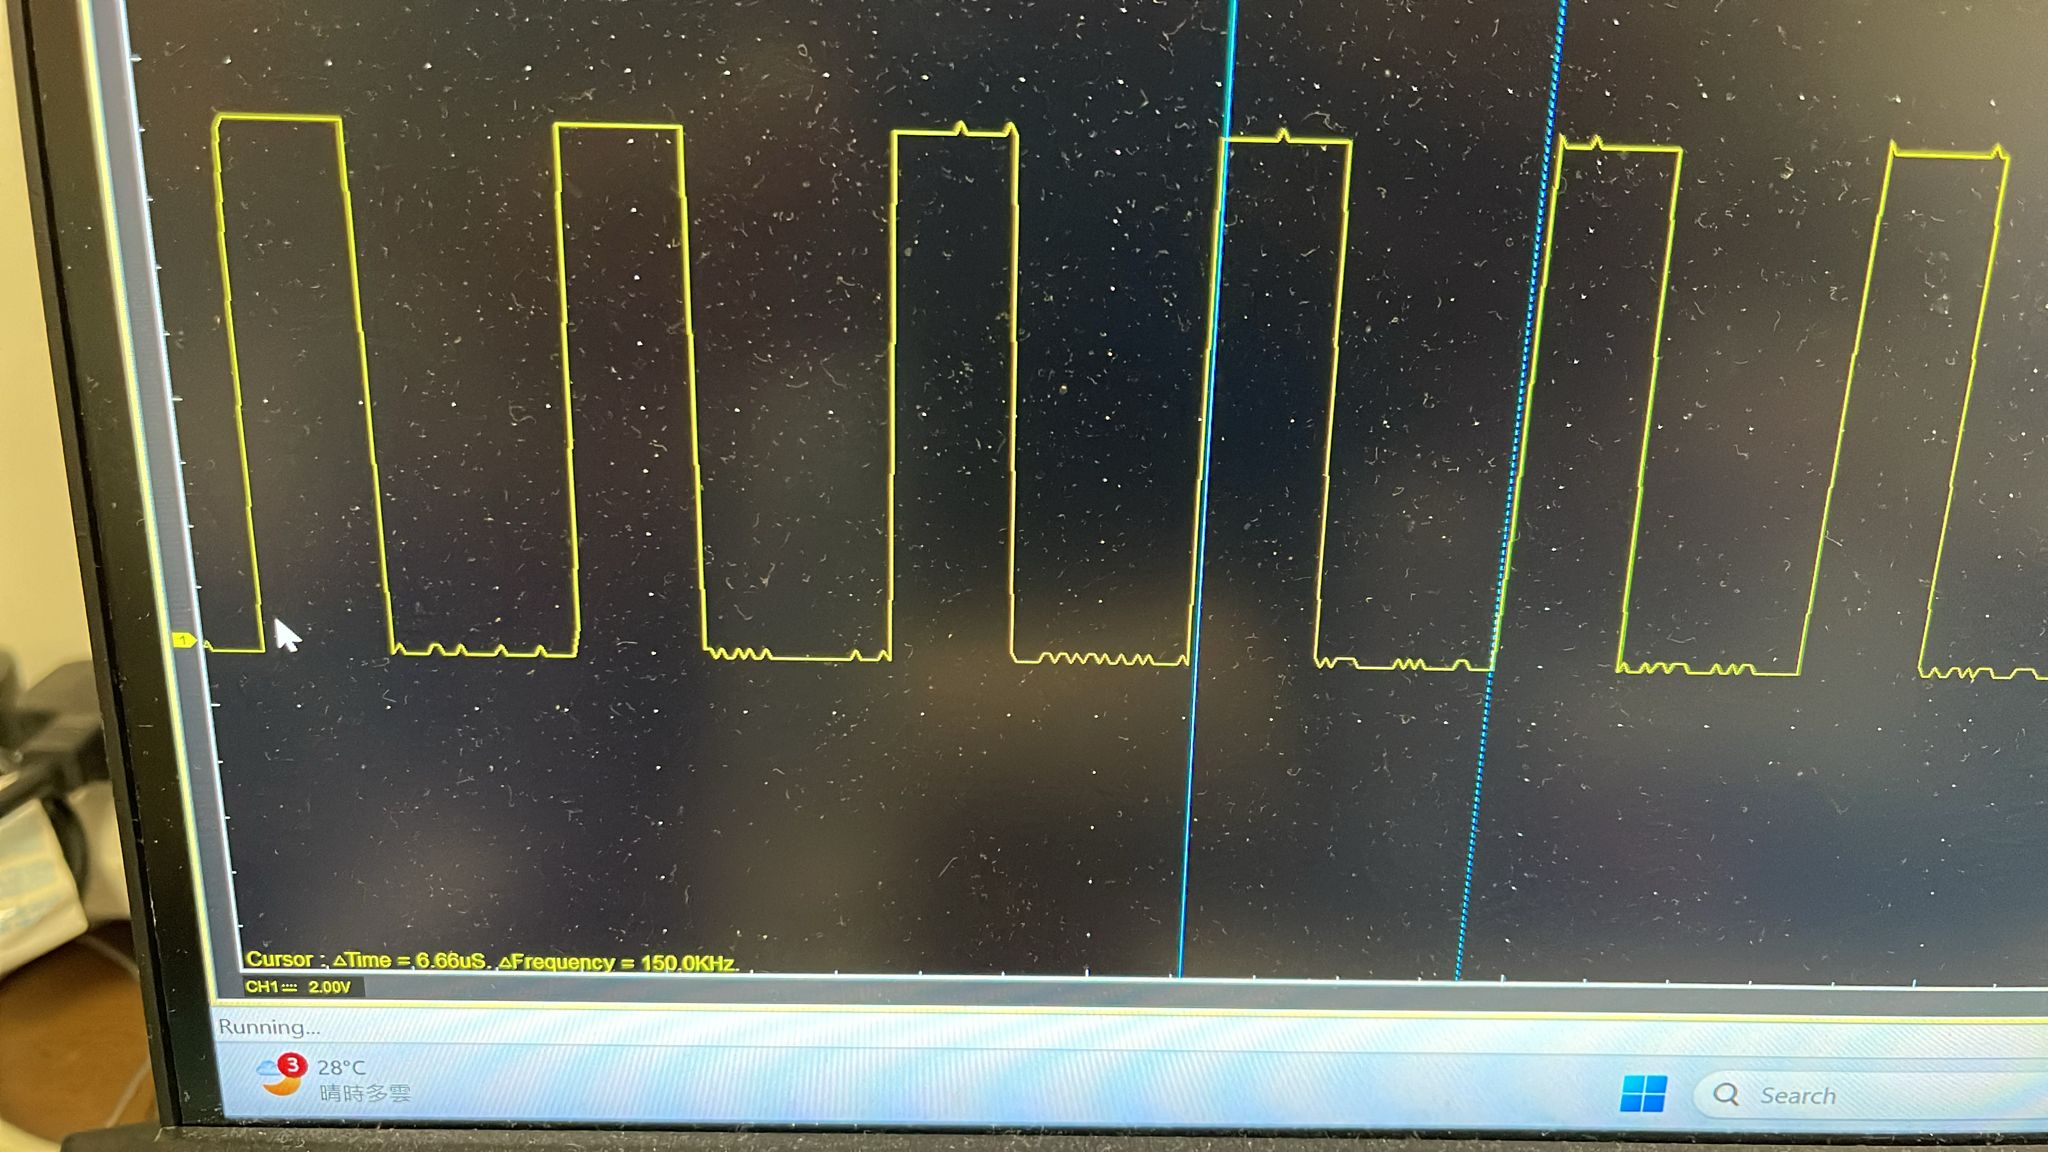
Determine the Linux GPIO Number for GPIO3_D1
The Orange Pi CM4 uses a 40-pin header, and GPIO3_D1 corresponds to a specific Linux GPIO number. The RK3566 GPIO numbering follows the formula:
GPIO_number = (bank_number * 32) + (subgroup_letter - 'A') * 8 + pin_number
- GPIO3_D1:
- Bank: GPIO3 (bank number 3)
- Subgroup: D (D - A = 3)
- Pin: 1
- Calculation: (3 * 32) + (3 * 8) + 1 = 96 + 24 + 1 = 121
So, GPIO3_D1 is Linux GPIO 121. According to the Orange Pi CM4 pinout, GPIO3_D1 is physical pin 18 on the 40-pin header.
import os
import sys
import time
import signal

# Configuration
GPIO_NUMBER = 121  # GPIO3_D1 (physical pin 18)
LOOP_COUNT = 10000000  # Toggle 10 million times (~5-10s)
BASE_PATH = '/sys/class/gpio'

# Global flag for graceful exit
running = True

def signal_handler(sig, frame):
    global running
    print('\nStopping toggle...')
    running = False

signal.signal(signal.SIGINT, signal_handler)

def main():
    # Check if root
    if os.geteuid() != 0:
        print("Error: Run as root (sudo).", file=sys.stderr)
        sys.exit(1)

    gpio_path = f'{BASE_PATH}/gpio{GPIO_NUMBER}'

    # Export GPIO
    if not os.path.exists(gpio_path):
        try:
            with open(f'{BASE_PATH}/export', 'w') as f:
                f.write(str(GPIO_NUMBER))
            time.sleep(0.1)  # Allow setup
        except IOError as e:
            print(f"Error exporting GPIO {GPIO_NUMBER}: {e}", file=sys.stderr)
            sys.exit(1)

    # Set as output
    try:
        with open(f'{gpio_path}/direction', 'w') as f:
            f.write('out')
    except IOError as e:
        print(f"Error setting direction: {e}", file=sys.stderr)
        sys.exit(1)

    # Open value file for fast I/O in binary mode
    try:
        value_file = open(f'{gpio_path}/value', 'wb', buffering=0)
    except IOError as e:
        print(f"Error opening value file: {e}", file=sys.stderr)
        sys.exit(1)

    print(f"Toggling GPIO {GPIO_NUMBER} (GPIO3_D1, physical pin 18)...")
    print(f"Press Ctrl+C to stop.")
    start_time = time.perf_counter()

    count = 0
    while running and (LOOP_COUNT == 0 or count < LOOP_COUNT):
        value_file.write(b'1')  # Write bytes
        value_file.write(b'0')  # Write bytes
        value_file.flush()      # Ensure write
        count += 1

    end_time = time.perf_counter()
    value_file.close()

    # Cleanup
    try:
        with open(f'{BASE_PATH}/unexport', 'w') as f:
            f.write(str(GPIO_NUMBER))
    except IOError:
        pass

    duration = end_time - start_time
    if duration > 0:
        freq_hz = (count * 2) / duration
        print(f"\nCompleted {count} toggles in {duration:.3f}s ({freq_hz:.0f} Hz).")

if __name__ == '__main__':
    main()
If using C, it reaches 352khz, 2 times faster
This command check the memory base address of GPIO
dtc -I fs /sys/firmware/devicetree/base | grep -i gpio3
Compile:
sudo apt update
sudo apt install build-essential
cat /sys/kernel/debug/gpio
gcc -o toggle_gpio3_d1 toggle_gpio3_d1.c
#include <stdio.h>
#include <stdlib.h>
#include <fcntl.h>
#include <unistd.h>
#include <signal.h>

#define SYSFS_GPIO_PATH "/sys/class/gpio"
#define GPIO_NUM 121  // GPIO3_D1

volatile sig_atomic_t running = 1;

void signal_handler(int sig) {
    running = 0;
}

int main() {
    int fd_export, fd_direction, fd_value;
    char path[64];

    // Check if root
    if (geteuid() != 0) {
        fprintf(stderr, "Error: Run as root (sudo).\n");
        return 1;
    }

    // Export GPIO
    snprintf(path, sizeof(path), "%s/export", SYSFS_GPIO_PATH);
    fd_export = open(path, O_WRONLY);
    if (fd_export < 0) {
        perror("Error exporting GPIO");
        return 1;
    }
    dprintf(fd_export, "%d", GPIO_NUM);
    close(fd_export);
    usleep(100000); // Wait for export

    // Set as output
    snprintf(path, sizeof(path), "%s/gpio%d/direction", SYSFS_GPIO_PATH, GPIO_NUM);
    fd_direction = open(path, O_WRONLY);
    if (fd_direction < 0) {
        perror("Error setting direction");
        return 1;
    }
    write(fd_direction, "out", 3);
    close(fd_direction);

    // Open value file
    snprintf(path, sizeof(path), "%s/gpio%d/value", SYSFS_GPIO_PATH, GPIO_NUM);
    fd_value = open(path, O_WRONLY);
    if (fd_value < 0) {
        perror("Error opening value file");
        return 1;
    }

    printf("Toggling GPIO3_D1 (Linux GPIO %d) at ~500 Hz to find physical pin...\n", GPIO_NUM);
    printf("Test pins 15, 16, 18 with oscilloscope. Press Ctrl+C to stop.\n");

    // Slow toggle for testing
    while (running) {
        write(fd_value, "1", 1);
        //usleep(1000); // 1ms
        write(fd_value, "0", 1);
        //usleep(1000); // 1ms
    }

    // Cleanup
    close(fd_value);
    snprintf(path, sizeof(path), "%s/unexport", SYSFS_GPIO_PATH);
    fd_export = open(path, O_WRONLY);
    if (fd_export >= 0) {
        dprintf(fd_export, "%d", GPIO_NUM);
        close(fd_export);
    }

    printf("GPIO3_D1 unexported\n");
    return 0;
}
Command to toggle pin GPIO3_D1 (GPIO 121)
# Export GPIO 121
echo 121 > /sys/class/gpio/export

# Set as output
echo out > /sys/class/gpio/gpio121/direction

# Toggle manually and check with scope
echo 1 > /sys/class/gpio/gpio121/value
echo 0 > /sys/class/gpio/gpio121/value

# Cleanup
echo 121 > /sys/class/gpio/unexport