!!! This is not the perfect guide, during the compilation it got errors, ask gemini. https://share.gemini.google/bFyDzMtkYZVk
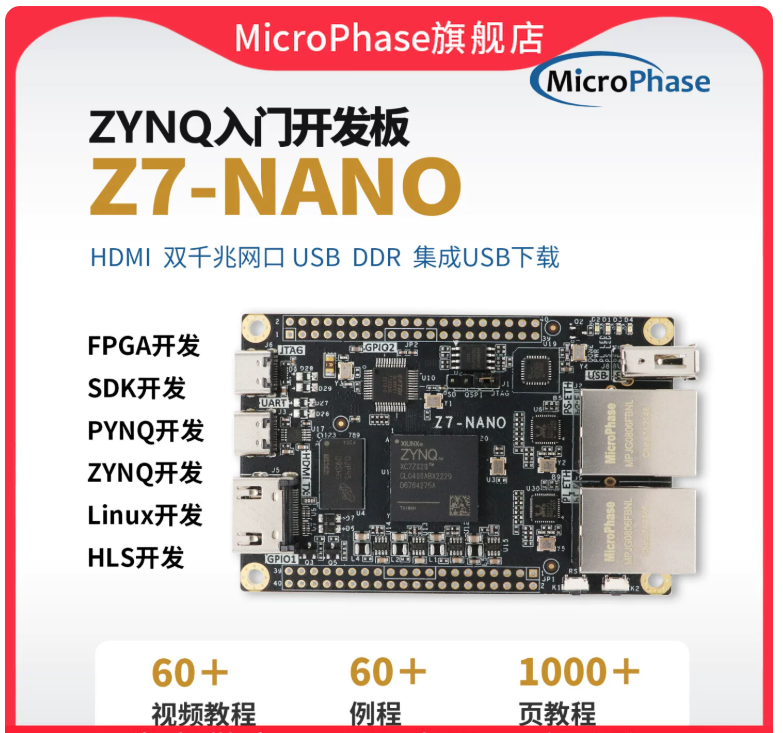
I am using this board
Step 1: Install Vitis (it has Vivado)
Step 2: Install petalinux https://www.amd.com/en/products/software/adaptive-socs-and-fpgas/embedded-software/petalinux-sdk.html
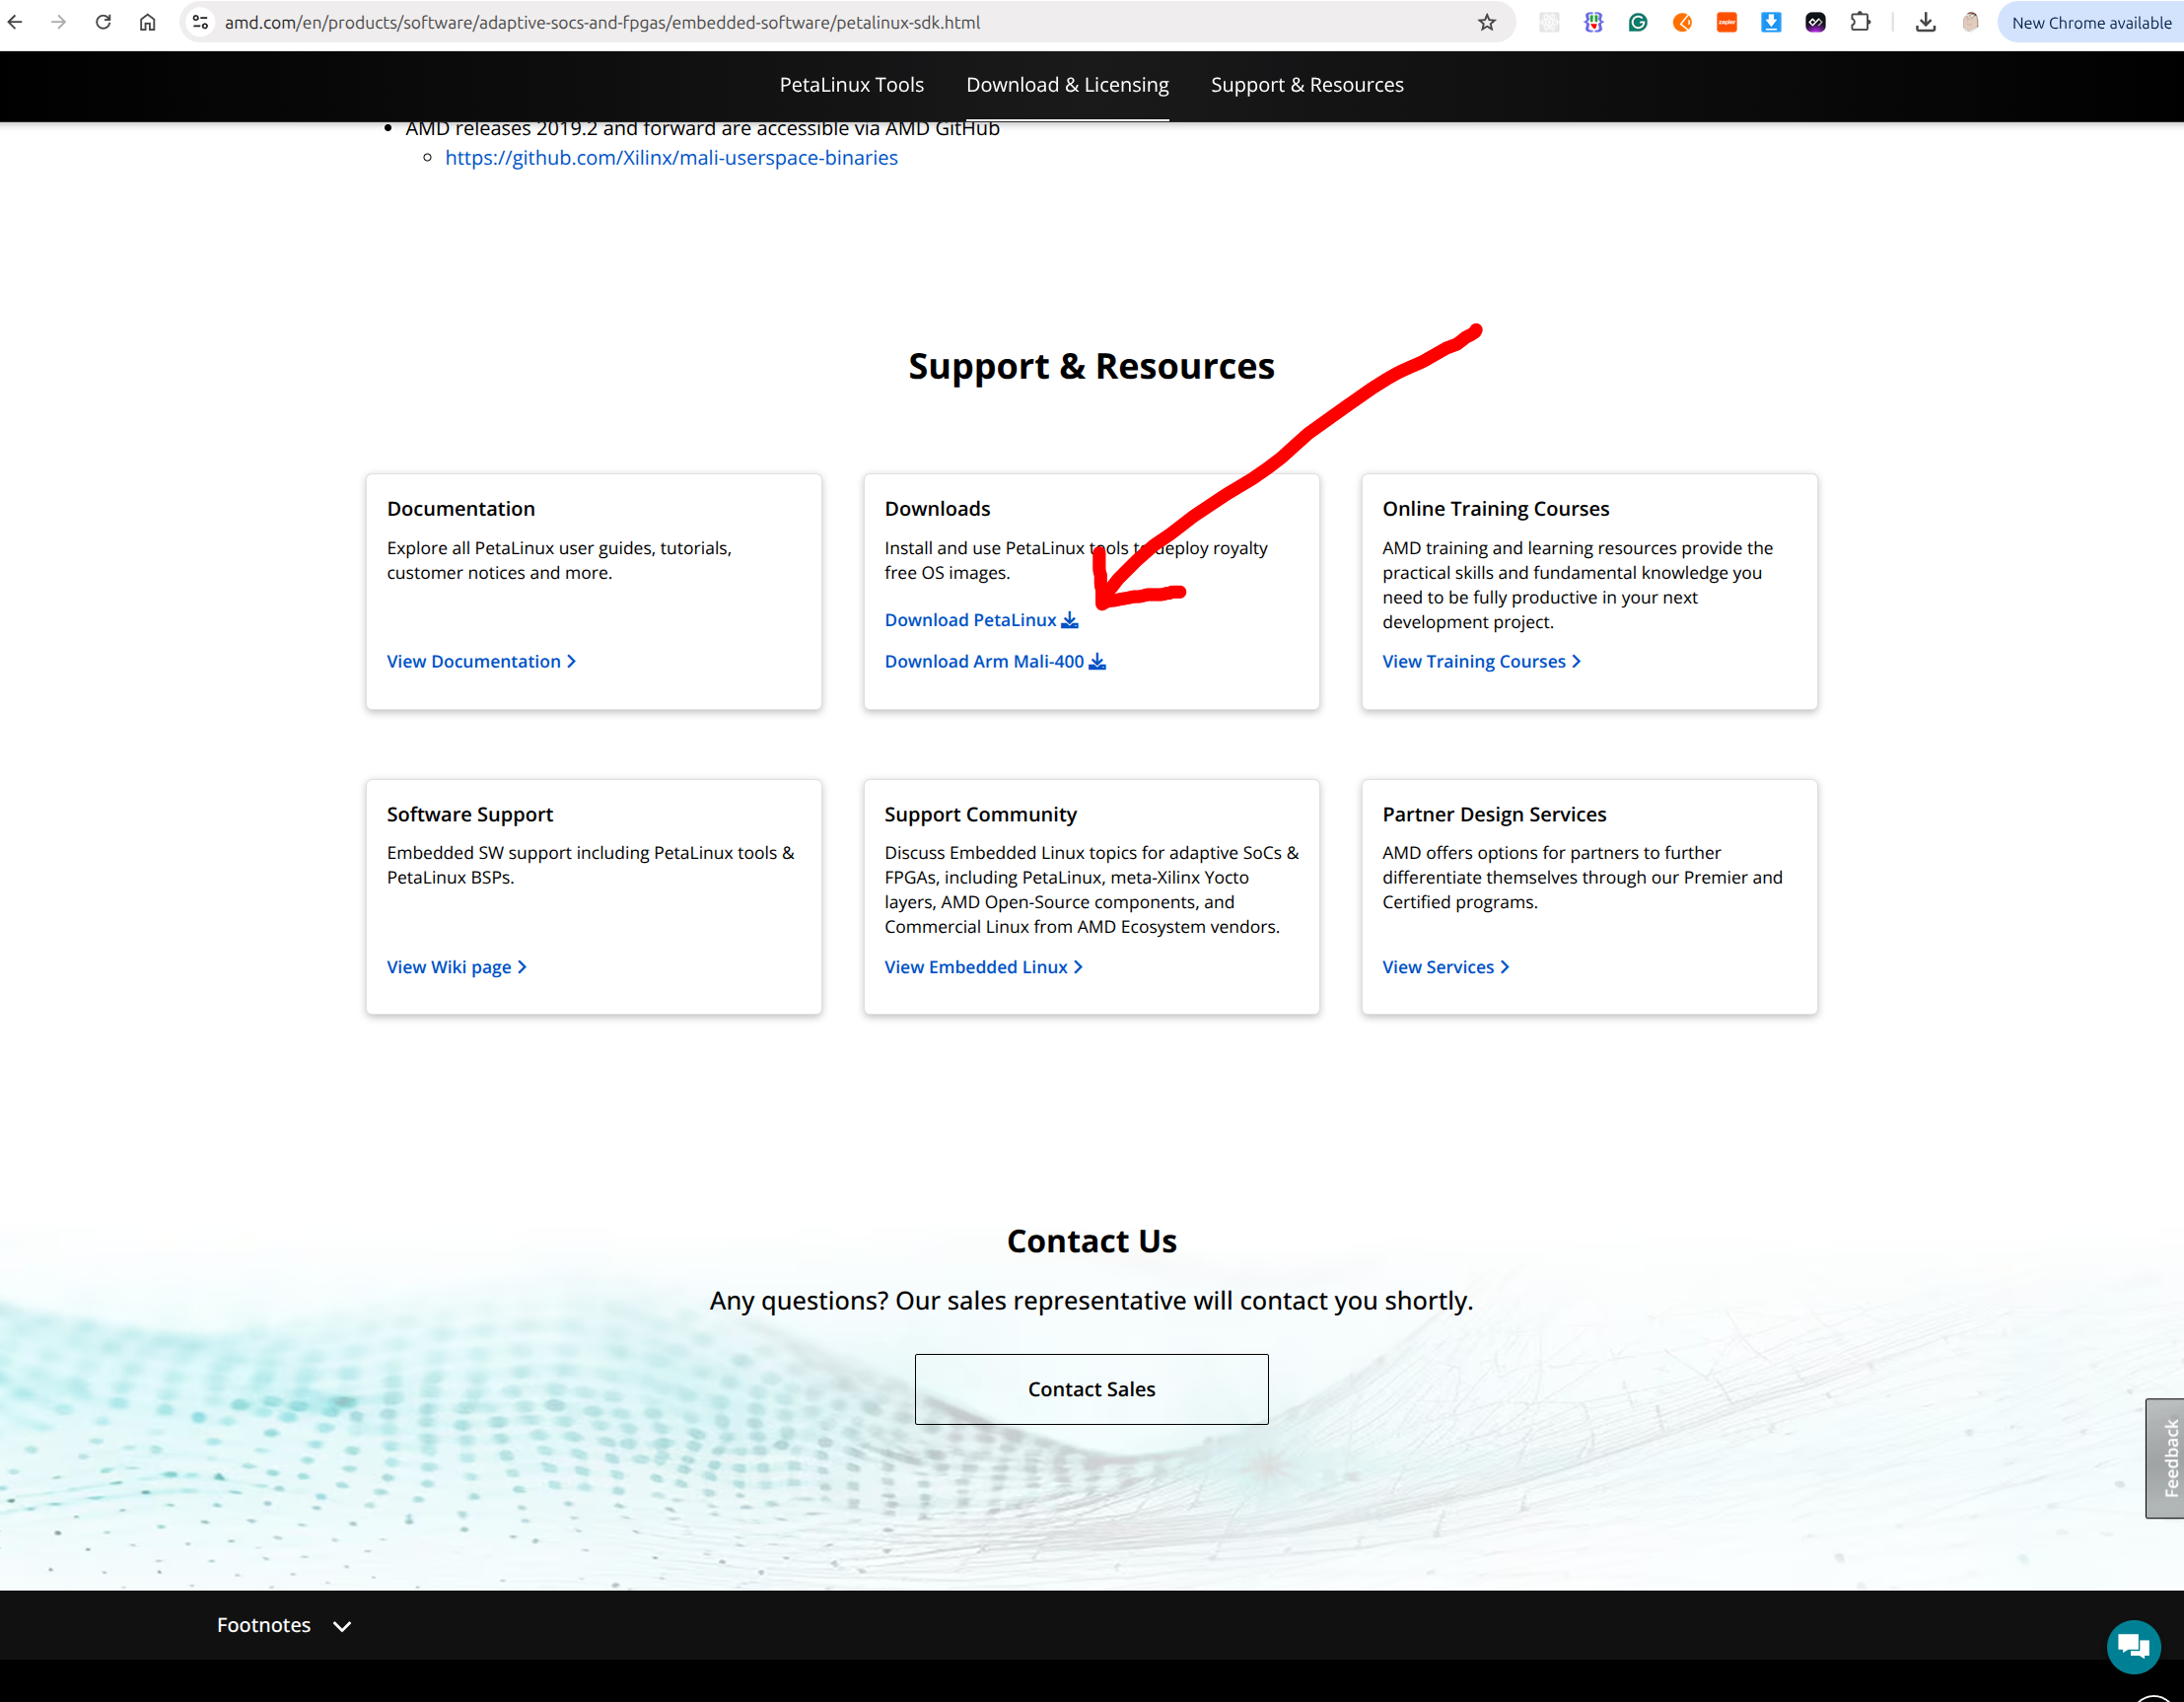
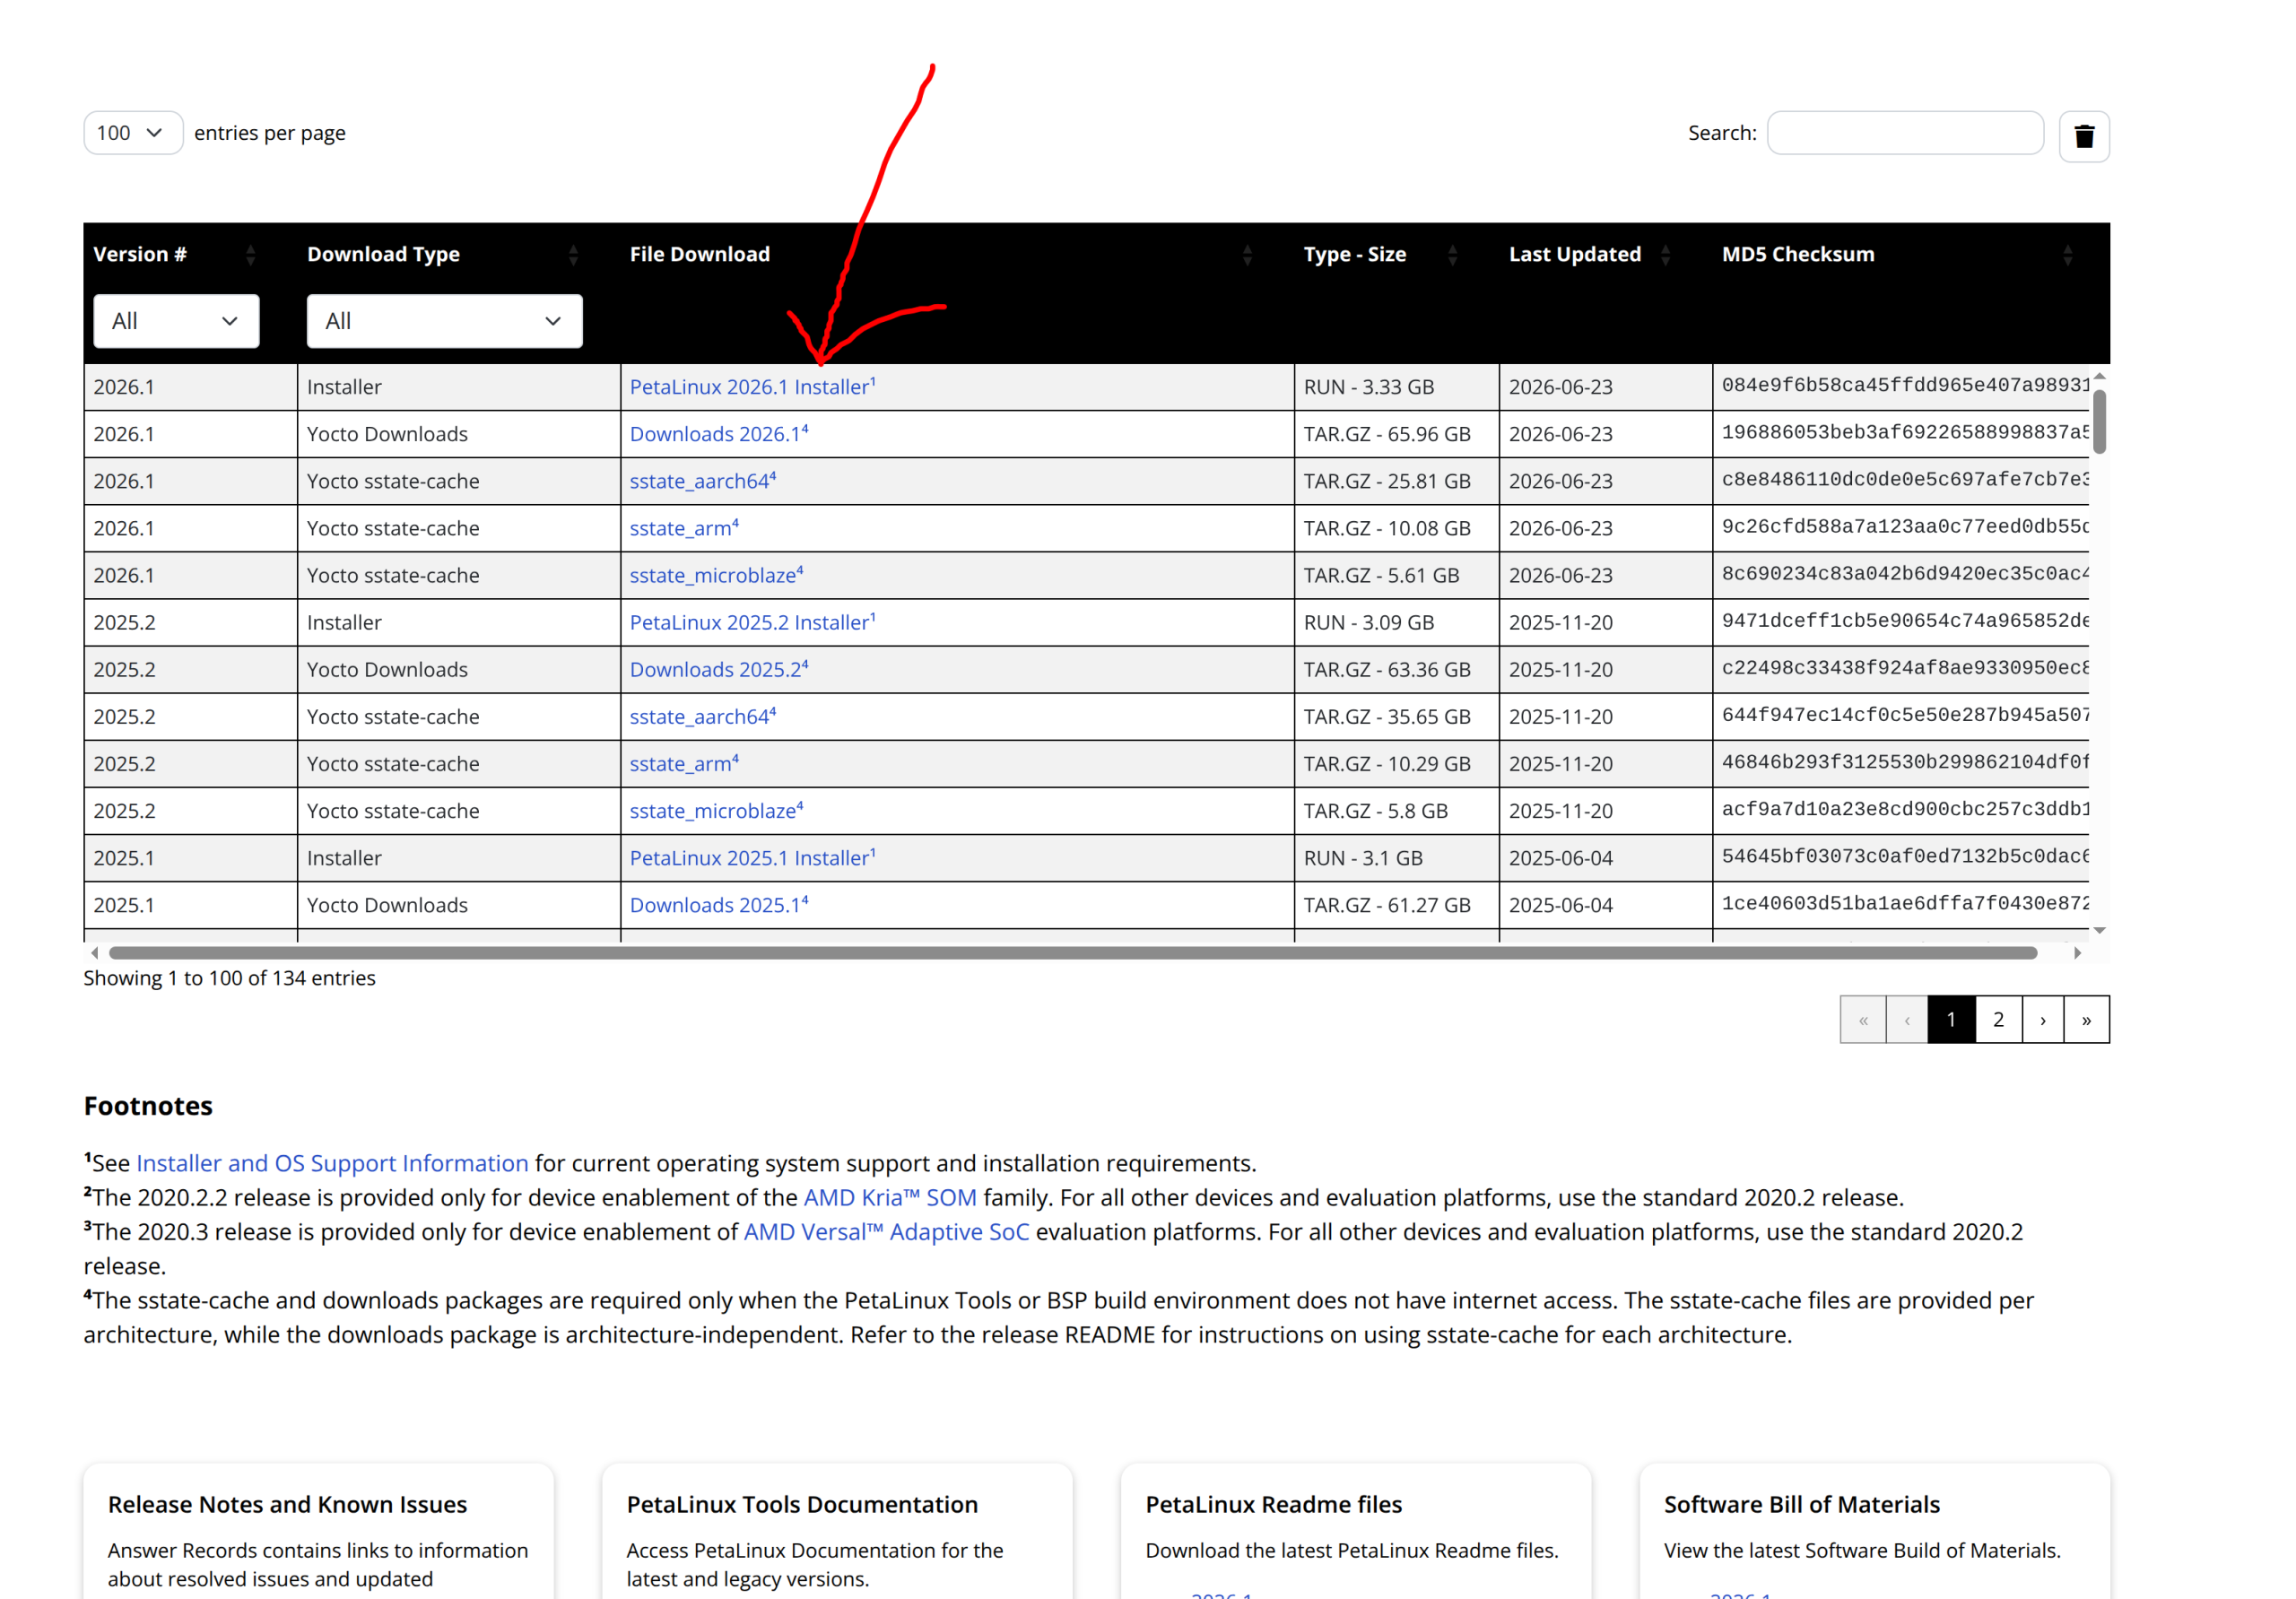
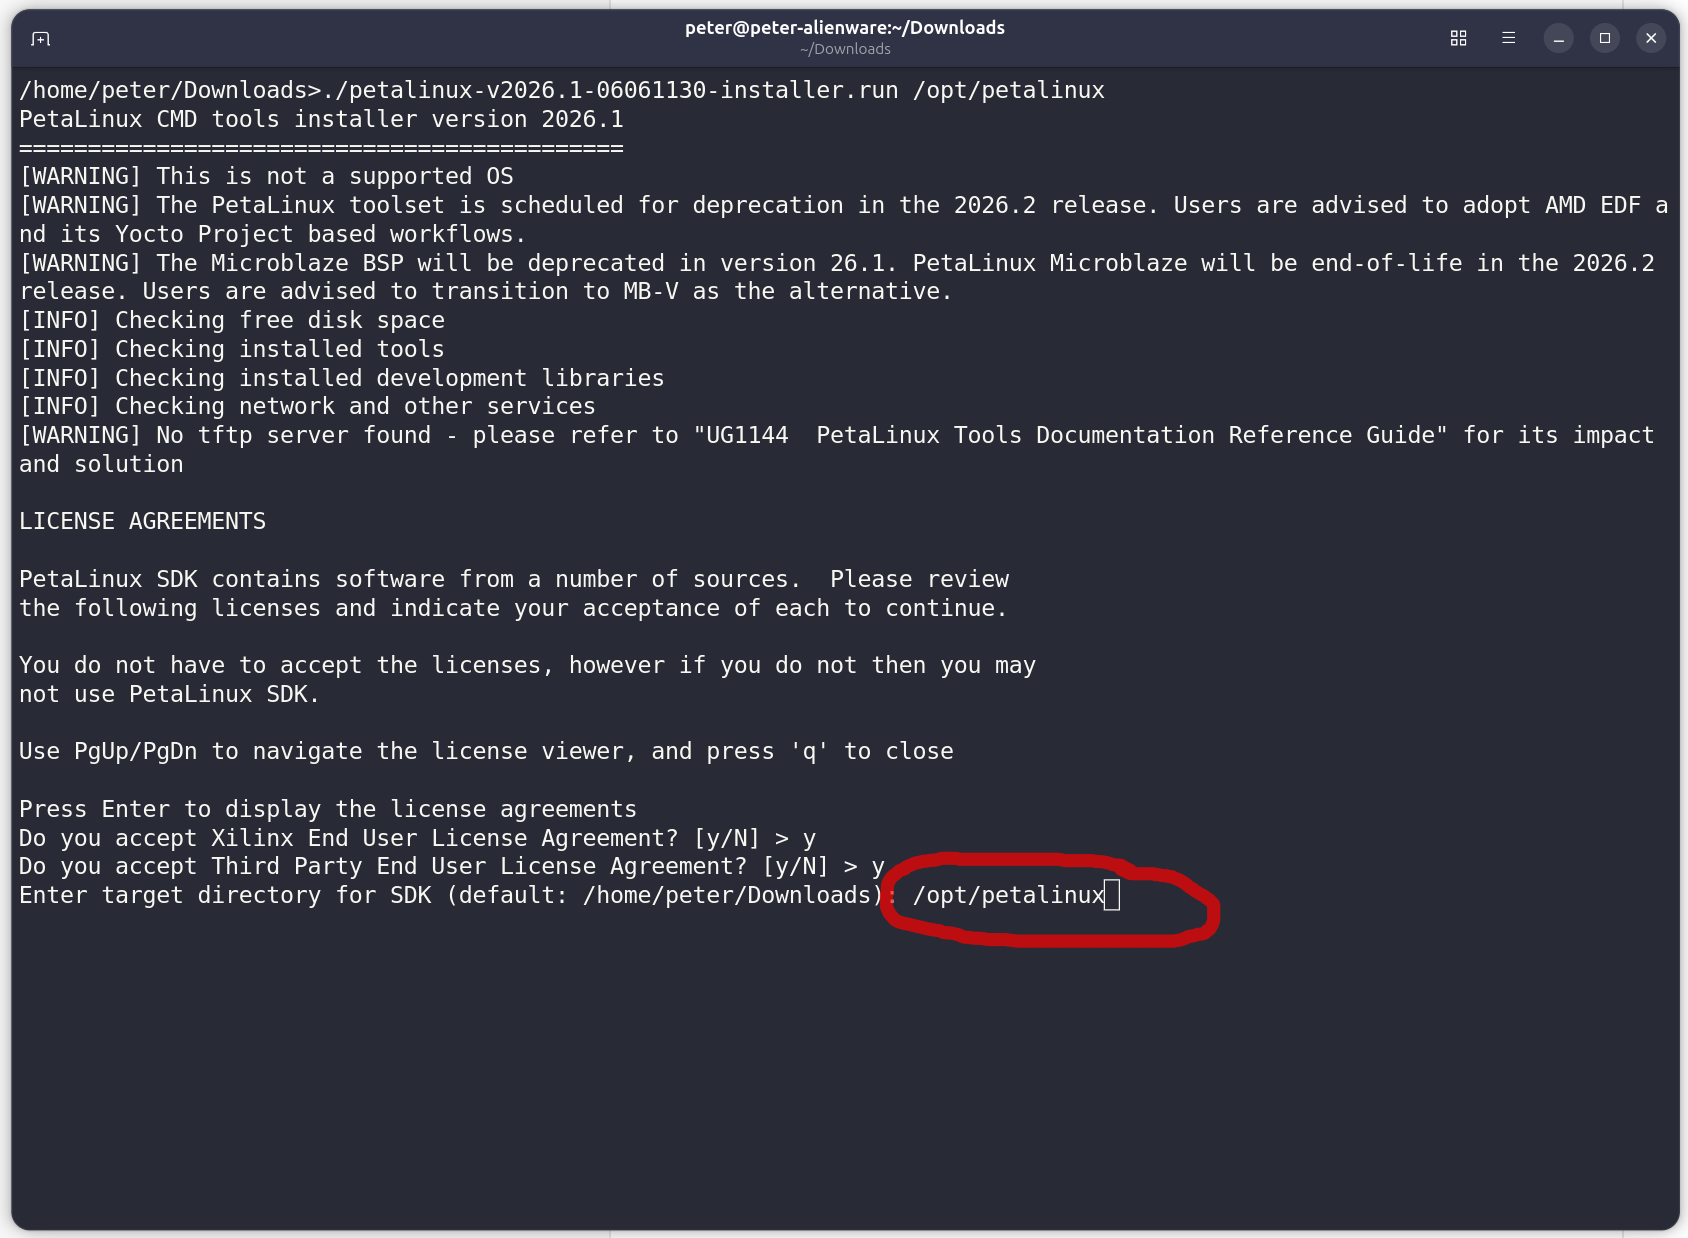
chmod +x petalinux-v20XX.X-final-installer.run
./petalinux-v20XX.X-final-installer.run
Step 3: Add the board files to Vivado
git clone https://github.com/karolzmijewski/z7-nano-7020.git
mkdir /home/peter/xilinx/2026.1/data/boards/board_files
cp -r z7-nano-7020/board_files/z7-nano-7020 /home/peter/xilinx/2026.1/data/boards/board_files/
Step 4: Build a minimal hardware design in Vivado
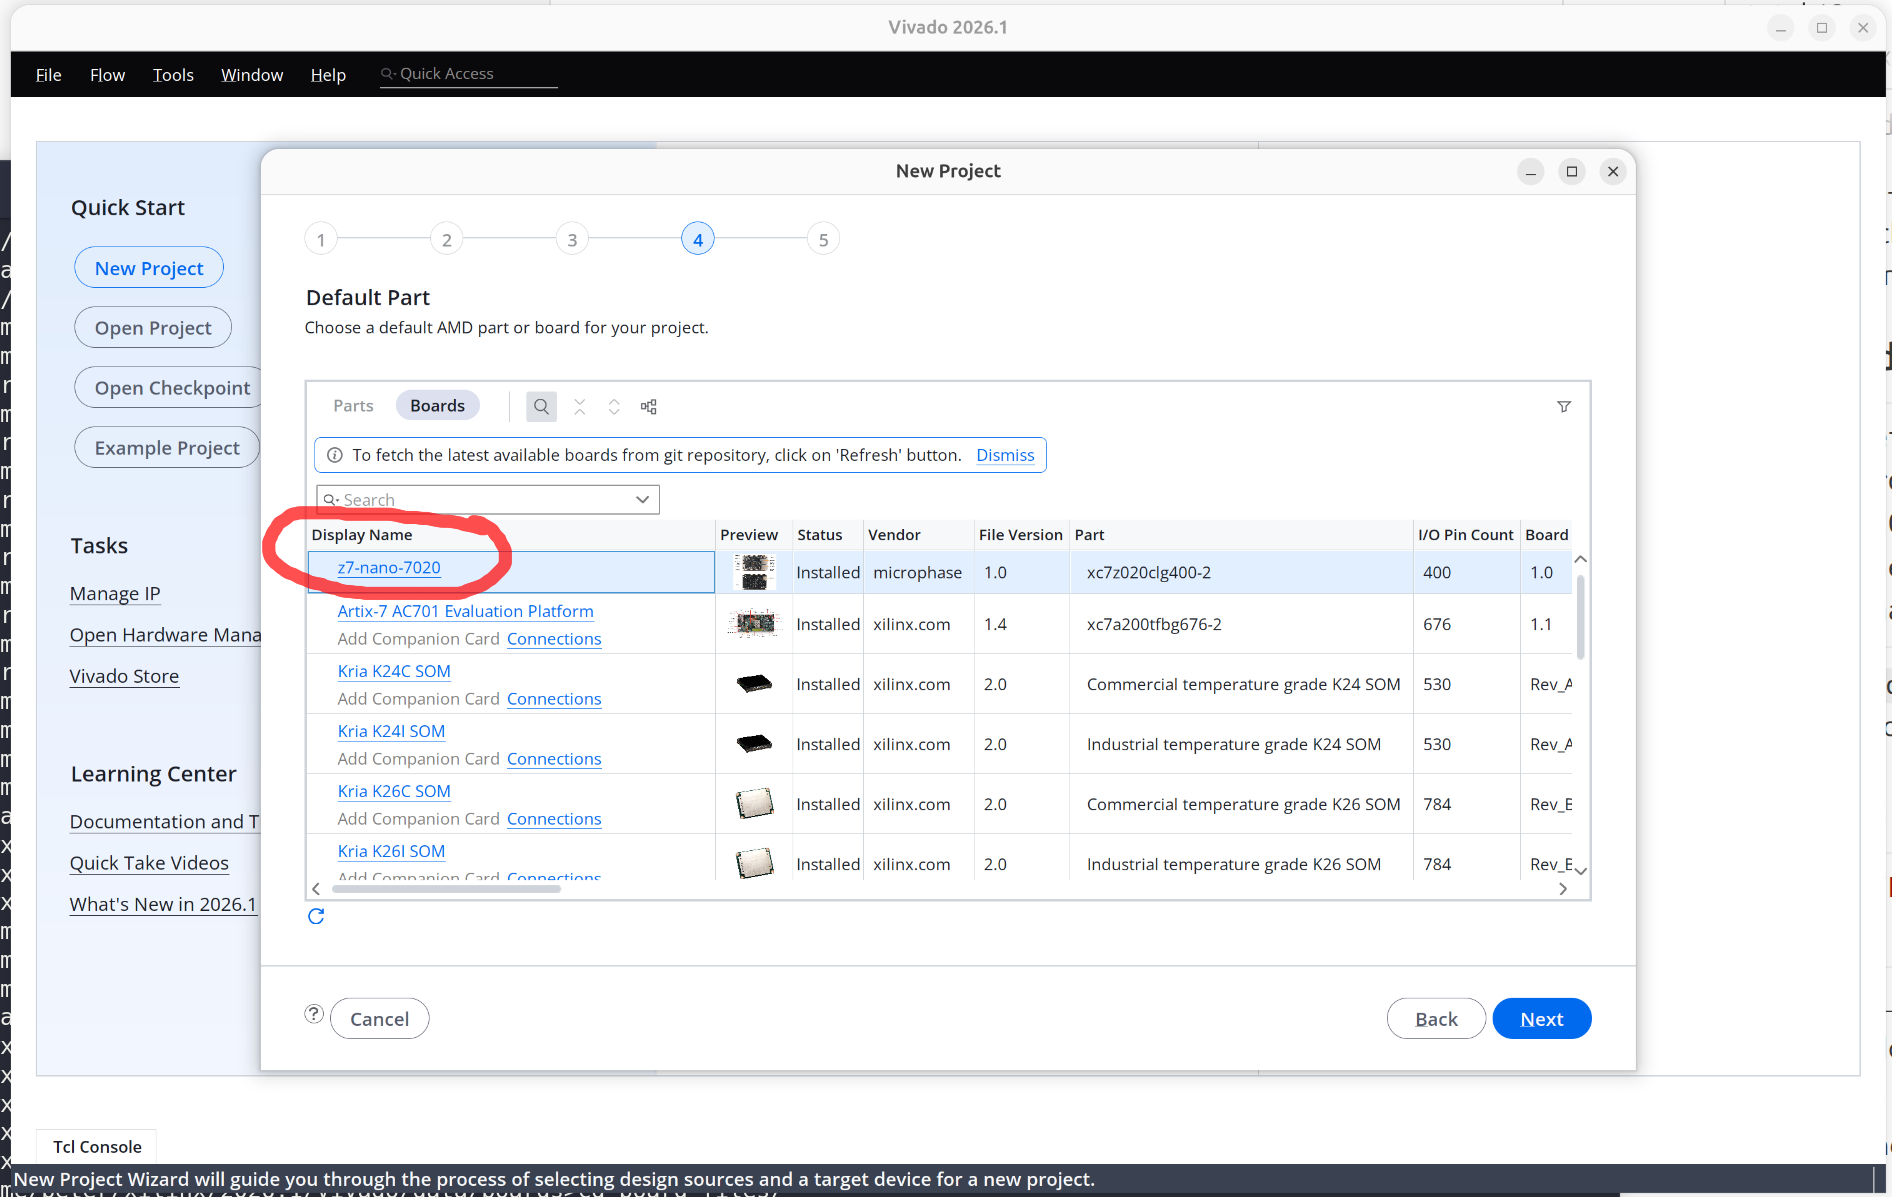
vivado→ Create New Project → RTL Project, no sources- Choose Boards tab → select Z7-Nano-7020 (now visible thanks to step 2)
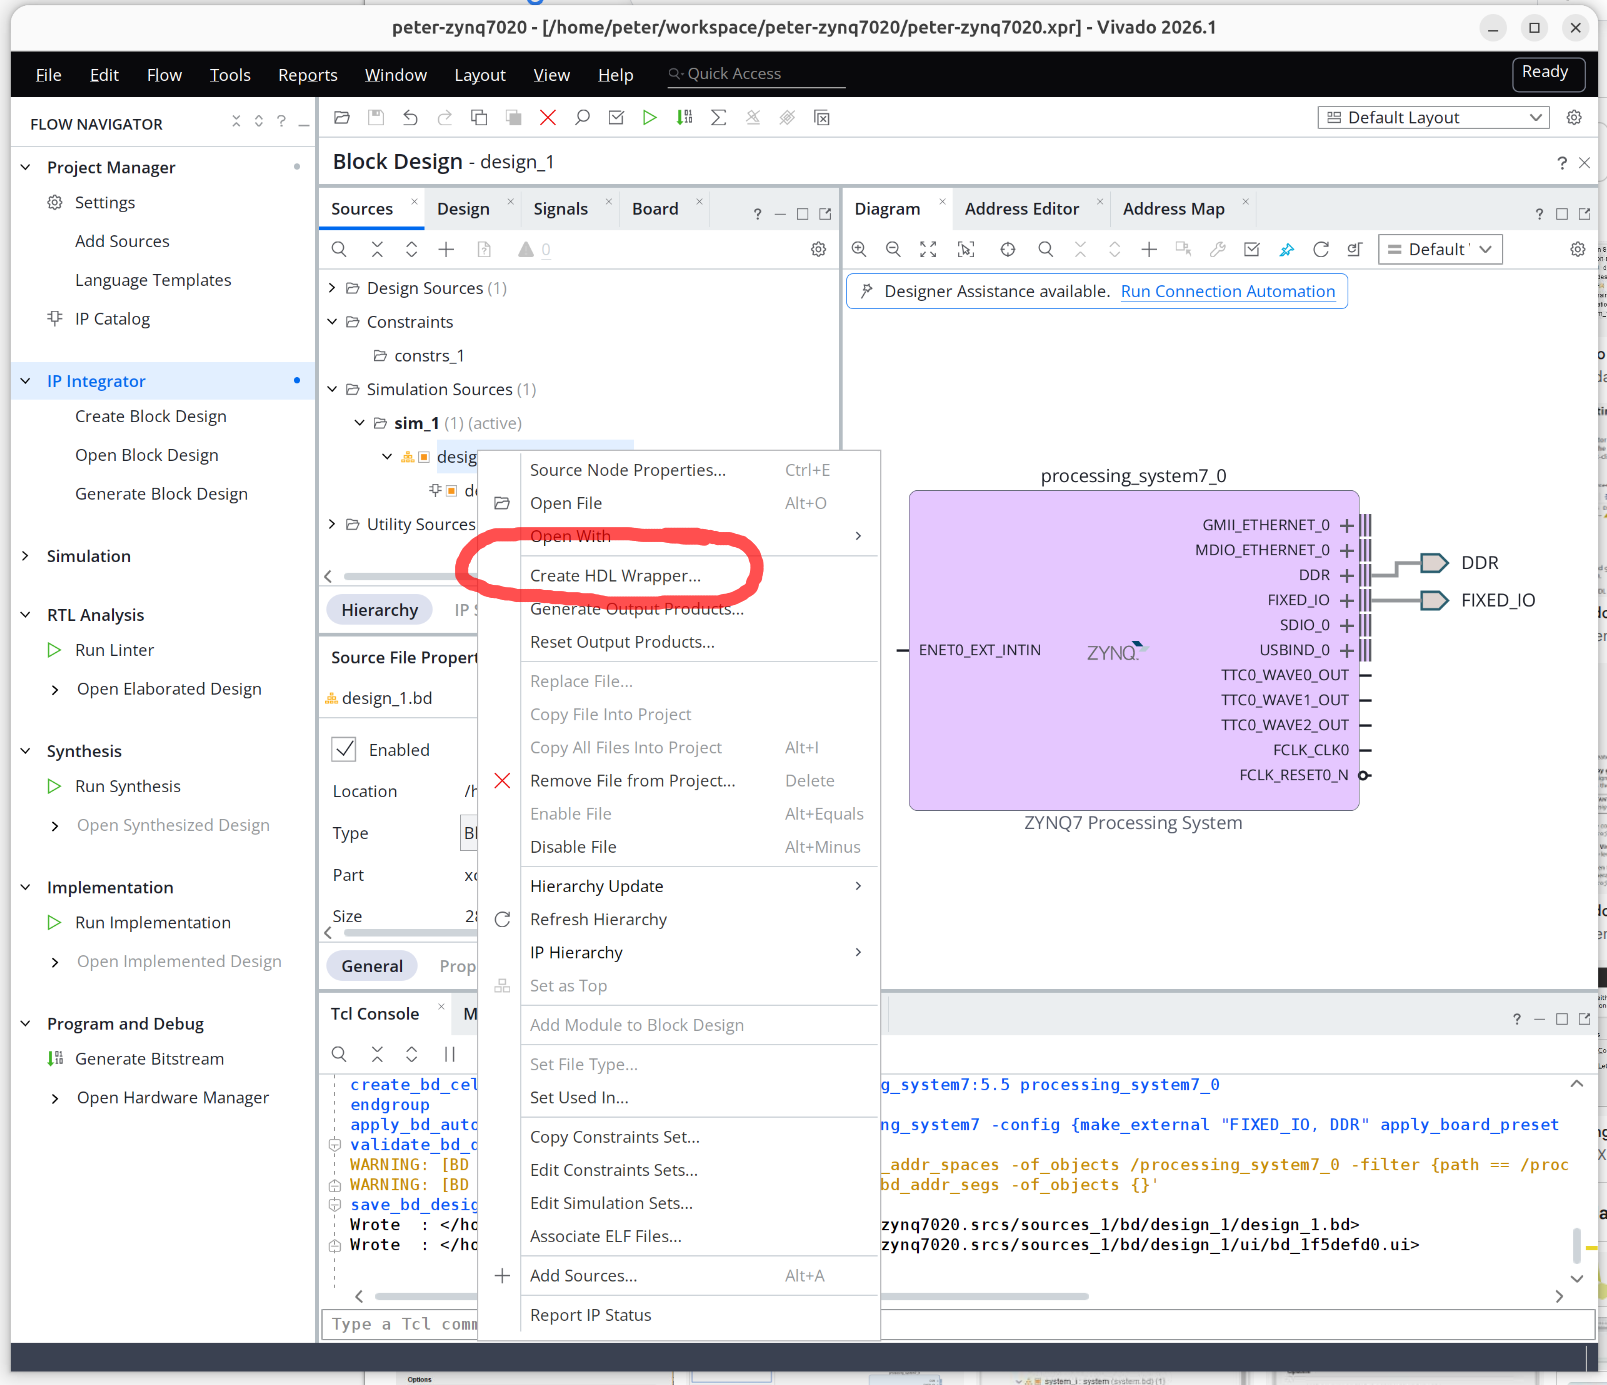
- Create Block Design → add ZYNQ7 Processing System → click Run Block Automation (it will apply the board preset automatically: DDR3, UART, SD, ETH, USB)
- Validate the design (F6), no errors
- Create HDL wrapper → right click wrapper → Generate Bitstream
- File → Export → Export Hardware → check Include bitstream → produces a
.xsafile (e.g.z7nano_wrapper.xsa)
Step 5: Create the PetaLinux project
source home/peter/xilinx/2026.1/Model_Composer/settings64.sh
source /opt/petalinux/settings.sh
petalinux-create -t project --template zynq -n z7nano-linux
cd z7nano-linux
petalinux-config --get-hw-description=/path/to/xsa/dir
In the config menu that opens:
- Subsystem AUTO Hardware Settings → confirm/adjust serial console (should be
ps7_uart_1or_0matching your design), Ethernet, SD - Image Packaging Configuration → Root filesystem type → set to
EXT4 (SD/eMMC/USB)(so rootfs lives directly on the SD card, not inside an initramfs) - Boot Image Settings → FSBL and u-boot should default correctly for Zynq-7000
petalinux-config -c kernel
petalinux-config -c rootfs
Step 6: Build
petalinux-build
This produces (under images/linux/): zynq_fsbl.elf, u-boot.elf, image.ub (kernel+devicetree+ramdisk fitImage), system.dtb, rootfs.tar.gz.
Then package the boot binary:
petalinux-package --boot --fsbl images/linux/zynq_fsbl.elf \
                   --fpga images/linux/system.bit \
                   --u-boot --force

petalinux-package --boot --fsbl images/linux/zynq_fsbl.elf --u-boot images/linux/u-boot.elf --force
This creates images/linux/BOOT.BIN.
Step 7: Prepare the microSD card
Partition it with two partitions (use fdisk/gparted):
| Partition | Size | Type | Contents |
|---|---|---|---|
| 1 | ~500MB | FAT32, boot flag | BOOT.BIN, image.ub, boot.scr (if generated) |
| 2 | remainder | ext4 | extracted rootfs |
sudo mkfs.vfat -F 32 -n BOOT /dev/sdX1
sudo mkfs.ext4 -L rootfs /dev/sdX2
sudo mount /dev/sdX1 /mnt/boot
sudo cp images/linux/BOOT.BIN images/linux/image.ub /mnt/boot/
sudo umount /mnt/boot
sudo mount /dev/sdX2 /mnt/root
sudo tar xzf images/linux/rootfs.tar.gz -C /mnt/root
sudo umount /mnt/root
Step 8: Set the boot mode jumper
On the Z7-Nano, boot mode is set by jumper J1 ("MODE" pins) — set it to the SD boot position (JTAG/QSPI/SD options are silkscreened near J1; check the reference manual's Boot Config diagram or the schematic if the silkscreen is unclear — standard Zynq-7000 SD boot mode pins are MIO[6:2] = 1 0 1 0 1).
Step 9: Boot it
- Insert the microSD card
- Connect the USB-UART port to your PC (
/dev/ttyUSB0, appears as CH340 device) - Open a serial terminal:
screen /dev/ttyUSB0 115200(orminicom -D /dev/ttyUSB0 -b 115200) - Power the board via USB
- You should see FSBL → U-Boot → kernel boot messages, ending in a login prompt (default PetaLinux root/root or root/petalinux depending on version config)
Troubleshooting notes
- DDR/FSBL hangs at boot: usually a MIG/PS7 DDR config mismatch — re-run Block Automation in Vivado rather than hand-editing PS7 DDR settings, since the board preset already has correct MT41K256M16 timings.
- No Ethernet: the RTL8211F PHY sometimes needs a reset GPIO toggle in the device tree (
phy-reset-gpio) — checkkarolzmijewski/z7-nano-7020examples for the exact PHY reset pin if this happens. - U-Boot doesn't find
image.ub: confirm the FAT32 partition has the boot flag set and file names match whatpetalinux-packageproduced. - Faster iteration: once this works, you can skip re-running Vivado each time and just re-run
petalinux-build+petalinux-packagefor software-only changes (keep the same.xsaunless you change PL hardware).
Alternative: PYNQ instead of plain PetaLinux
Since the board explicitly advertises a microSD slot "for PYNQ," if your goal is Python/Jupyter-based FPGA development rather than a bare Linux console, you can follow the same Vivado XSA export above but instead build via the PYNQ SD card image build flow, which layers Jupyter + the PYNQ Python overlay framework on top of a PetaLinux-built image. It's more work (bigger BSP customization, xilinx-pynq recipe) but gives you a full Jupyter notebook environment on the board out of the box.
Let me know which route you want (plain embedded Linux console vs. PYNQ/Jupyter), and whether you'd like help writing the actual Vivado TCL block-design script or PetaLinux device-tree overlay for specific peripherals (Ethernet, HDMI, GPIO) — I can generate those files for you.